Author: wizardpc
-
Artist depiction of the next 4-8 years

Doesn’t really matter who wins, does it?
Oh, and don’t be surprised if Putin invades some other country before spring.
-
Assorted Thoughts
In no particular order…
- First off, thanks to Anne from Widener’s for sending me a marketing email that wasn’t just some intern or virtual assistant compiling a list of bloggers’ email addresses and then blasting something out. She actually read the blog and started off her email with a funny comment about semiblogtirement. I LOL’d.
Widener’s has come out with a Smokeless Powder Guide. I am not a reloader because 1) I don’t have time to reload, 2) I don’t have anywhere to do it, and 3) if I had the time, it would probably be better spent shooting. 🙂
I did take a look at it and I LOVE the pictures. I learned a lot, too.
- The Grendel shoots like a boss. I’m talking like 3/4 MOA.
- I finally bought an AR10. Sort of. LGS had an Aero Precision M5 lower for $199 so I bought it–then the co-worker who tagged along bought one, too.
I’m a terrible influence, I know.
This will end up being the gun that answers the question: If you could only take one gun to the zombie apocalypse, what would it be? An 18″ AR10 with a Tac-Con 241 and a Primary Arms 1-8 ACSS scope.
- To paraphrase Glenn, they told me if I voted for John McCain, Americans would still be fighting and dying in Iraq in 2016, and they were right!
- Why would anyone ever need a gun on campus?
- I can’t take credit for this phrase, but it’s too bad the only people who were able to predict this were racists and haters.
- I’m on Instagram now. Mostly it’s 3D printed Jeep stuff and pictures of my kids screaming for no particular reason.
- Speaking of 3D Printed Jeep Stuff, here’s my store. I document my design work on IG if you want to know what I’m working on. Right now the focus is on reproduction Infinity Tweeter Pods. They’re rare, people want them, and they won’t be god-awful expensive to make.
That’s about all I have time for right now.
- First off, thanks to Anne from Widener’s for sending me a marketing email that wasn’t just some intern or virtual assistant compiling a list of bloggers’ email addresses and then blasting something out. She actually read the blog and started off her email with a funny comment about semiblogtirement. I LOL’d.
-
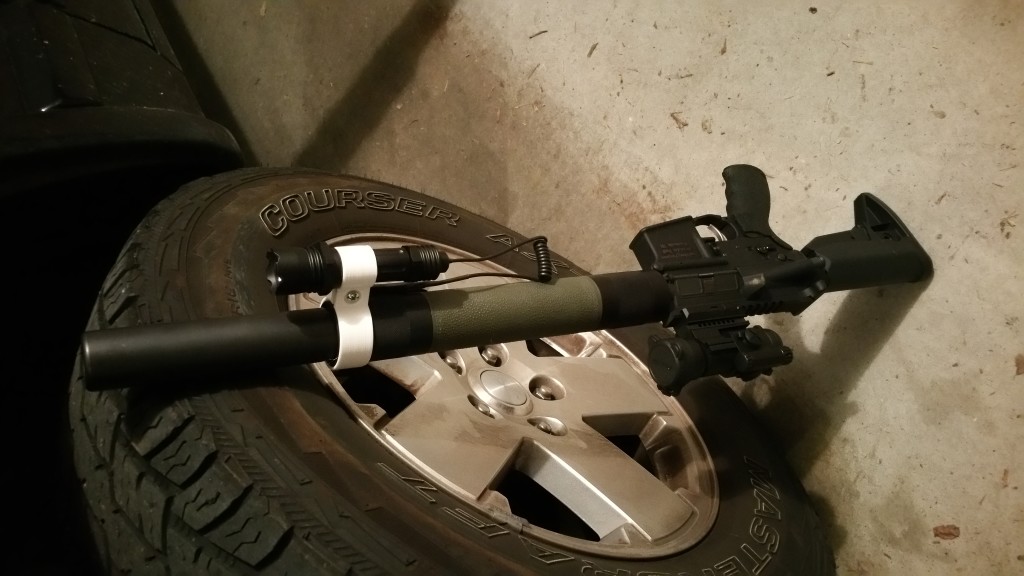
6.5 Grendel Build
Haven’t shot it yet, but I’ve been gathering parts for this for the last few months and it’s finally range ready:
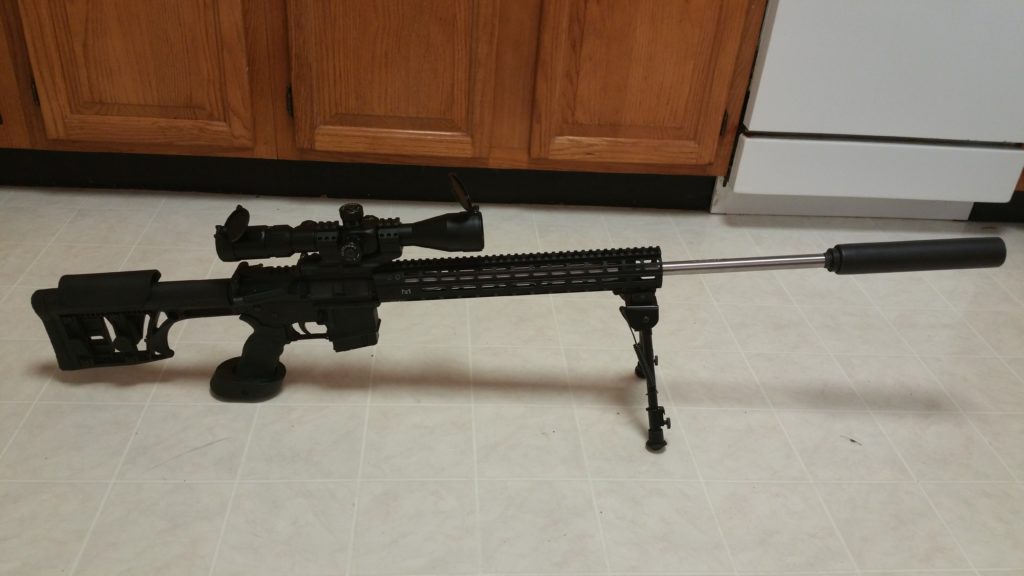
Hopefully I’ll be able to take it out on Friday.
Front to back parts list
YHM Phantom Stainless 7.62 QD Suppressor (Discontinued by manufacturer)
YHM Phantom 30 cal QD Muzzle Brake YHM-3302-MB-24A
AR10 Crush WasherBrownells 24″ 6.5 Grendel Barrel and Bolt combo
UTG Picatinny Bipod
YHM Low Profile Gas Block YHM-9383YHM Rifle Length Gas Tube YHM-BL04
C-Products 10 Round 6.5 Grendel Magazine
Aero Precision M4E1 Upper Receiver and 15″ M-LOK Handguard
Palmetto State Armory Bolt Carrier and Firing Pin (the 5.56 bolt is now a spare)
Rock River Lower Receiver
Rock River Takedown Pin, Pivot Pin, and Safety
Geissele Hi-Speed National Match – Match Rifle Trigger – Small Pin
Ergo Grip AR15/M16 Ambidextrous Tactical Deluxe Grip With Palm Shelf Black
Primary Arms 4-14x44mm FFP 30mm scope with RGRID reticle
Butler Creek Scope Cover – Eye size 19
-
It’s true because I say it is!
Presented without comment–the current CNN front page:

-
That moment I went from “no way am I voting for that guy” to “well, maybe…”
Was right after reading this. Sebastian is absolutely right when he says “American gun owners are sick to death of having this shit pinned on us, and we’re not going to take it anymore.”
Good job, media.
-
Problem solving in 2016
Problem:
The 12lb AR (which is down to a more reasonable 9lbs lately) is losing its spot as the home defense rifle. It’s being replaced by the 300blk sbr I built last year.
The sbr has a Hogue free float tube that had been given to me several years ago but had been sitting in my parts bin ever since.
I am a firm believer in “every home defense gunshould have a light” but the old Hogue tubes don’t have any attachment points.
Solution:
I have digital calipers, design software, and a 3d printer.
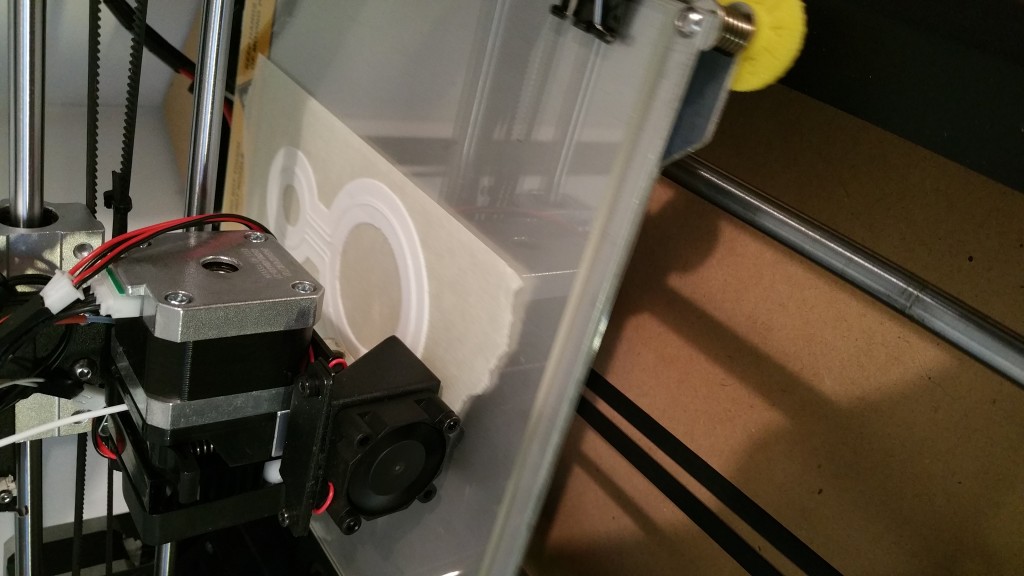
An hour later…
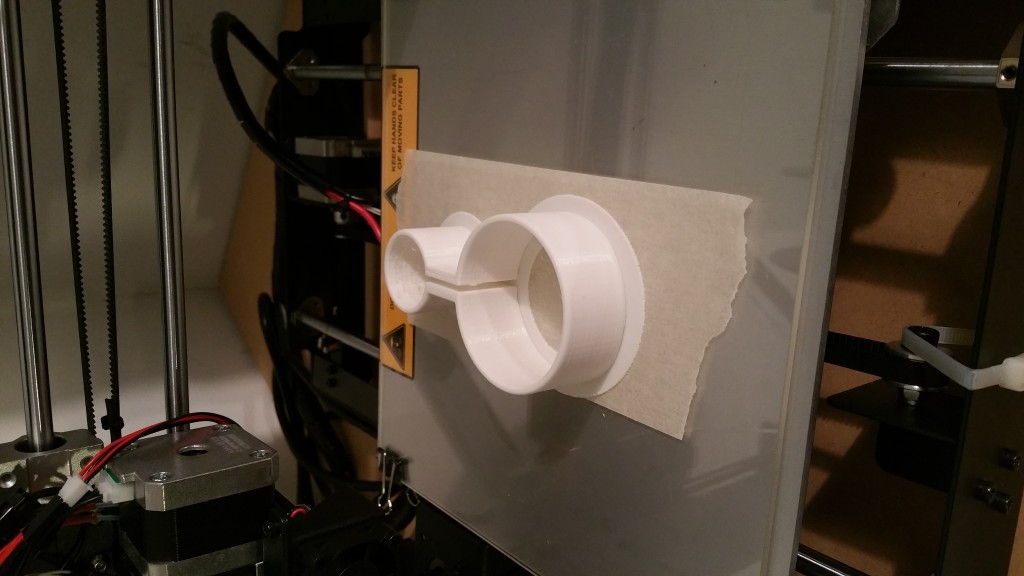
Cost me about a dollar in material and electricity, and took about ten minutes to design. No, it’s not a permanent solution. No, it probably wouldn’t do very well in a sustained firefight.
But man, that’s cool.
-
A 3D printed 6 switch panel for Jeep XJs
Alternate title: What I’ve been doing instead of blogging.
We mentioned on last week’s episode of the GunBlog VarietyCast that I have designed a new lower switch panel for 1997-2001 Jeep Cherokees, known in JeepSpeak as the newer XJ.
As of right now, I have seven different models for sale in my Shapeways store.
So here’s the story:
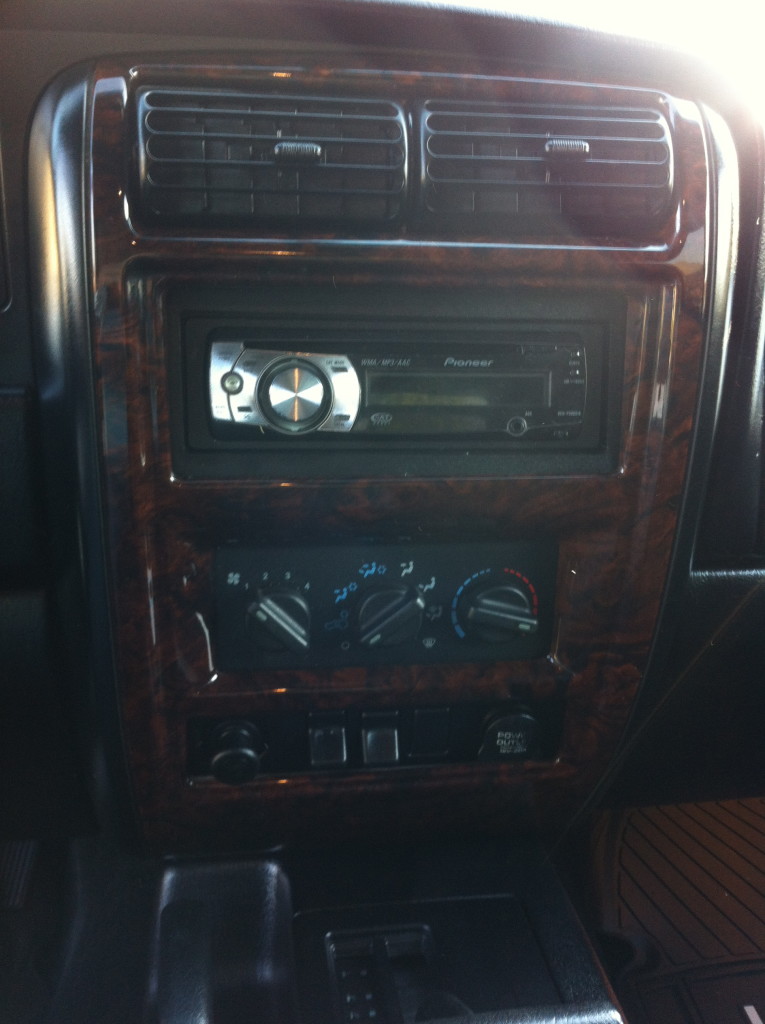
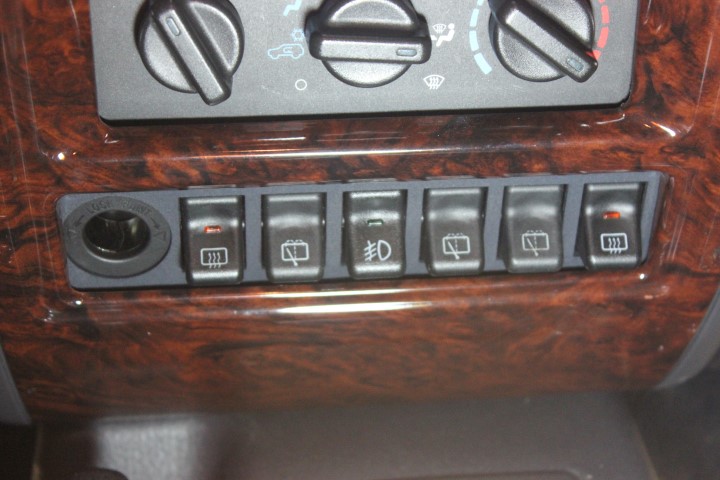
Jeep sold the XJ with one of three different lower switch panels, depending on trim level and options. They all have two 12v power ports–a driver side one that is only on when the key is in ACC/RUN, and a passenger side one that is always on.They came in three flavors. One with two switches and a blank that is actually solid and completely unable to be converted to hold a third OEM switch:
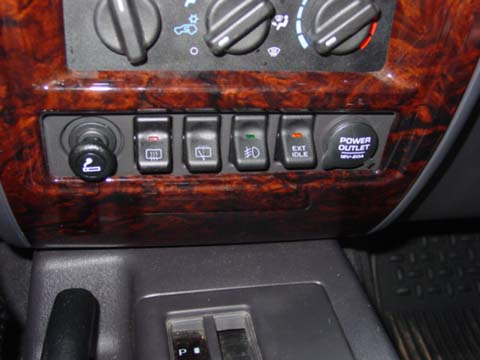
One with three switches for models with factory fog lights:
And a super-rare 4 switch model that came ONLY in police package models domestically, and in some European export models that also had rear fogs (which is apparently a thing in Europe):
So here’s the thing, though: You CANNOT buy the 4 switch panel anymore. Jeep doesn’t make or carry them, and the parts distributors ran out years ago. They occasionally pop up on ebay for $225 or so, with no switches.
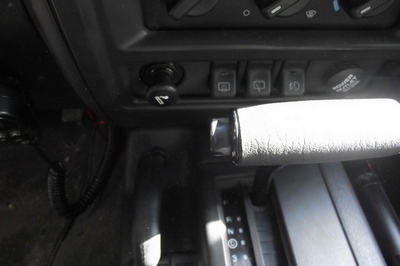
And here’s mine, with SIX switches:
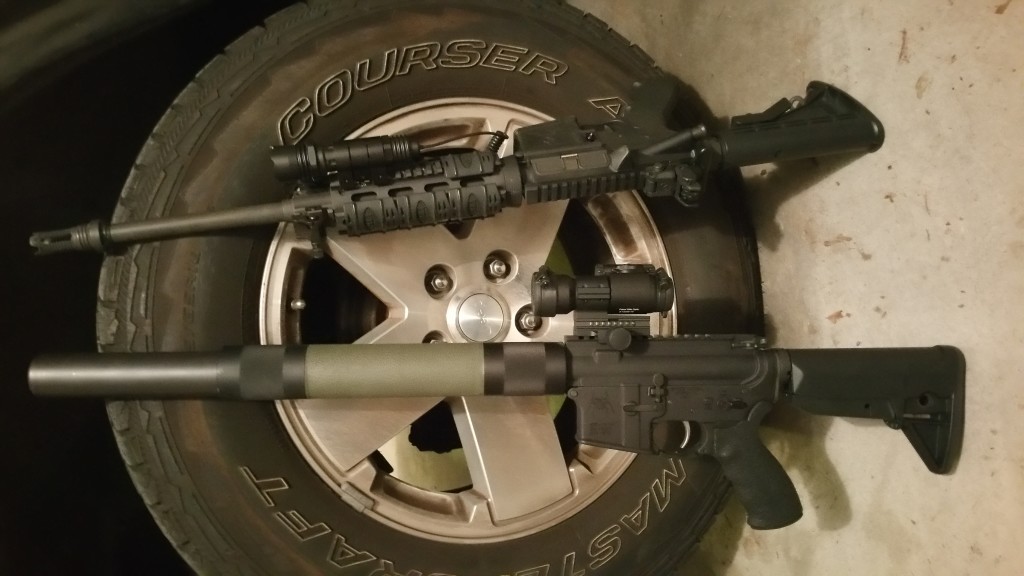
It took about 6 months of designing, prototyping, breaking, and redesigning the panels on hobbyist-grade 3D printers (using makexyz.com as my prototype provider) before I got one that I was ready to try out on Shapeways.
The makexyz printers–depending on who gets your design–can range from $800 to about $2500. The prints are functional, but the quality is…variable. I sent the exact same design to three different printers and got three very different results, structurally speaking.
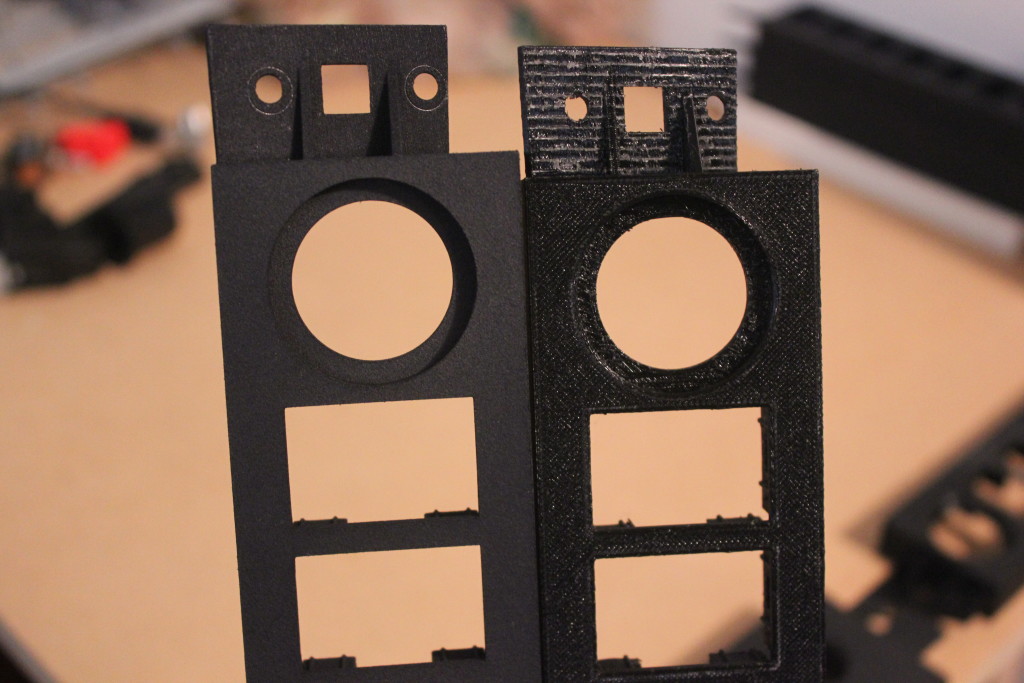
Shapeways uses Stratasys printers, which start at $200,000 each, and produce much more finished products. The two on top here were makexyz prints, the bottom is the Shapeways print. Click to embiggenate.
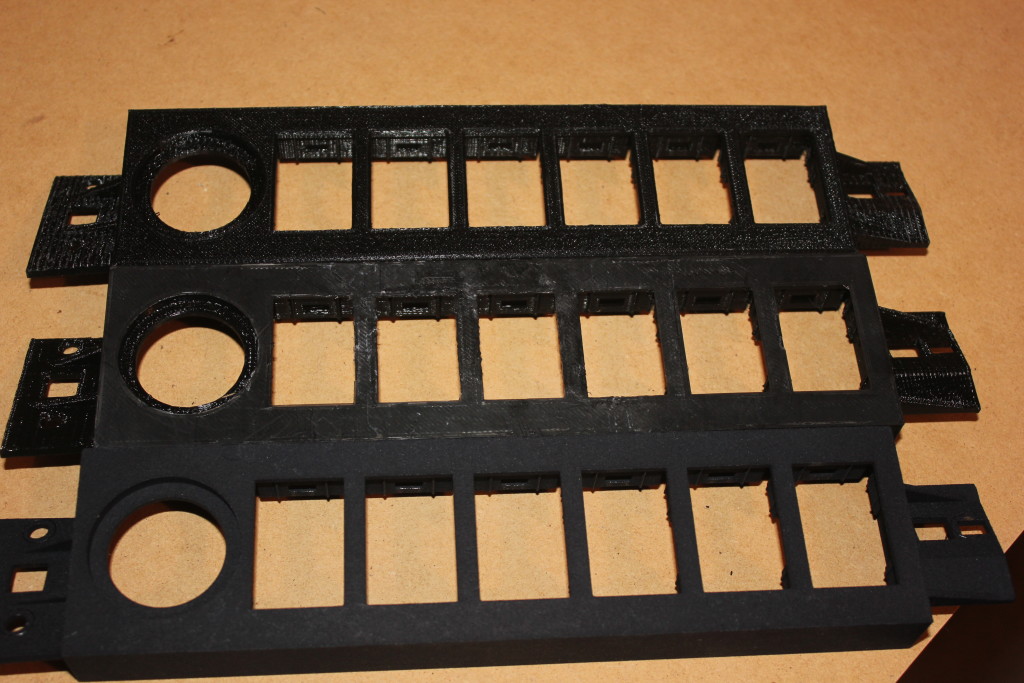
Left: Shapeways, Right: makexyz
Now I feel like I’ve got the design down I can make custom ones, too. I did 5 models in two hours one Sunday.
So now I have a product, available for sale, that is manufactured on-demand and shipped to your house with no interaction from me. I love living in the future!
-
Okay, Google. Start the Jeep!
So this happened:
Now let me tell you how I got all that to work.
Hardware:
Raspberry Pi 2 w/Case
16GB Micro SD Card
TP-LINK TL-WN722N Wireless N150 High Gain USB Adapter
5db Antenna
SainSMart 4 Channel Relay Module
Wire Jumpers
2A Car Charger
Avital 5103L Remote Start Car AlarmSoftware:
Tasker
AutoVoice and the unlock code
Raspbian
WiringPi
Apache
PHPThe high-level workflow goes like this:
- Activate Google Now on my Note 4 by saying, “Okay, Google”
- Send Google Now the command “Start the Jeep”
- AutoVoice intercepts the command and kicks off a Tasker task
- Tasker launches Chrome with the URL that corresponds to a PHP page on the Pi
- That PHP page calls the WiringPi library and sets a GPIO pin to out mode, then activates that pin for 2 seconds and deactivates it
- The relay card accepts the GPIO signal and energizes one of the relays for that 2 second interval
- The relay is connected to the Remote Start Activation wire on the Normally Open side of the relay and the Jeep’s Ground on the common terminal, so when the relay is energized, the Remote Start Activation wire is grounded
- The alarm recognizes that the Remote Start Activation wire is grounded, and kicks off the black-box-to-me remote start process.
Unfortunately, I don’t have it working with my Samsung Gear Live Android Wear watch yet, but I’m confident I’ll get that figured out.
It’s important to note here that I wrote exactly 6 lines of code here, and two of those lines were the PHP opening and closing tags. This is not a project that requires a lot of that kind of expertise. Familiarity, yes, but not expertise.
The Remote Start
When I bought my Jeep, the previous owner had installed an Avital 3100L car alarm. I’ve had a few cars with remote start, so when the alarm started flaking out on me, I replaced it with an Avital 5103L Remote Start Car Alarm. The reason why I went with that remote start is, frankly, because it shares a harness with the 3100L. I didn’t want to have to re-wire the door locks, starter kill, dome light, etc. if I didn’t have to. Plus it was only like $80. Now that I’ve had it for a while, I know I should have spent the extra $30 and gotten the two-way pager model.
Avital is a DEI brand–like Viper, Clifford, and Python. DEI sells an internet-connected alarm add-on module for like $170 plus $70 a year. As of mid-August 2015, their “new version 4.0–coming early 2015” is still not ready yet. My point is that my Avital alarm has a wire that, when grounded, activates the remote start capabilities of the unit.
This is good, because now we can use this dedicated, purpose built hardware to accomplish the most difficult part of all this: Actually starting the Jeep!
Now, my Jeep is a 98. It’s old. It doesn’t have factory security or any fancy RFID keyfob. DEI has modules that can bypass those things, but they cost extra. Installing a remote start is not for the faint of heart, especially in a newer vehicle with 37 different kinds of security. Remote Starts essentially hotwire the car, and automakers have spent the last decade or so trying to make it very, very difficult to do that.
The Raspberry Pi 2
I finally broke down and bought one after Barron plugged it on GBVC EP27. And yes, it was my plan all along to use it for this purpose since I knew about that remote start activation wire.
In addition to my home wifi network, my employer provides a guest wifi network that I can have the Pi connect to. I haven’t gotten this part fully worked out yet, but the plan is to have the Pi connect to my OpenVPN instance at home and route the commands through that. I don’t want other people on the guest network to be able to randomly start my Jeep during the day 🙂
In order to make sure the Pi can actually reach the guest network, I bought a TP-LINK TL-WN722N Wireless N150 High Gain USB Adapter specifically because it has an external antenna connector. I also bought a 5db Antenna, but I’m not sure that’s actually getting me anything. Fifteen years ago I had a little magnet-mount 2.4ghz antenna specifically designed for WarDriving with an Orinoco card and I hope to find something like that. It was a great little antenna.
The Relay Card
The GPIO pins on the Pi can only handle a very tiny amount of current. It may be possible to set up the Pi in such a way that the relay card is necessary, but the card was only a few dollars and I can use the other relays for other things, like rolling down my windows or turning on my rear defrost.
In order to avoid the possibility of frying either the Pi or the Alarm brain, I got the relay card to isolate the two.
The card can be powered by the 5v line on the Pi 2. I’m not sure if I’d want to power all 4 relays simultaneously for an extended period of time, but for my purposes this is fine. One thing to note is that my card activates a relay if it is receiving a 0 on the GPIO line, not a 1. I had to compensate for that.
The Pi Software
I’m not going to lie: I totally followed this fabulous Instructable to get me to a point where I could hit a single page and activate a relay for 2 seconds. I didn’t do steps 5 or 6 because it wasn’t necessary for me.
Here is the entirety of the code that I wrote for this project:
<?php

system ( "gpio -g mode 4 out && gpio -g write 4 1");

system ( "gpio -g write 4 0");

sleep ( 1 );

system ( "gpio -g write 4 1");

?>
That’s saved as RemoteStart.PHP. Hit http://your.pi.ip/RemoteStart.PHP and BOOM! Relay fires for 2 seconds:
Hard, eh?
The Android Software
I bought Tasker about a year ago because everyone says it’s awesome and I had $10 of Play credit to use. As part of this project, I also installed the AutoVoice plugin for Tasker, and then bought the unlock code because it was $1.34 and in order to use the 7 day trial version, the developer wanted me to sign up with an account on some gaming site. Eff that. Take my money.
Now, I thought that AutoVoice was to make this work with my Android Wear, but I was wrong. This is to make this work with regular Google Now.
The AutoVoice page on Play has a pretty good video tutorial so I’ll refer you to that for how to set up the AutoVoice portion.
For Tasker, you want to set up a Task and call it “Start the Jeep” or whatever. Add a “Net” action for “Browse URL” and put your URL in there. Hit the play button to test it: Your default browser should open and go to that page. If not, something’s not right.
On the Profiles tab, create a new Event Profile. Select Plugin->AutoVoice->Recognized. Do the Speak Filter thing they demonstrate in the video tutorial and say “Start the Jeep.”
The Enter Task dialog will pop up. Select the task you created.NOW THIS IS VERY IMPORTANT! You have to actually activate Tasker! I didn’t at first and was angry–AutoVoice was showing a popup (sprite) saying that it recognized my “Start the Jeep” command, but then it wasn’t doing anything! If you don’t have a lightning bolt icon in your system bar up top, Tasker is not active.
Test it out!
Putting it all together
So now that all the pieces and parts are working, we put it all together in Proof-of-Concept form:
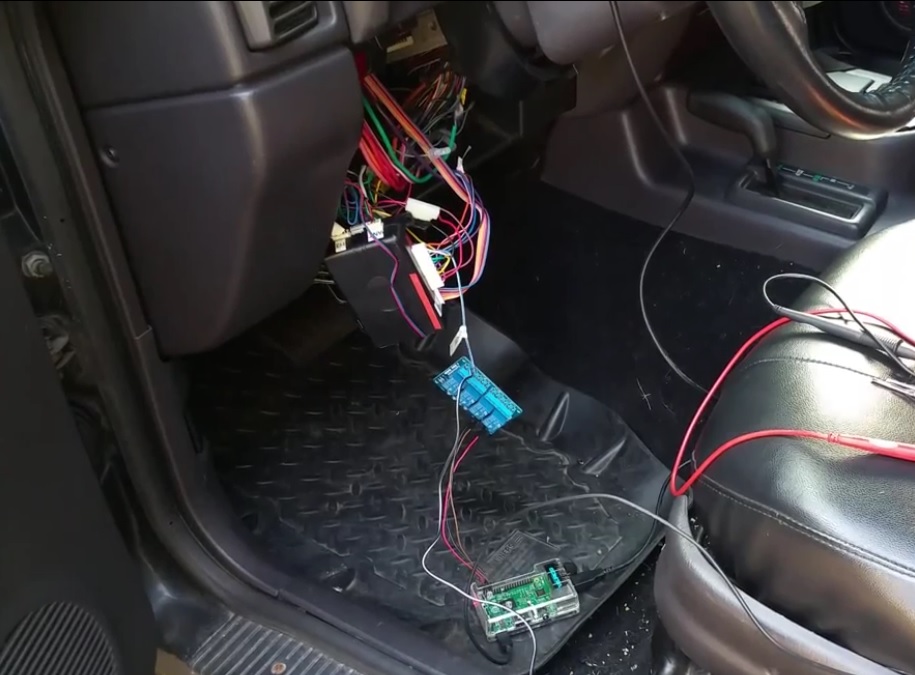
And everything should work…as long as you’re connected to your network.
