
I kind of accidentally bought this bumper so bear with me while I tell the story. Regular readers will know that I recently bought a 1998 Jeep Cherokee after chasing a guy down in traffic to buy it. It’s got a little bit of a lift and some 31″ tires. This one came from the factory with a donut spare, which is something I’d never even heard of before in a Cherokee. Because of that, it didn’t have the necessary hardware to properly hold a full-size spare–which only matters a little because the maximum tire size for the factory hardware is…31″.
This is my third XJ. For both of my previous Jeeps, I wanted new bumpers but didn’t really find it necessary to spend the money. I really like the way tire carrier rear bumpers look, this one needed one, so there’s all the excuse I needed. I bought this XJ for less than I sold my WRX for, so that’s where my budget came from.
Looking around, most of the bumpers that did what I wanted were in the $1200 range. That was basically my whole budget for upgrades so I kept looking. Smittybilt came out with one that got mixed reviews mostly from people who’d never seen one. “Trail Ready” and “Smittybilt” aren’t usually used in the same sentence. There were lots of questions about the thickness of the steel, the quality of the welds, and whether they tied into the frame or just used the stock bumper mounts. There weren’t any good writeups out there because the manufacturer has had problems with lead times. I think it was 6 months to a year before the first paying customers actually got their bumpers in hand.
If I’m completely honest with myself, the bumper would be just for show. I went wheeling exactly one time with the previous two Cherokees…and rode with someone else. The Smittybilt bumper was $750 pretty much everywhere, so I could save $450 if I bought theirs.
I live about 3 miles from a retail store for 4 Wheel Parts. They’re a retailer for Smittybilt, so one Saturday I took liwizard and we went investigating. They didn’t have any of the Cherokee bumpers on display, but they did have others in the XRC line for me to look at. They had something else, too.
There was a single sales flyer about the size of a postcard sitting on top of one of the Wrangler bumpers: “Buy a Cherokee front and rear XRC bumper by June 30th, get XRC Rock Sliders for free.” The sliders are about $500.
So for the cost of a “standard” tire carrier bumper, I could get the front and rear bumpers plus rock sliders. Yeah, so that was kind of a no-brainer.
Unfortunately–and this was not explained to me properly when I made my purchase–everything except the front bumper was backordered. For four months. Apparently “They’re in the warehouse in California and will take 3 weeks to get here” doesn’t actually mean that the ones in the warehouse haven’t already been bought by someone else. I learned that when I picked up the front bumper and the counter guy casually mentioned my other stuff was on backorder.
Things you should probably know up front
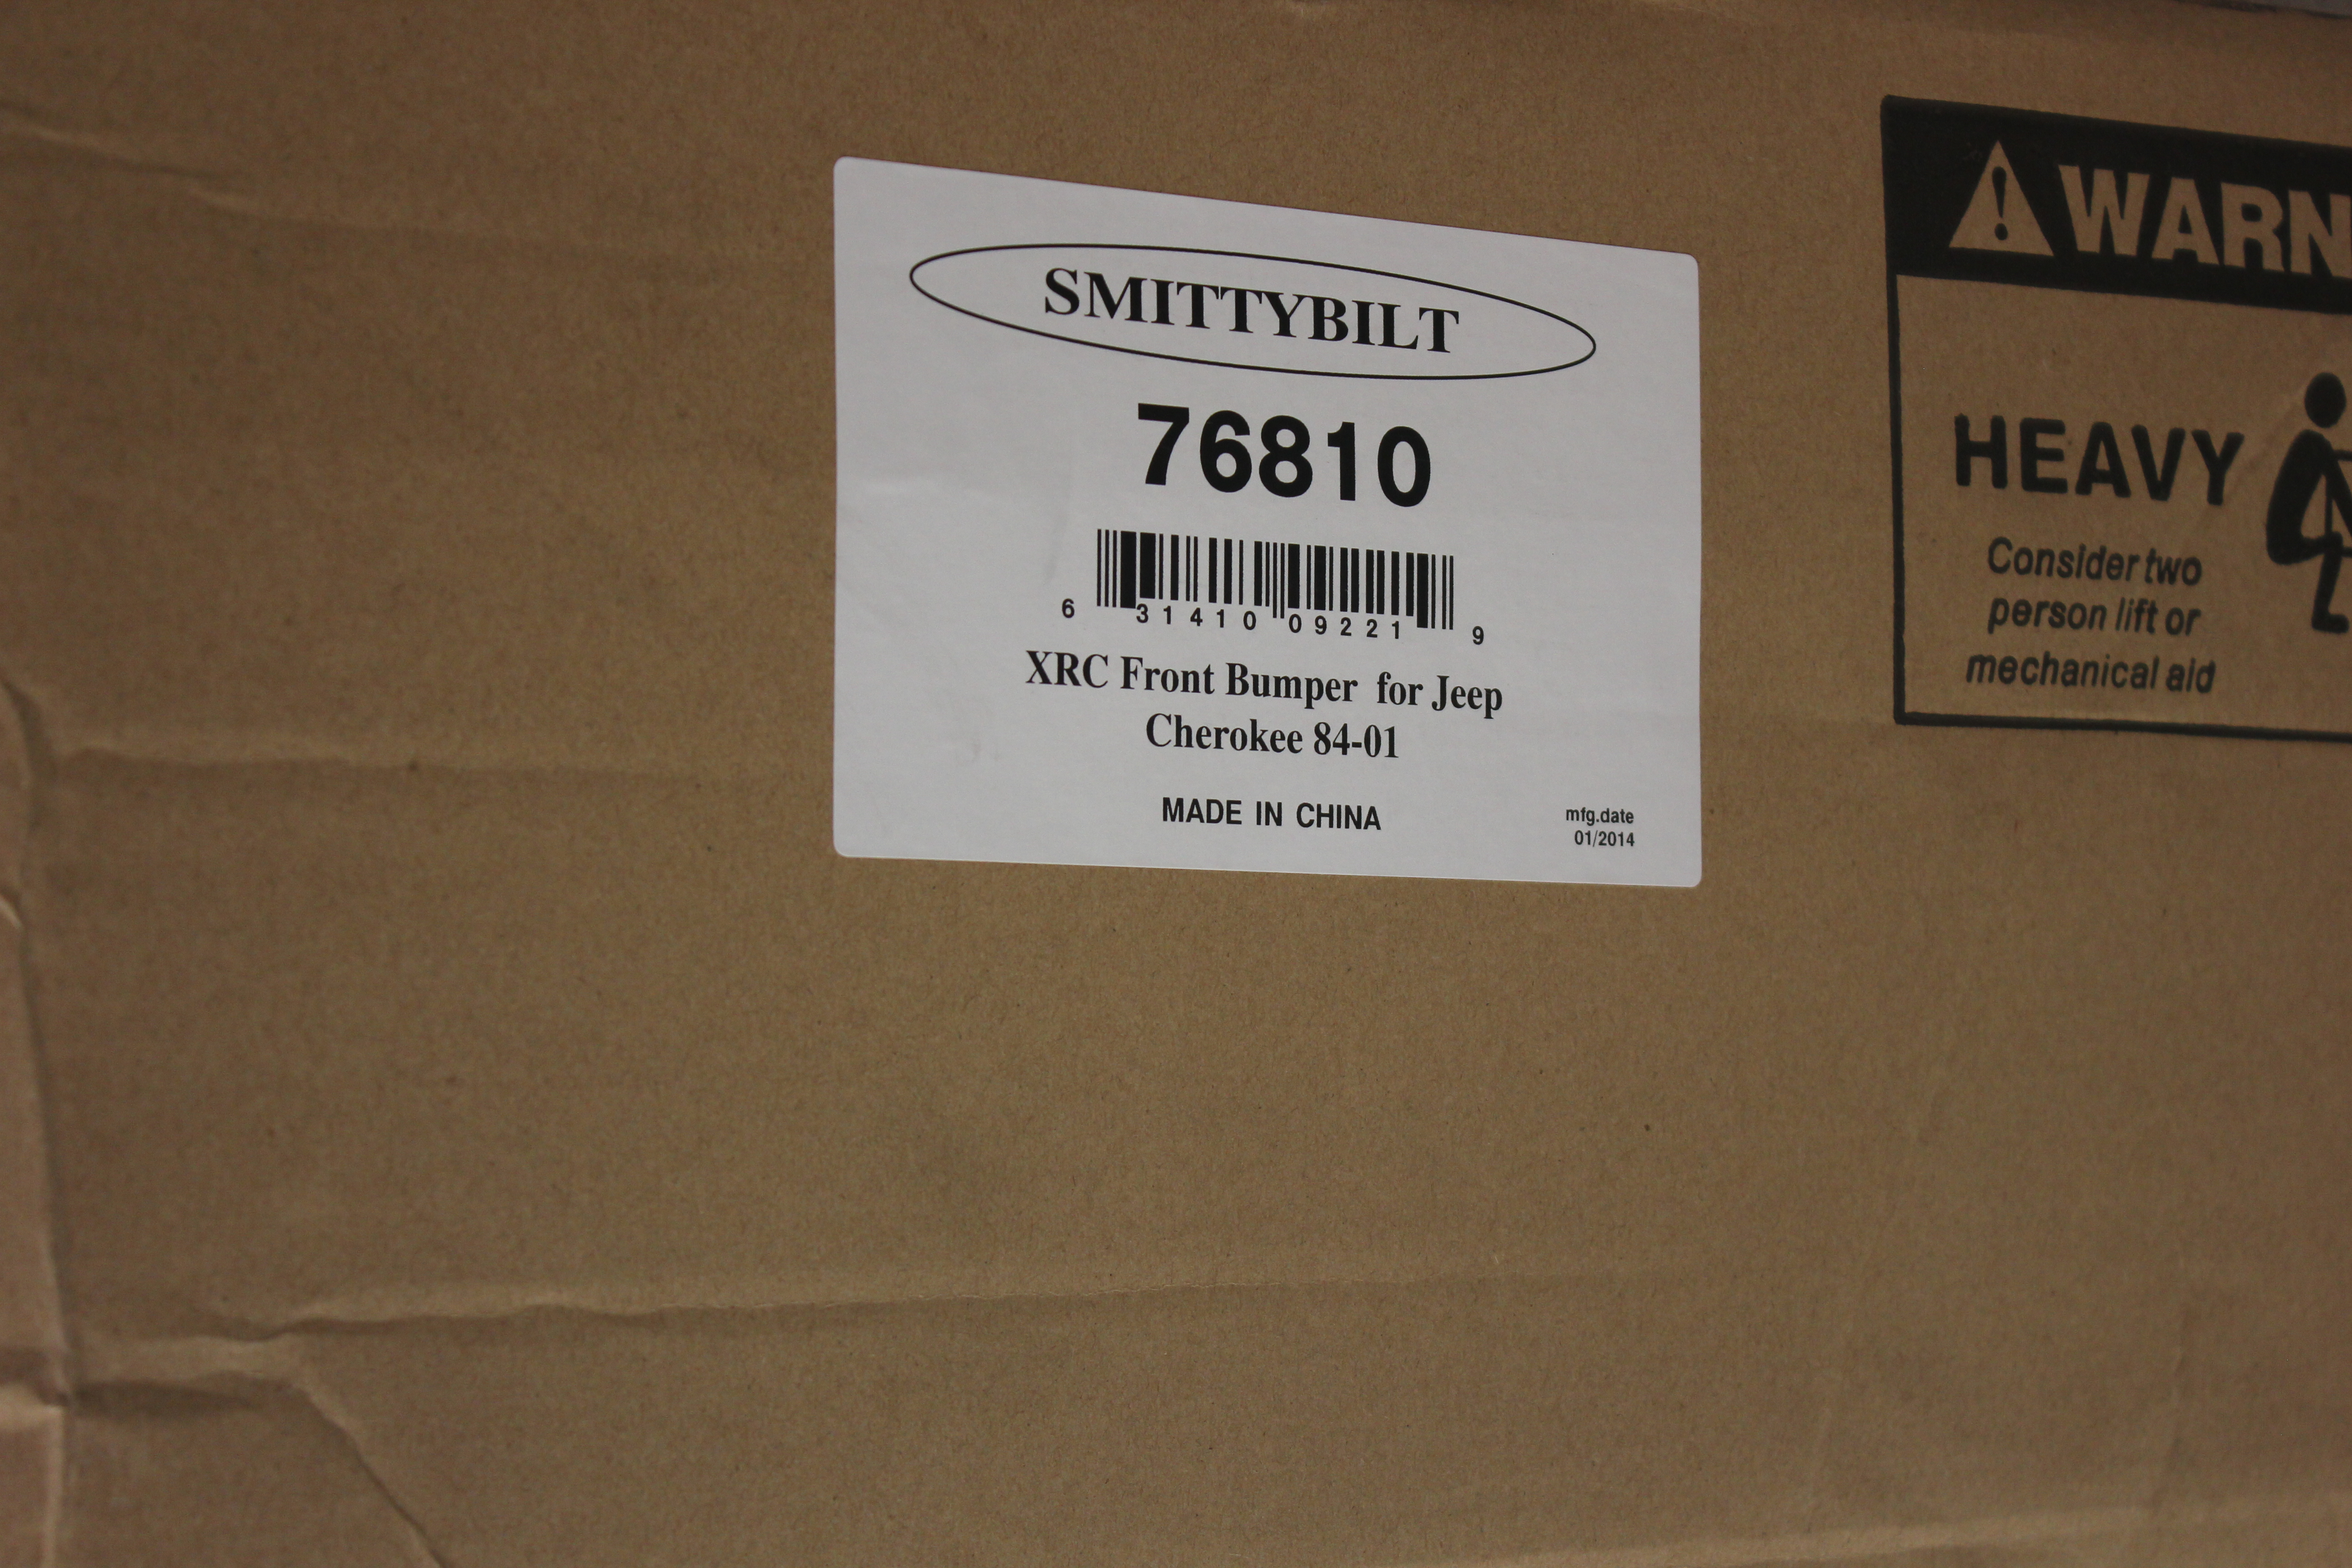
The box is much larger than you’d think. When I went to pick it up the first time we discovered it won’t actually fit in the back of a Cherokee. So unless you’re getting it freighted to your house, you’re going to need a bigger boat. The actual dimensions of the box are 71 1/2″ x 23″ x 13″ and it’s listed weight is 185 lbs.
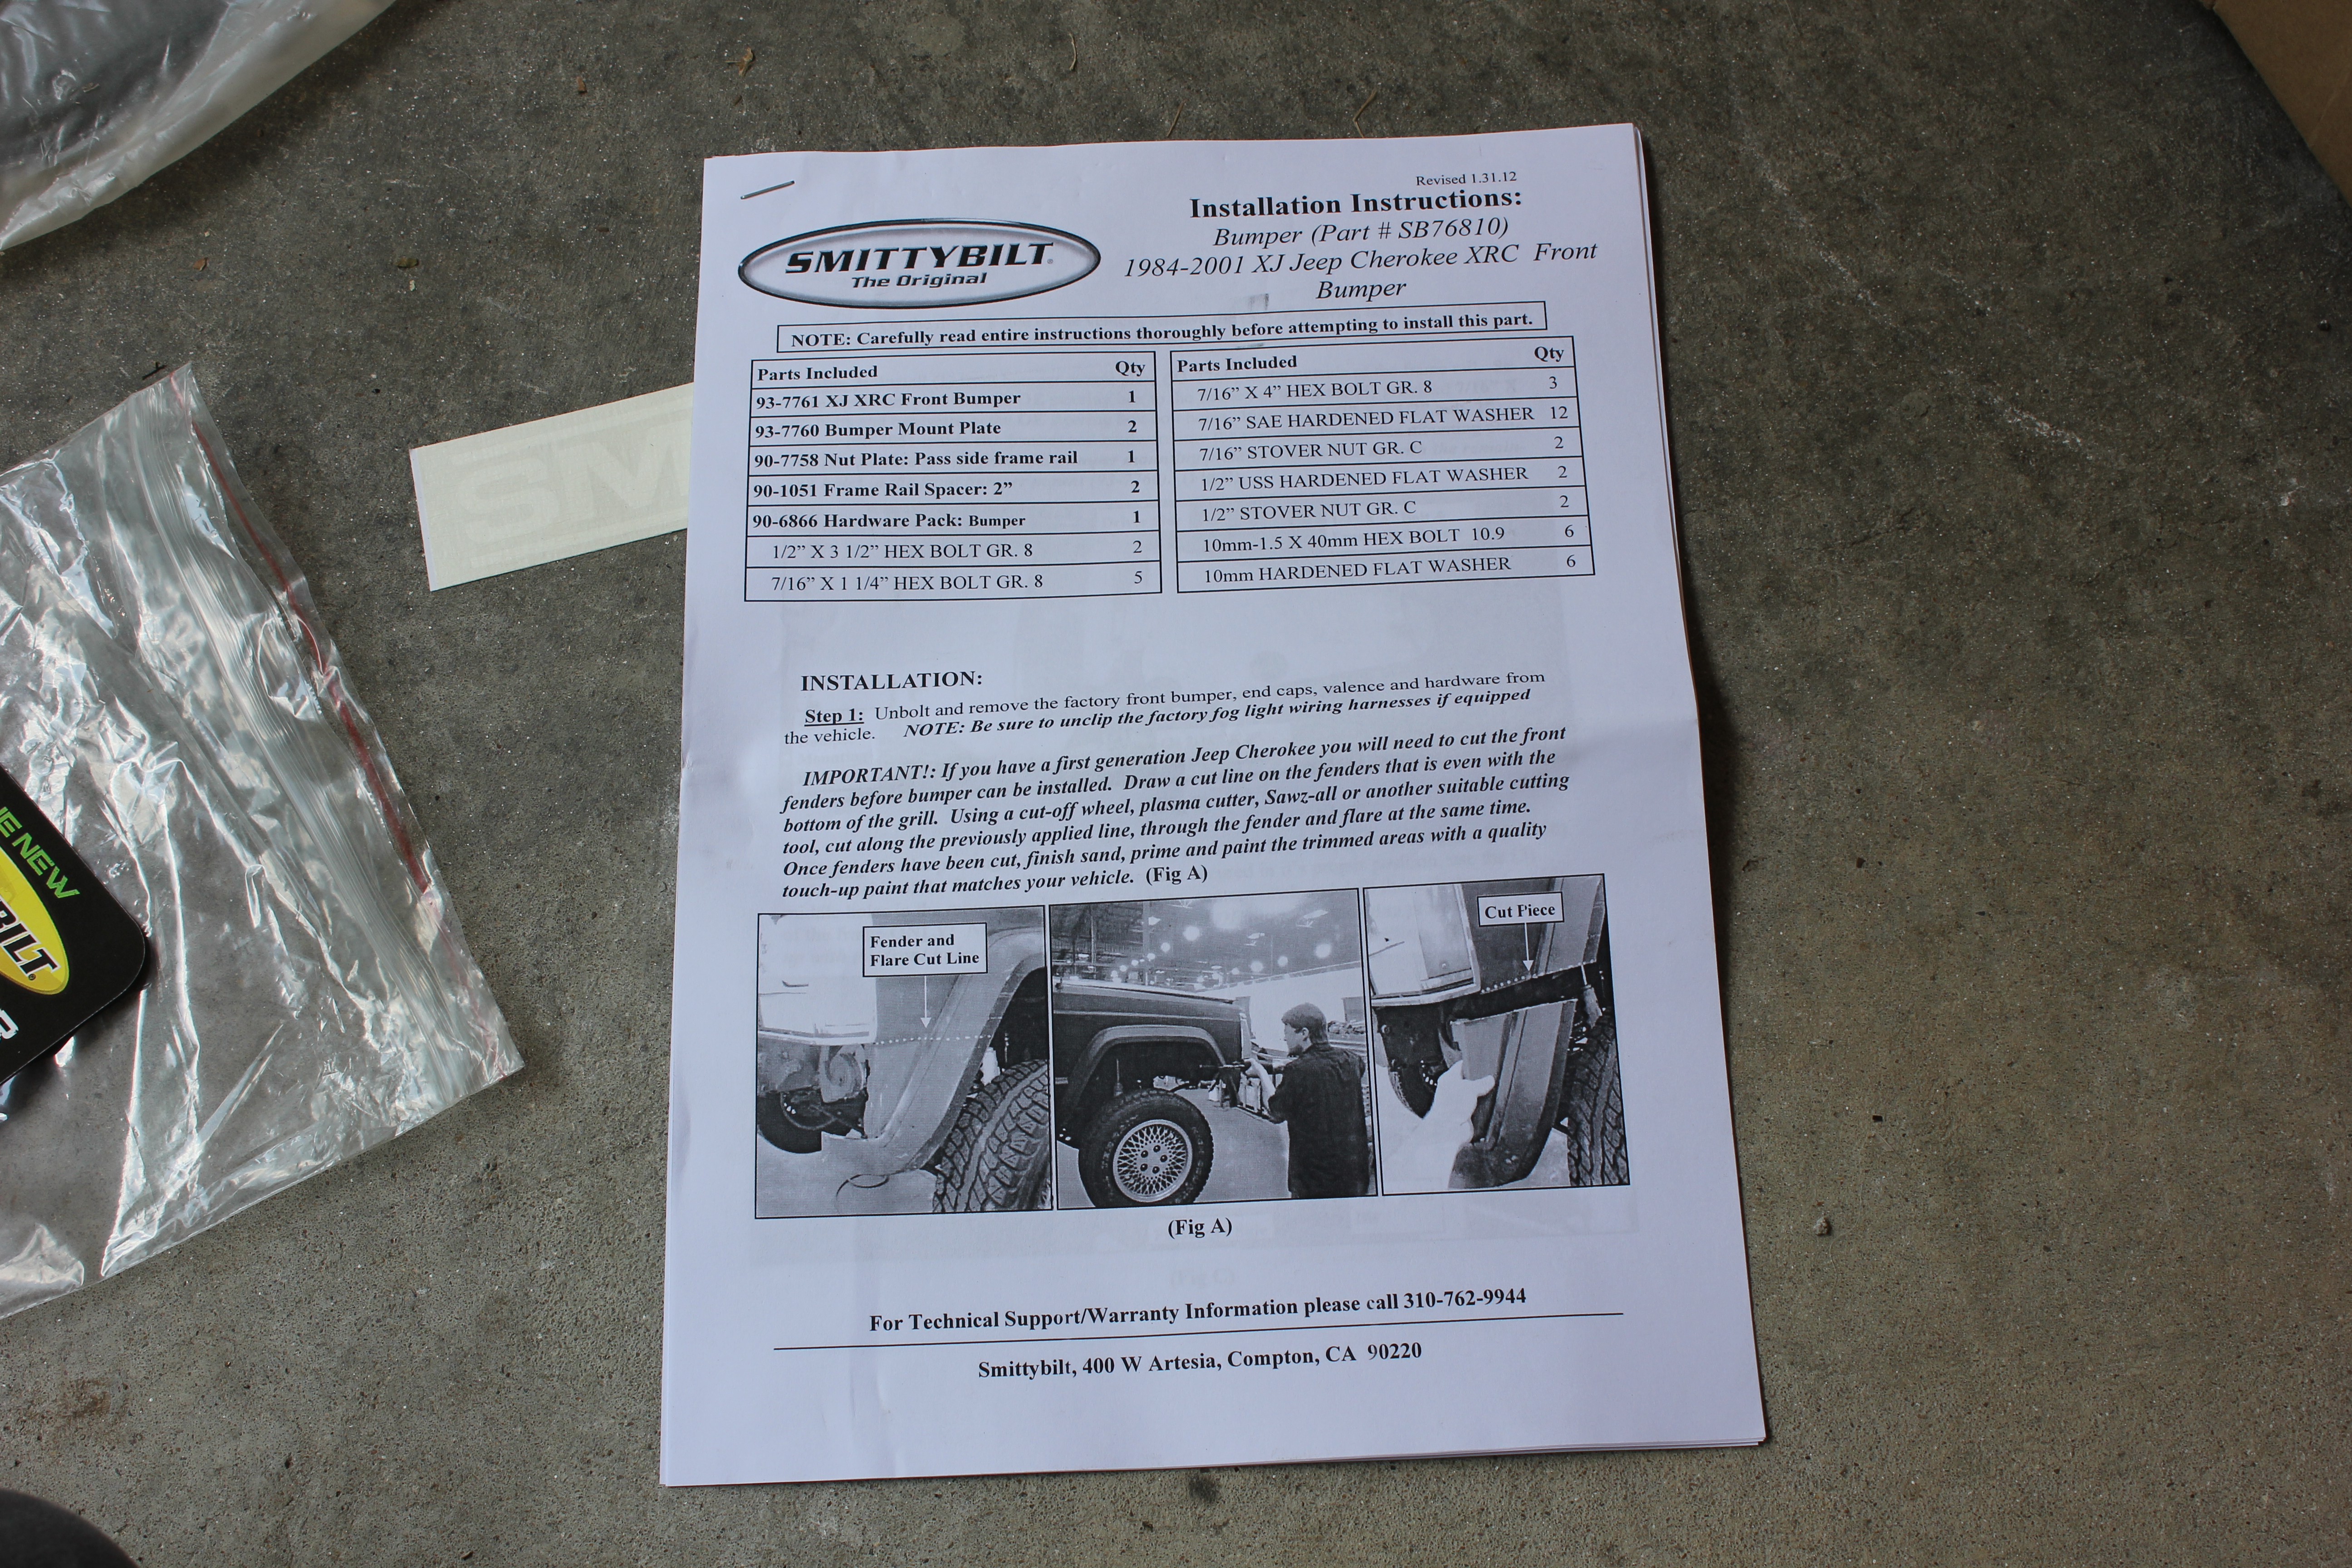
The instructions are, well, lacking. I didn’t have any luck finding them posted anywhere, so I scanned them and uploaded them here in hopes that some other poor soul can find them:
XJ XRC Front Bumper SB76810 Install Instructions
I apologize for the quality of the photos in the instructions…but that’s what ships with the bumper. No color photos, and the black and white ones are pretty grainy.
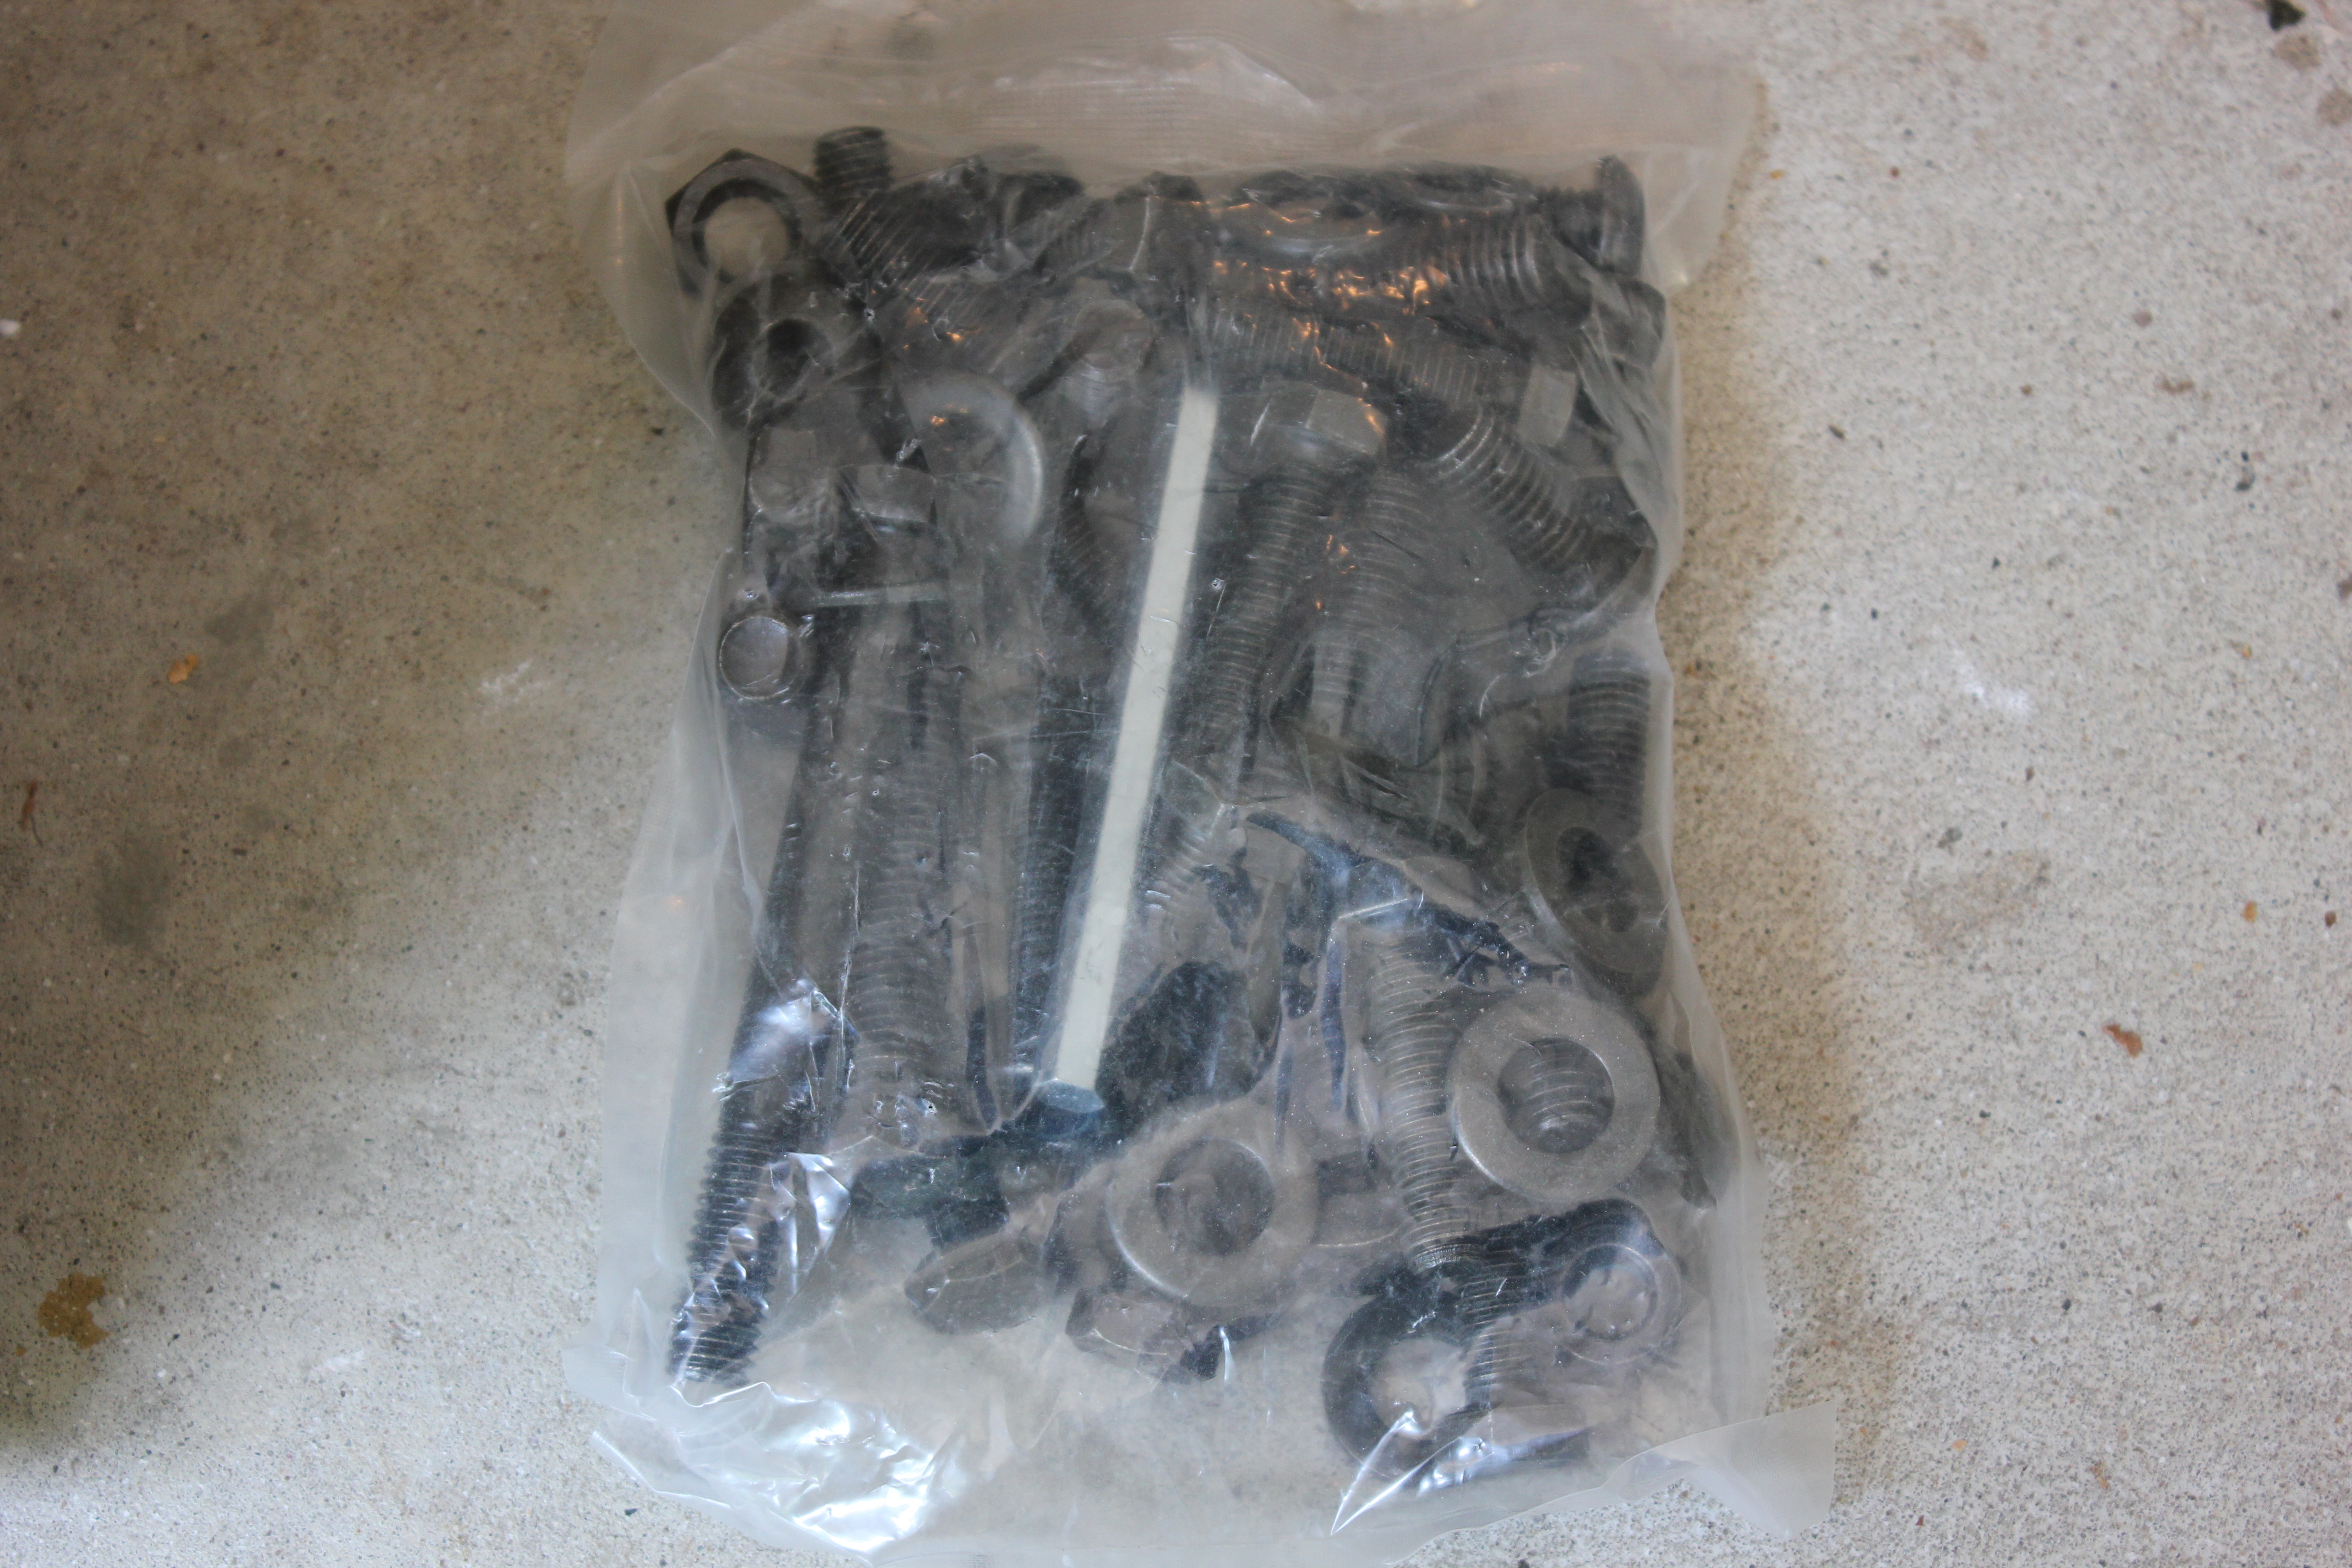
There more bolts and washers included than you’ll need, but there aren’t more nuts than you’ll need. I suspect this is the standard hardware they send out with several models.
There are two different sized washers. For the standard head bolts, use the smaller ones.
The 2″ spacer they mention is actually a 2″ washer
On 1996 and older models, cutting is required on the front fenders. I’ve seen some folks complain that the instructions tell you to cut too much, so there’s that.
Also, since you’re going to be in there anyway, you might want to pick up a steering box brace. I’ve heard good things about the M.O.R.E. brace. It didn’t occur to me until I was already in there that this would have been a perfect time to do it. Oh well.
Tools I used:
Sockets:
–XRC: Hex Cap bolts 5/8″ nuts 17mm (11/16″)
–XRC: Hex screw nuts 3/4″ (19mm)
–Jeep: Bumper Bracket Bolts 15mm
–Jeep: Other: 10mm and 1/4″
3/8-Inch Drive Ratchet
Black & Decker RCT100 TriRatchet 3/8-inch Drive Ratchet
DeWalt DC825B 1/4-Inch 18-Volt Cordless Impact Driver
12″ impact ready bit holder extension
ratcheting box wrenches
Plastic Fastener Remover
DeWalt Pivoting Bit Holder
Plastic Fastener Remover
3/8 Drive Wobble Extensions
1/2″ Drive Click Stop Torque Wrench
Blue Loctite 6-ml
DeWalt 18V 1/2″ Cordless XRP Drill
7/16-Inch Drill Bit
T-25 Torx bit
T-50 Torx Bit Socket
XJ Field Service Manual
Stanley Snips
Really would have been helpful, and I’ve bought since then:
DEWALT DW2547Ir 1/4-Inch Hex Shank To 1/2-Inch Socket Adaptor
Tons and tons of pictures after the break….
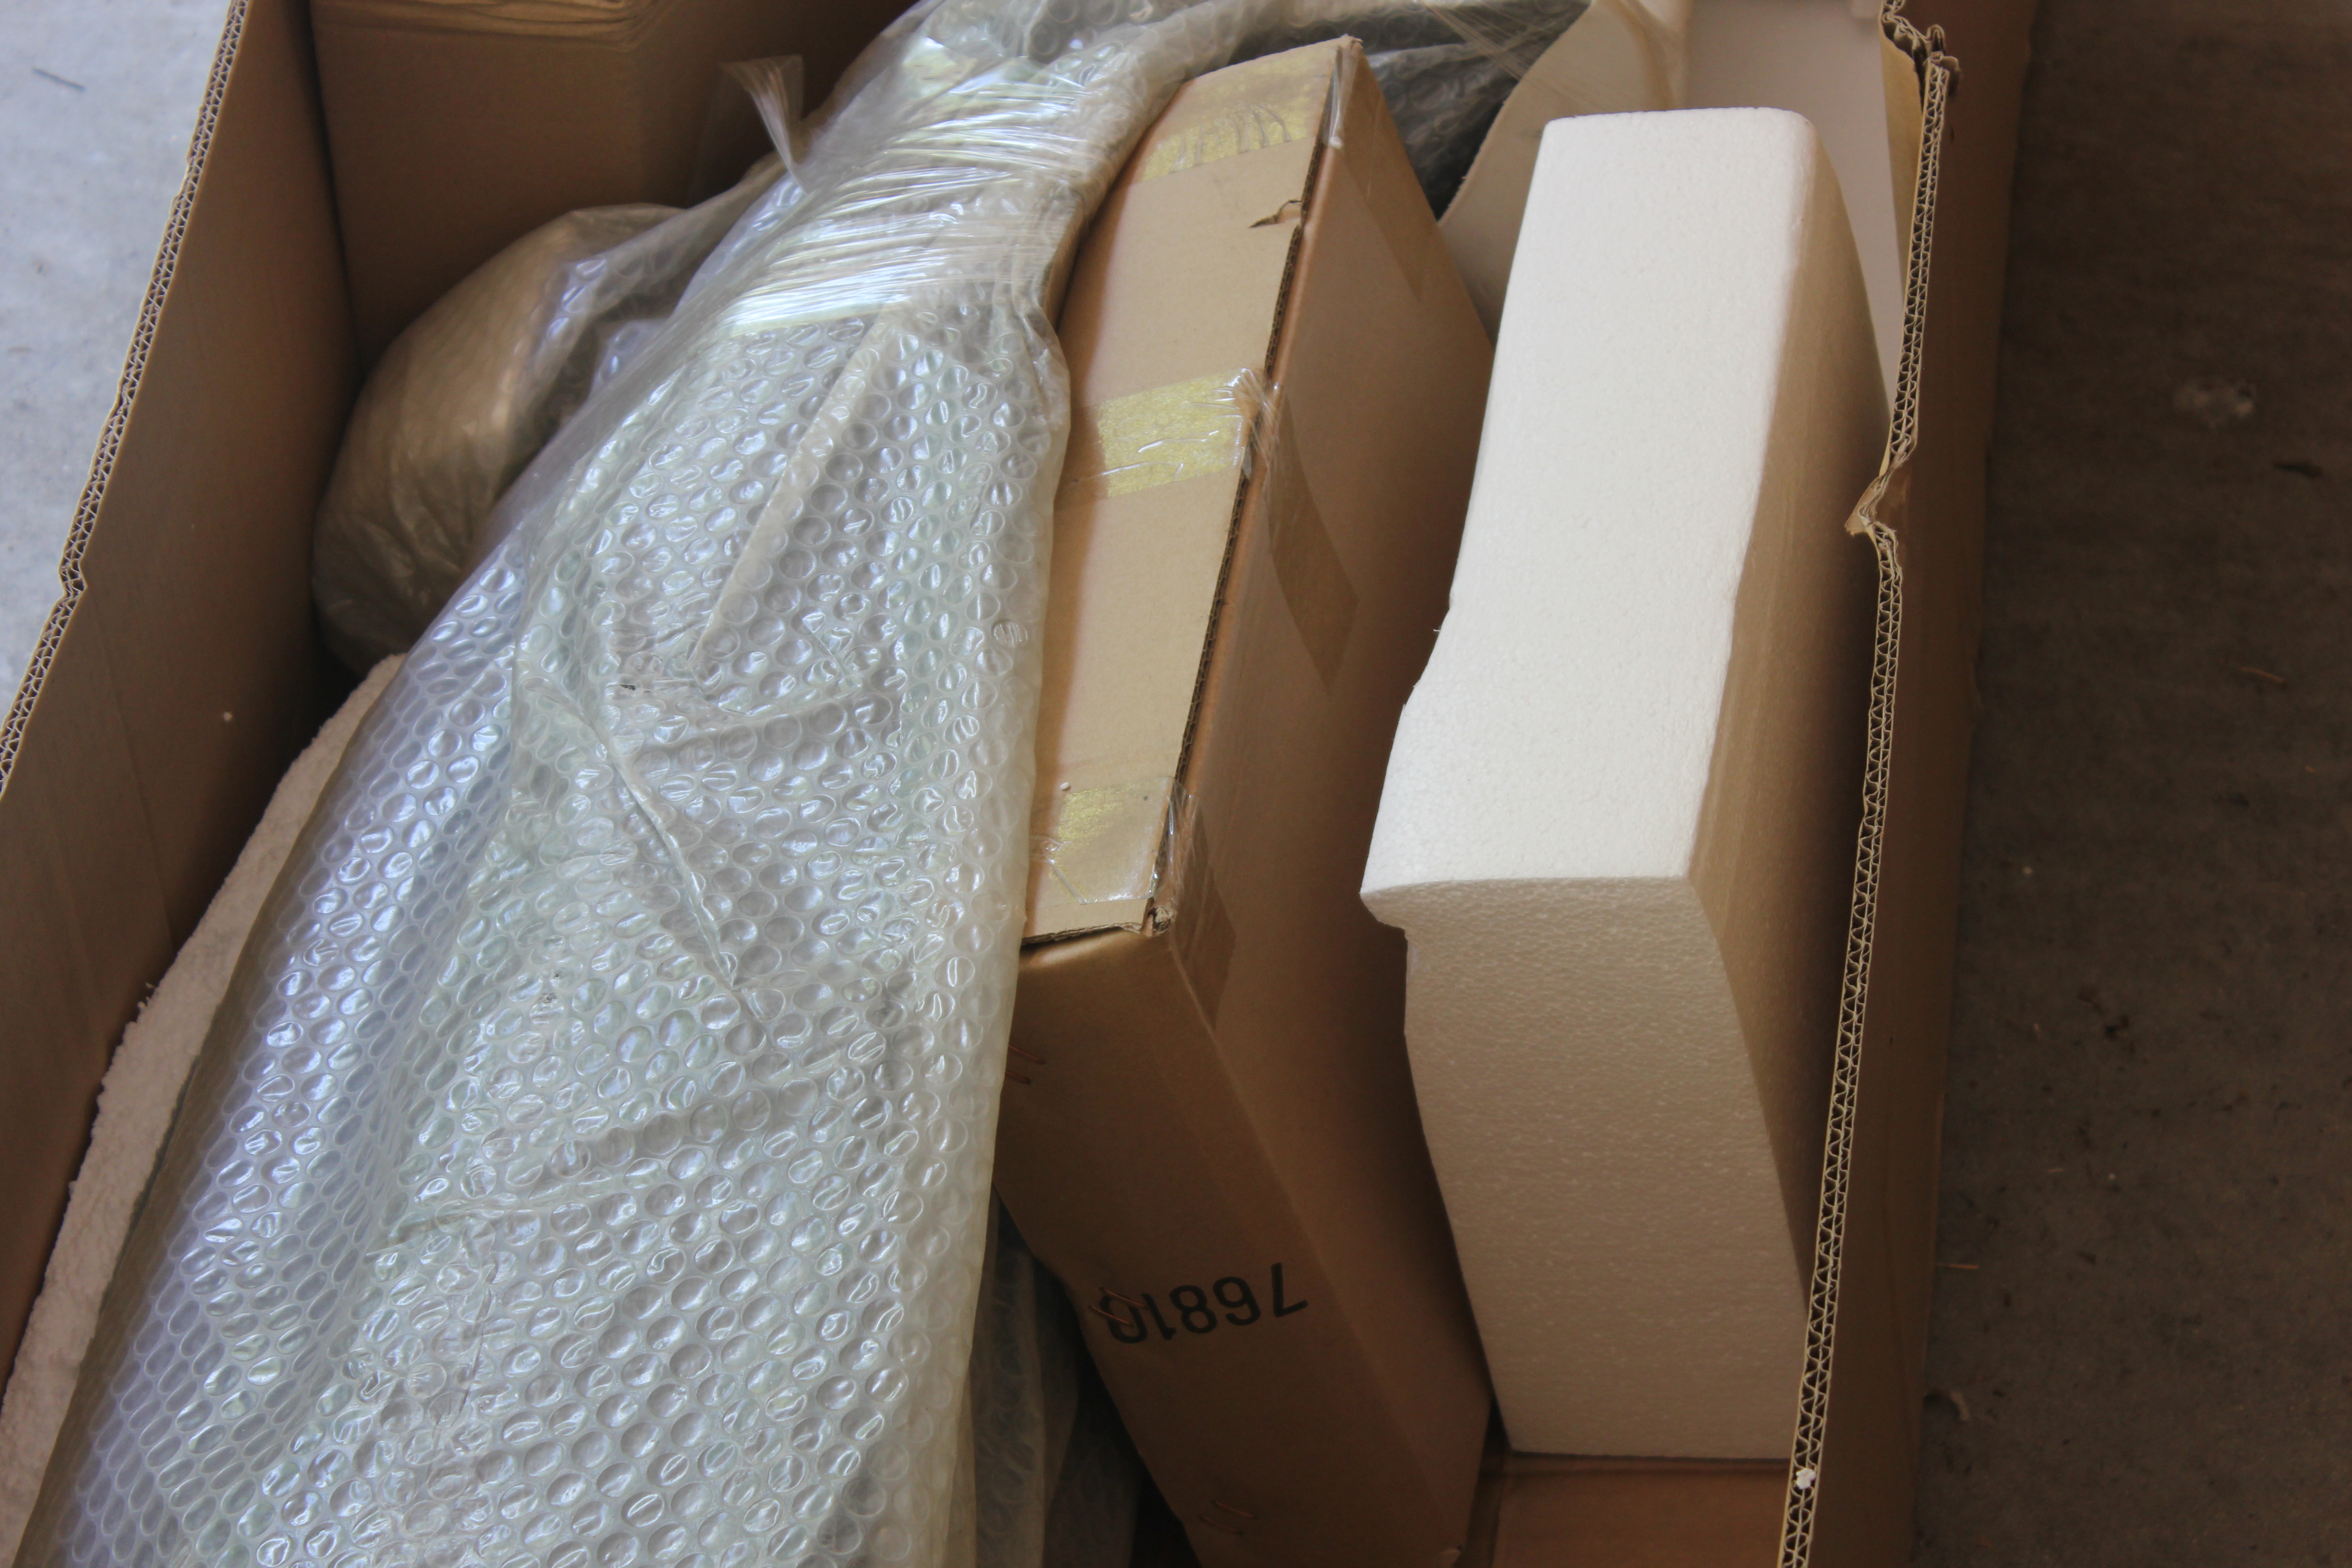
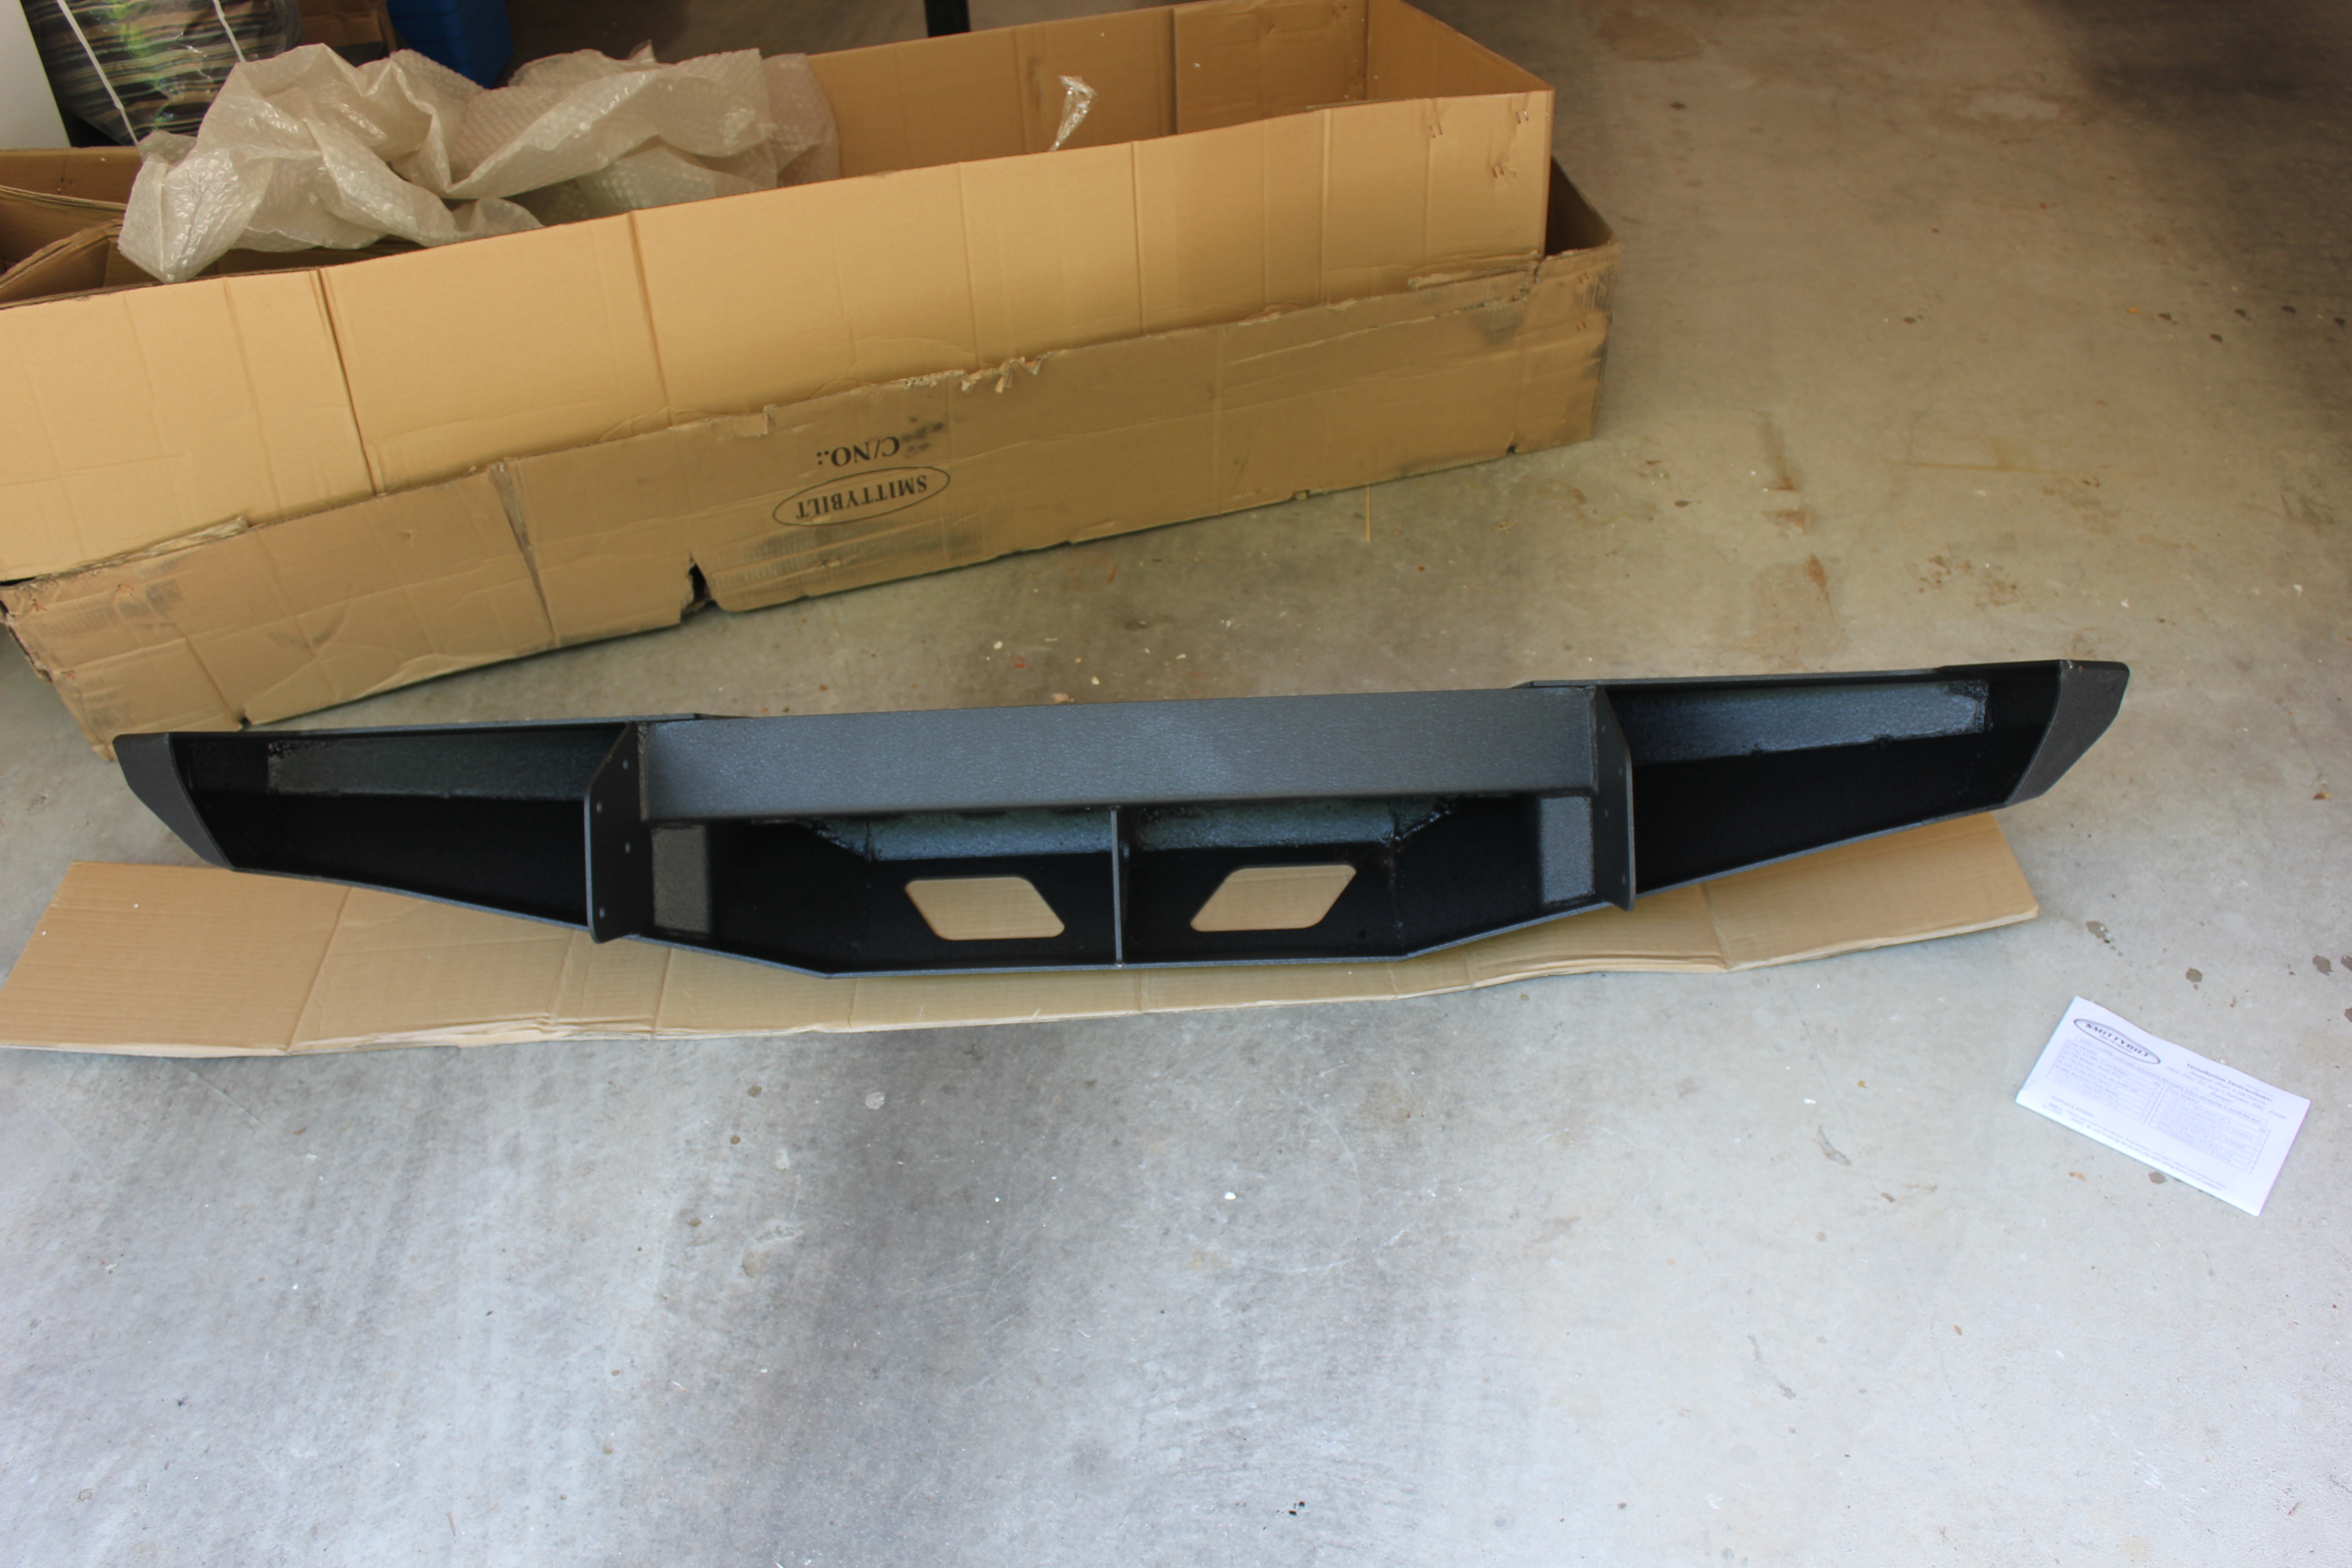
The Unboxening
The box, sitting in my garage after pulling it out of my wife’s crossover:

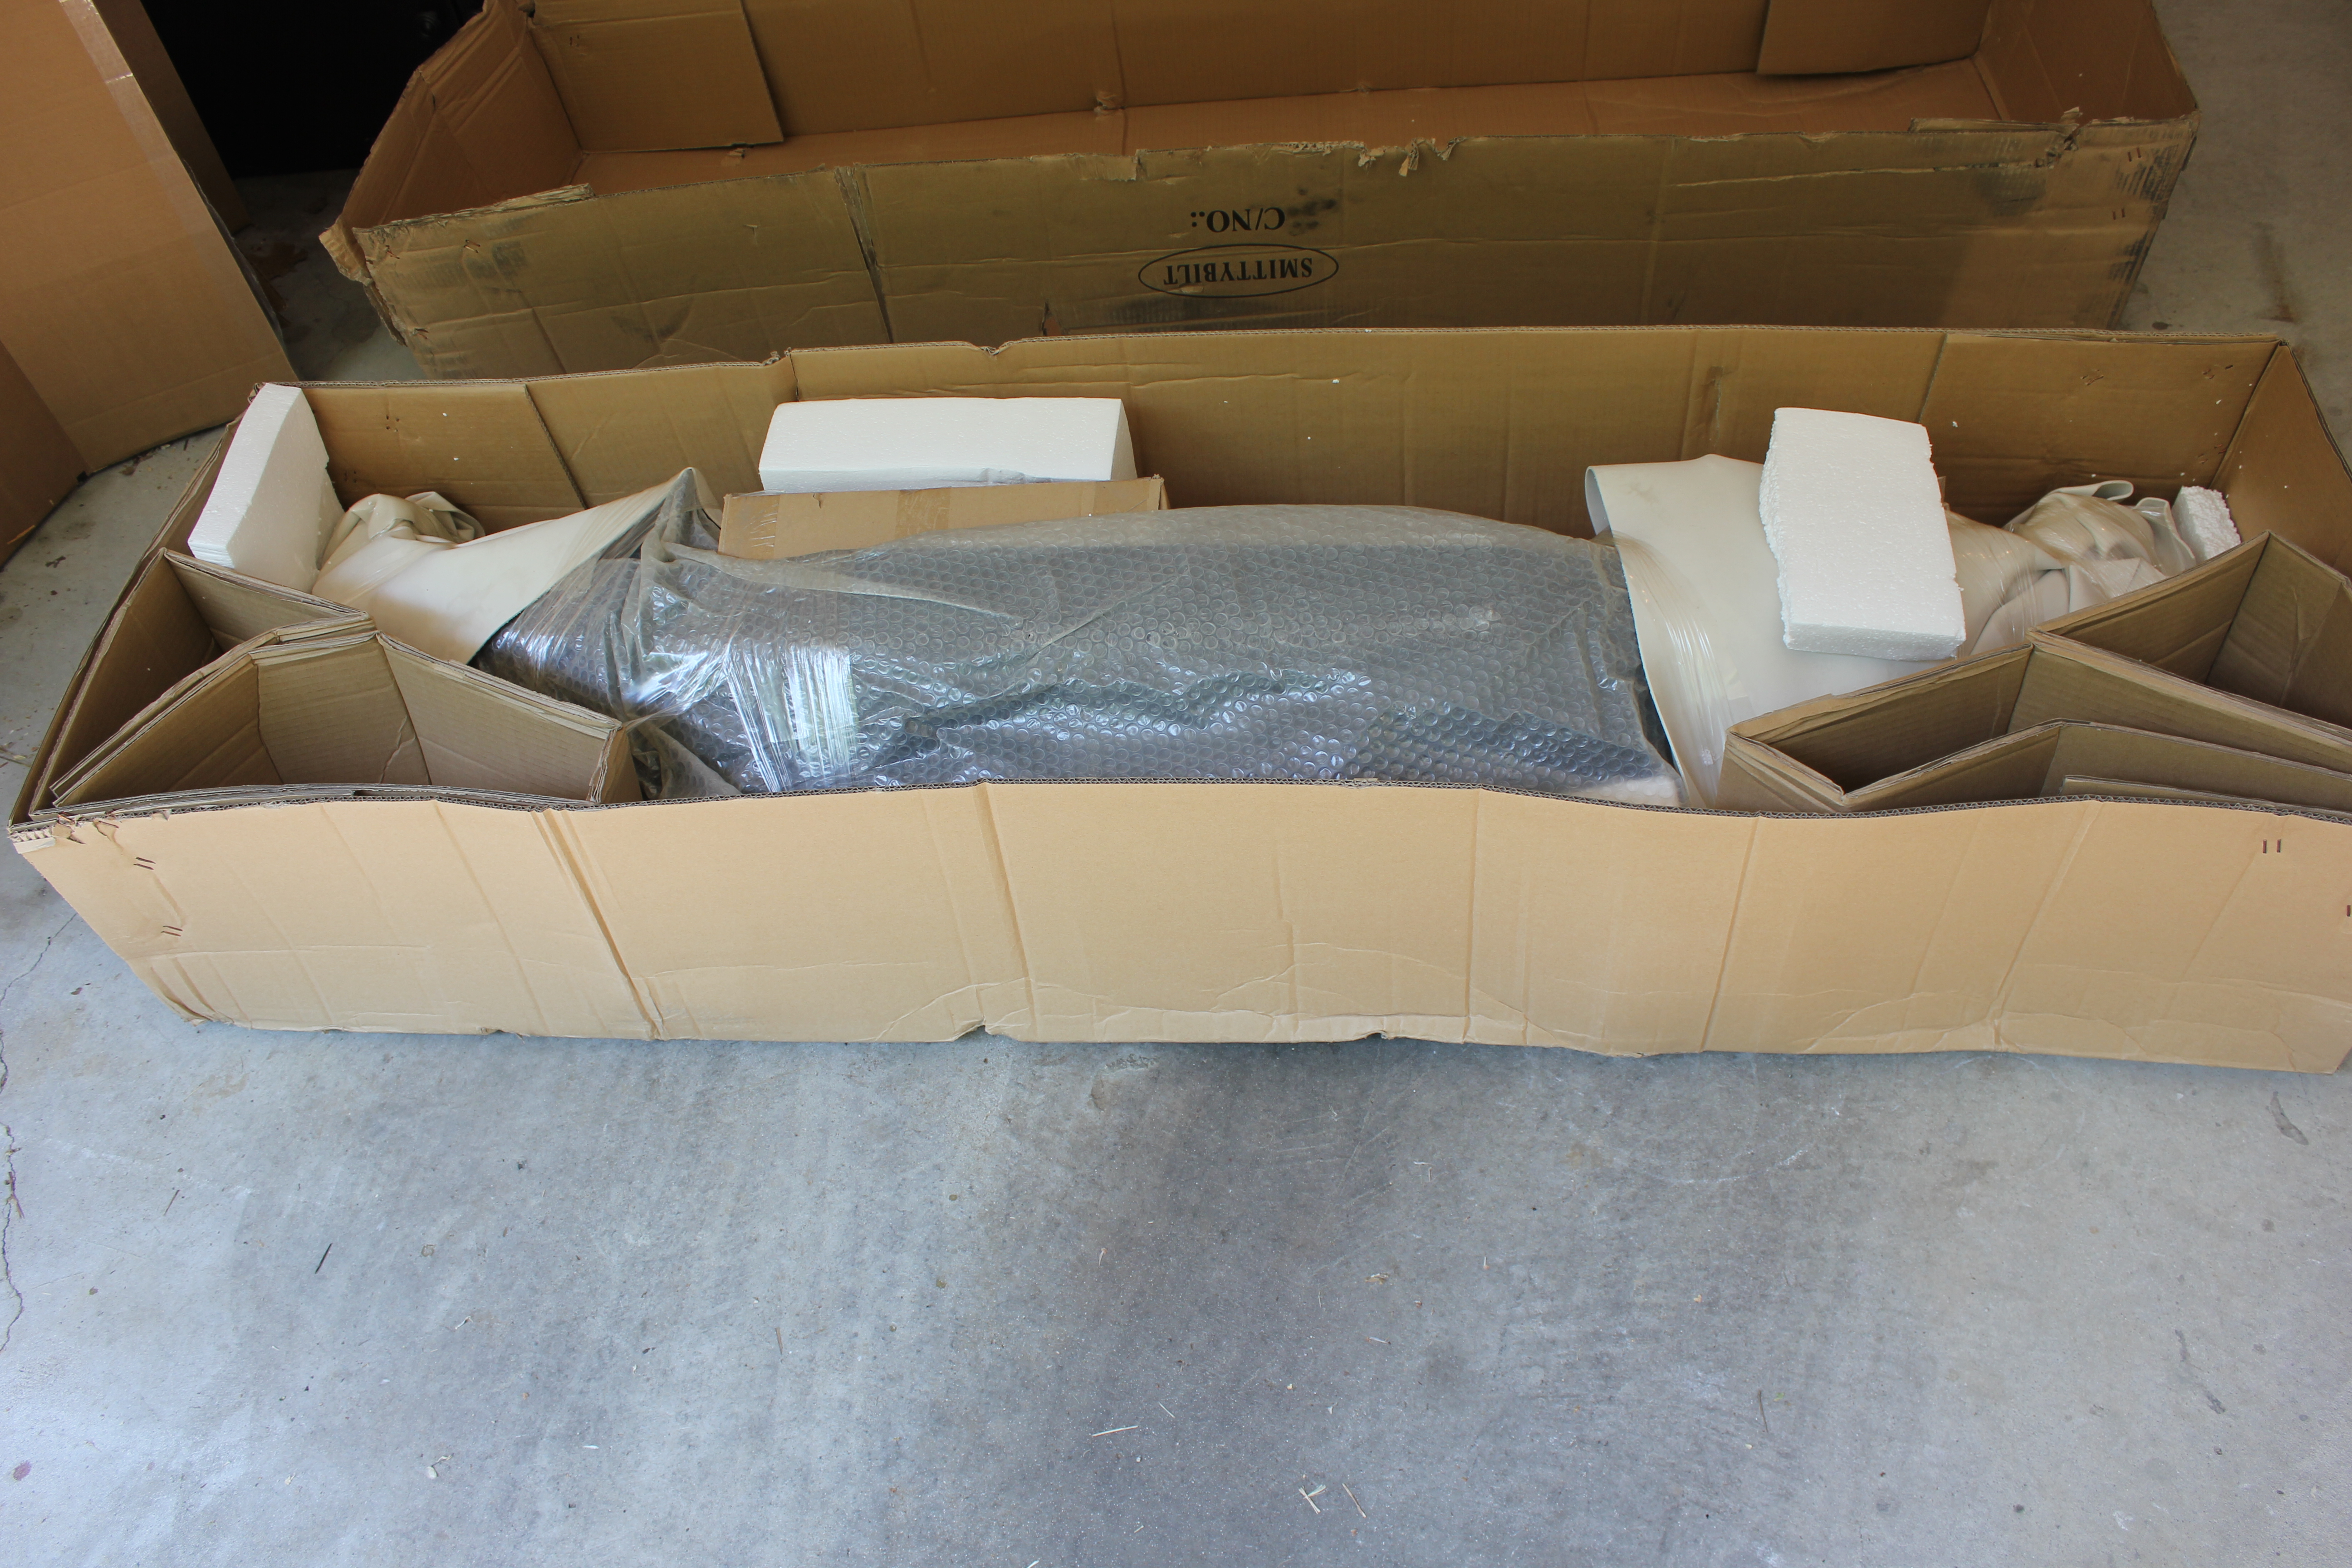
 The cardboard box in between the bumper and the large styrofoam block is where all the hardware and instructions are.
 Bubblewrap. To protect a 3/16″ steel bumper.
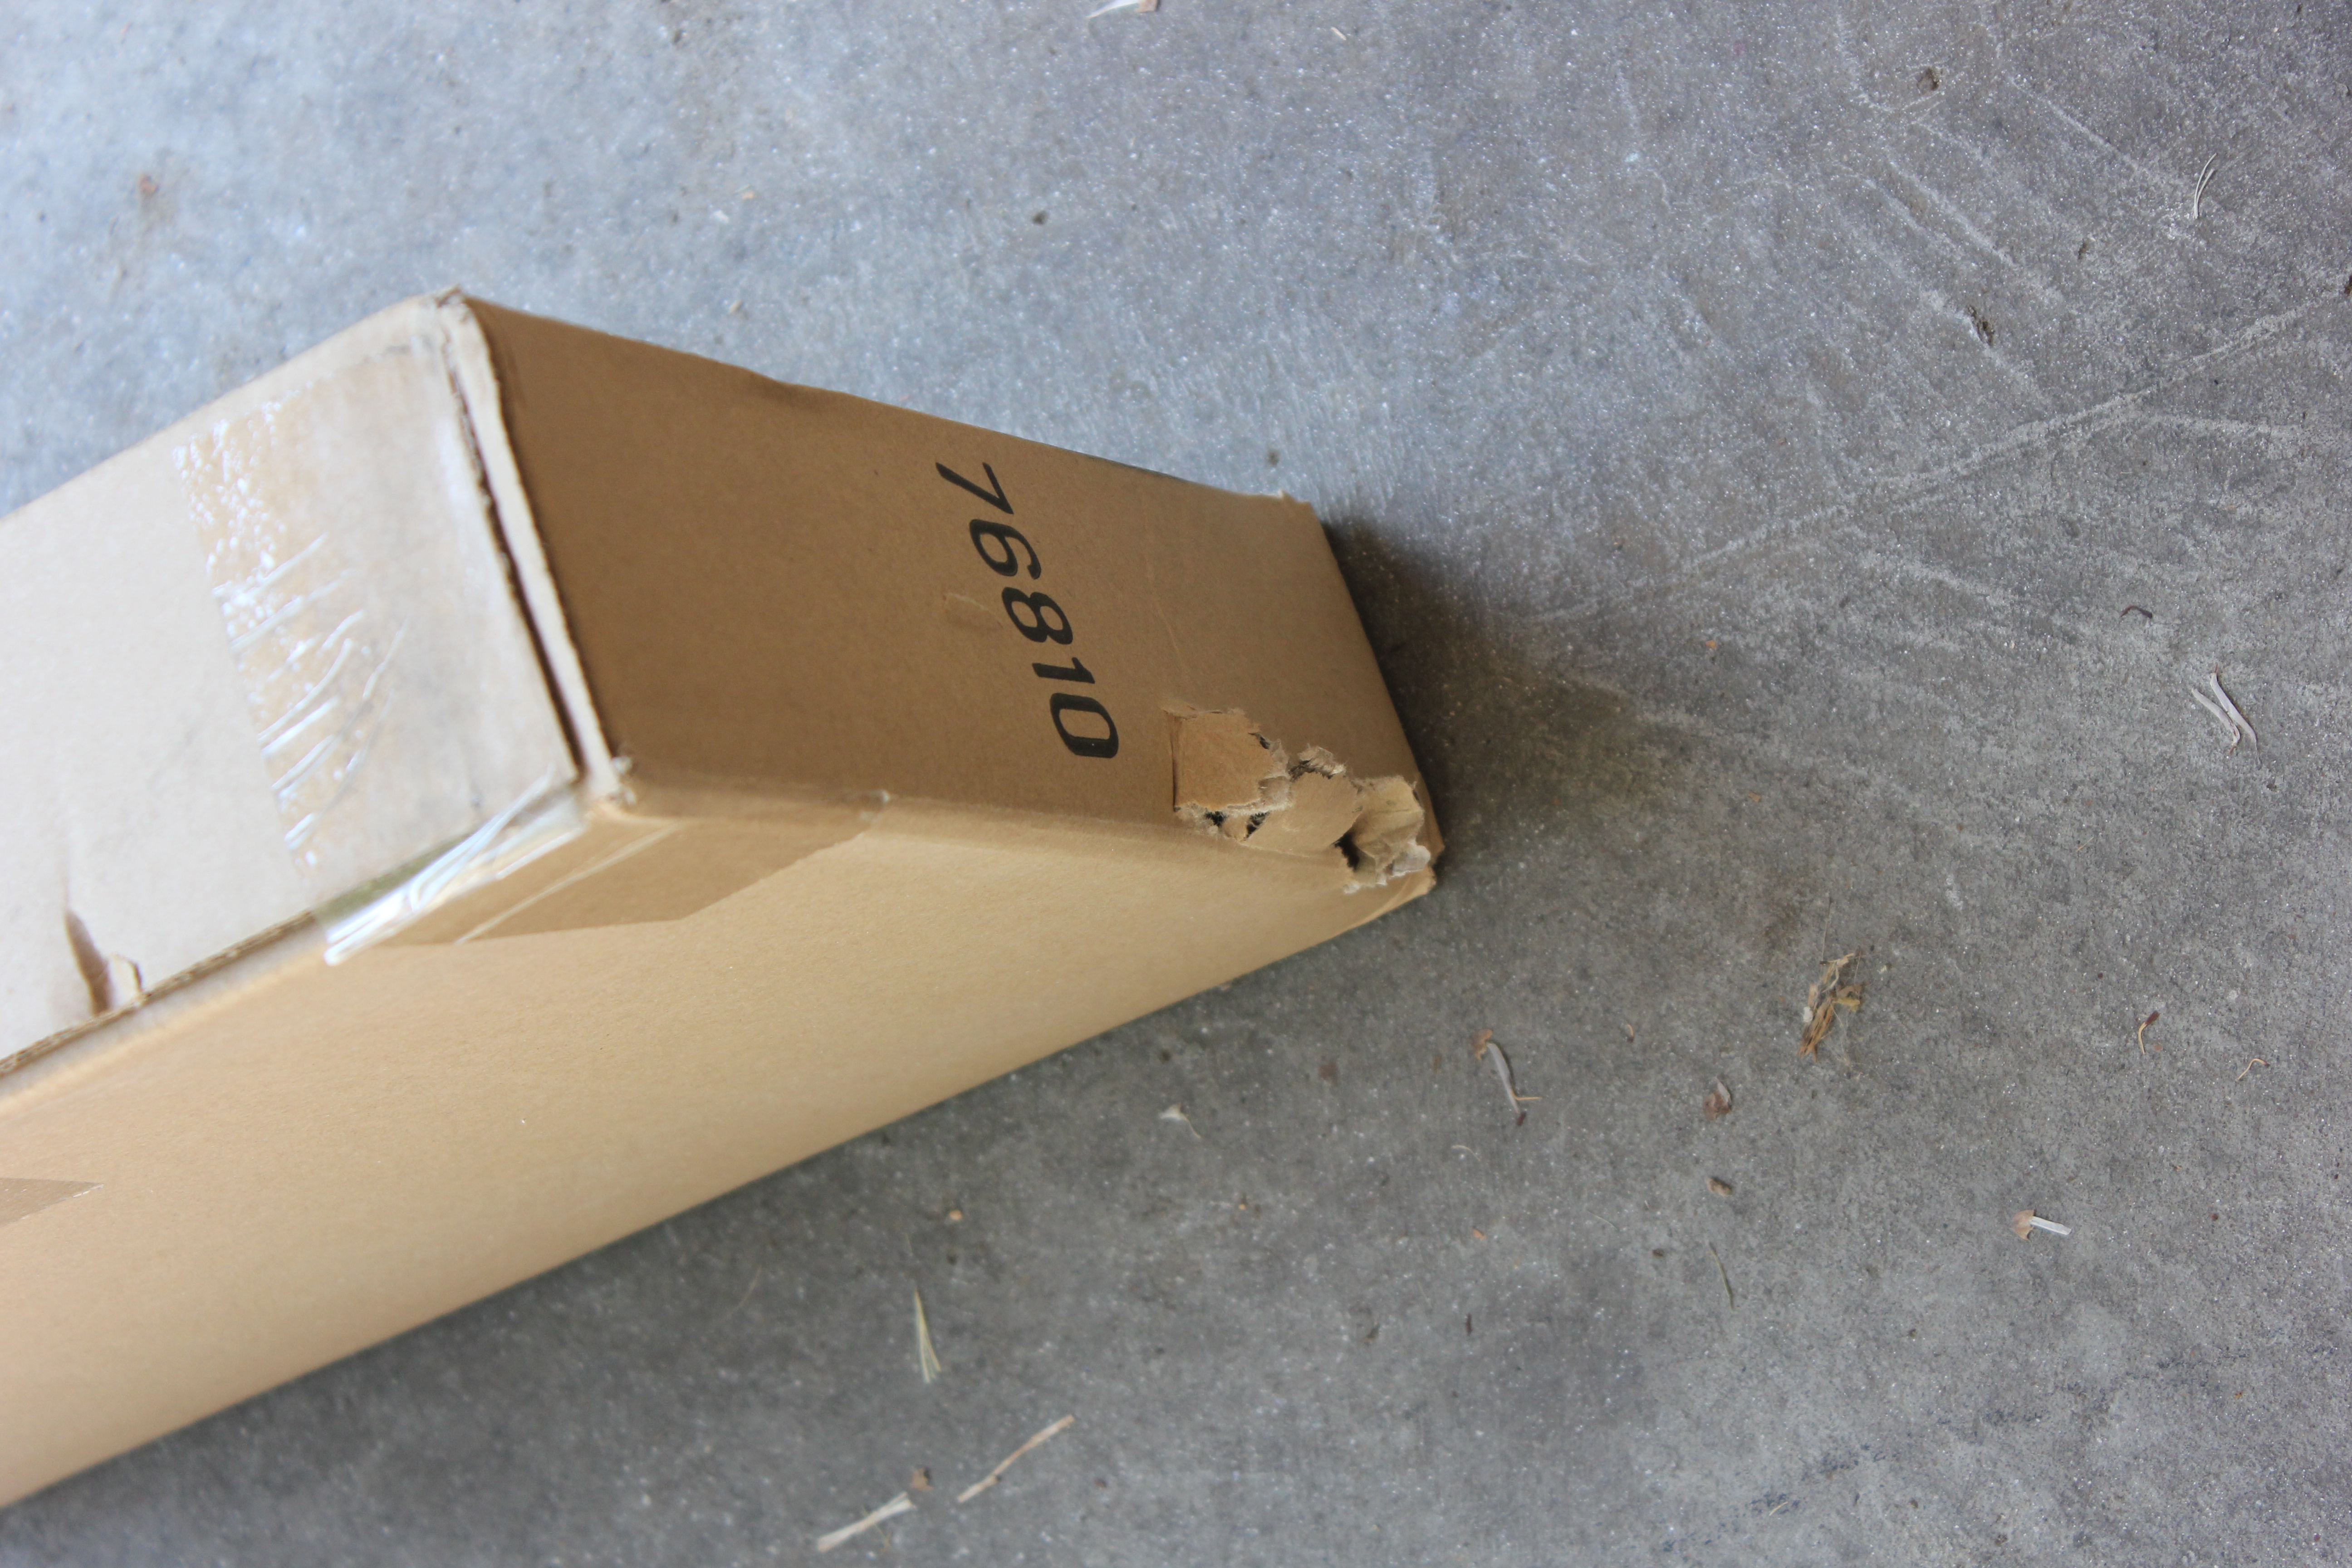
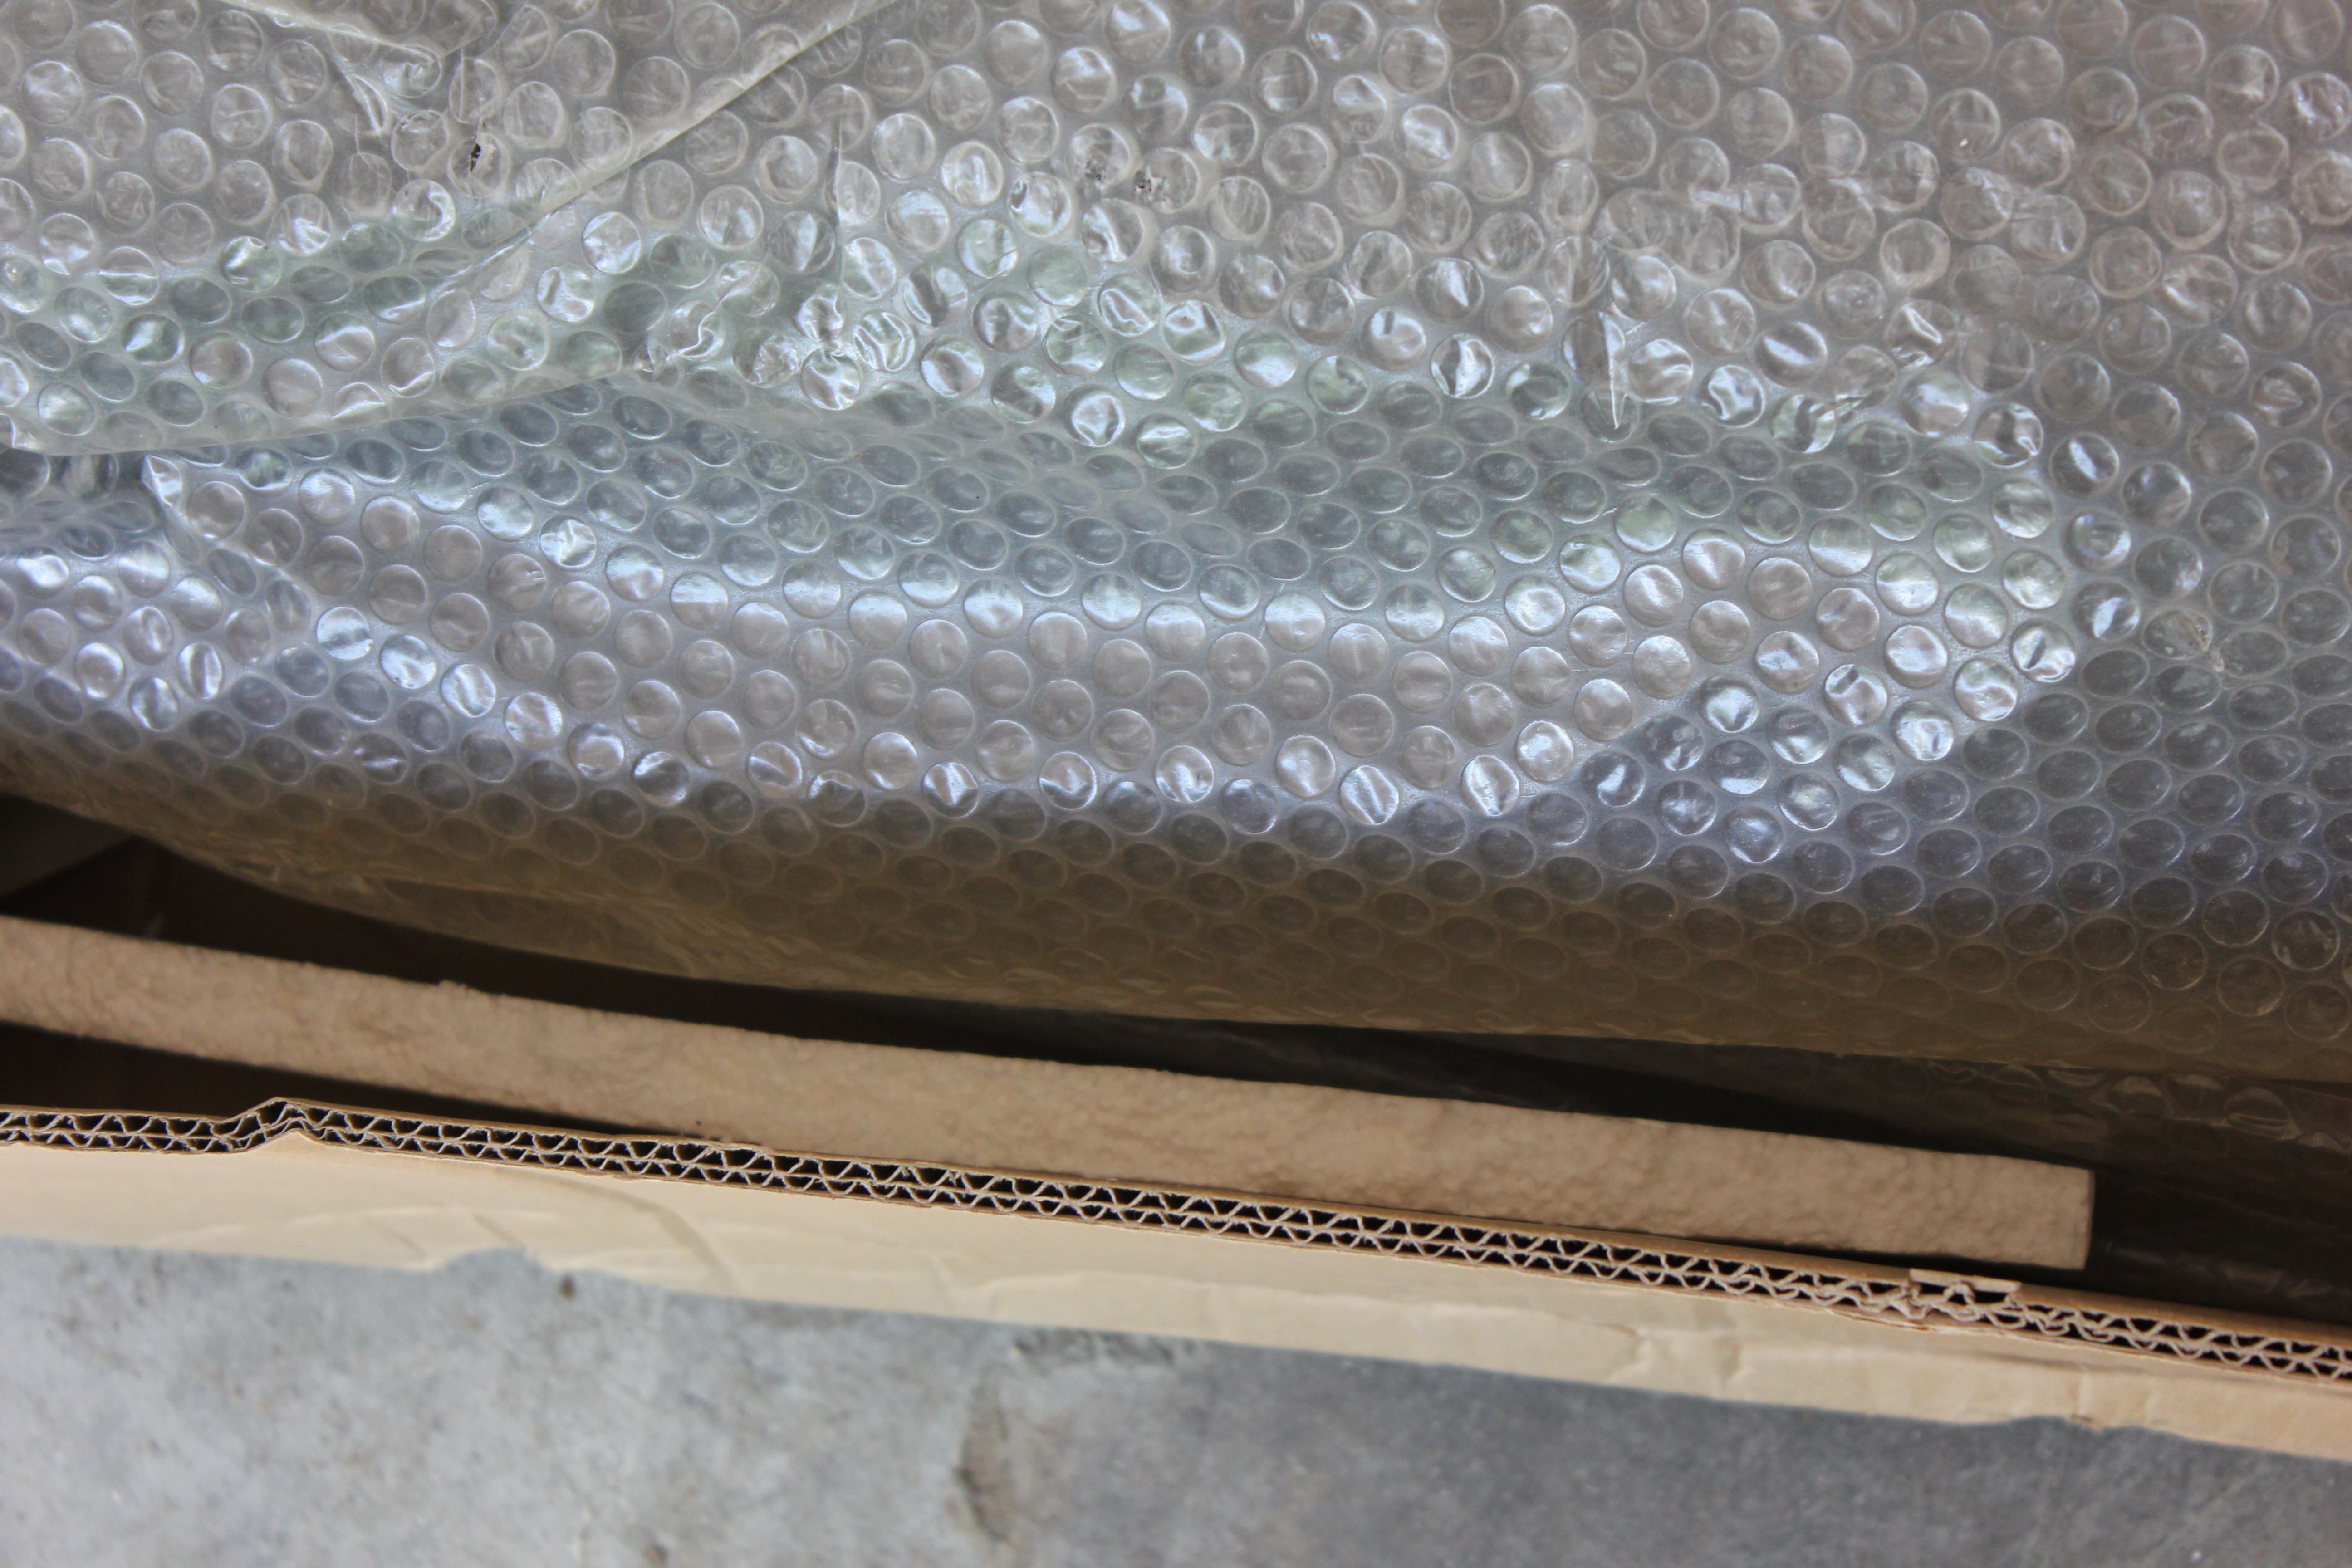 Didn’t protect the cardboard 🙂
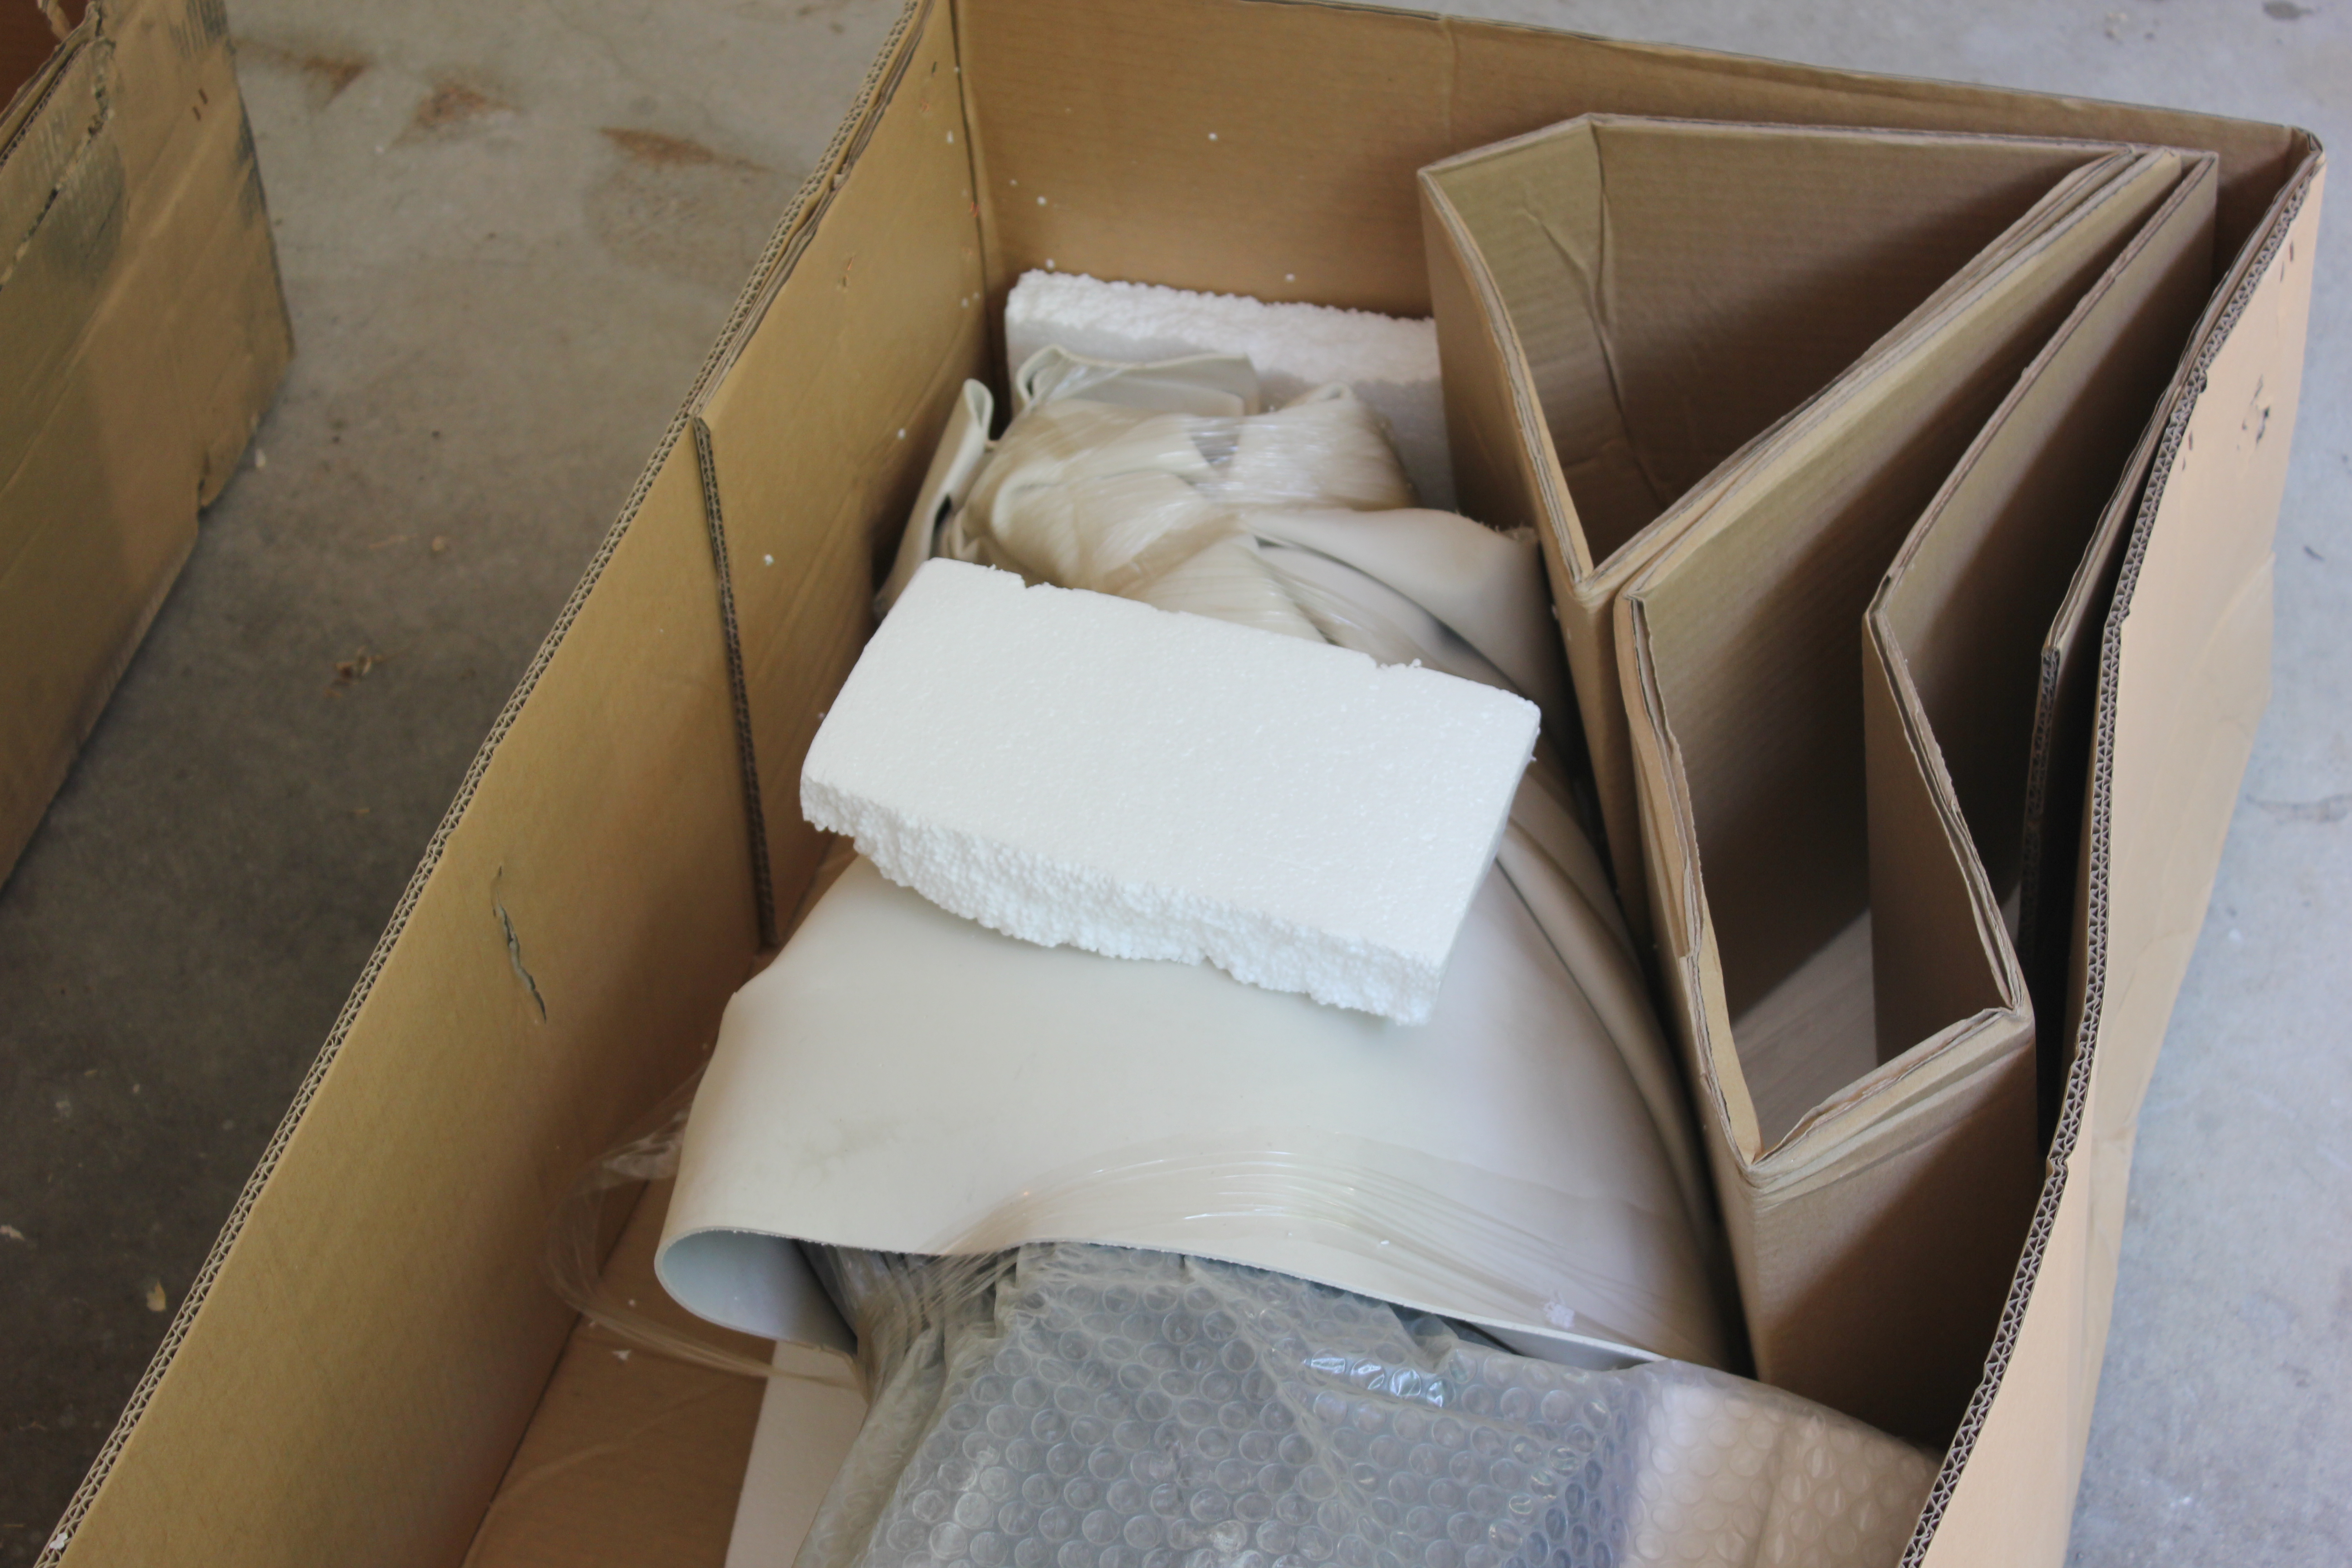
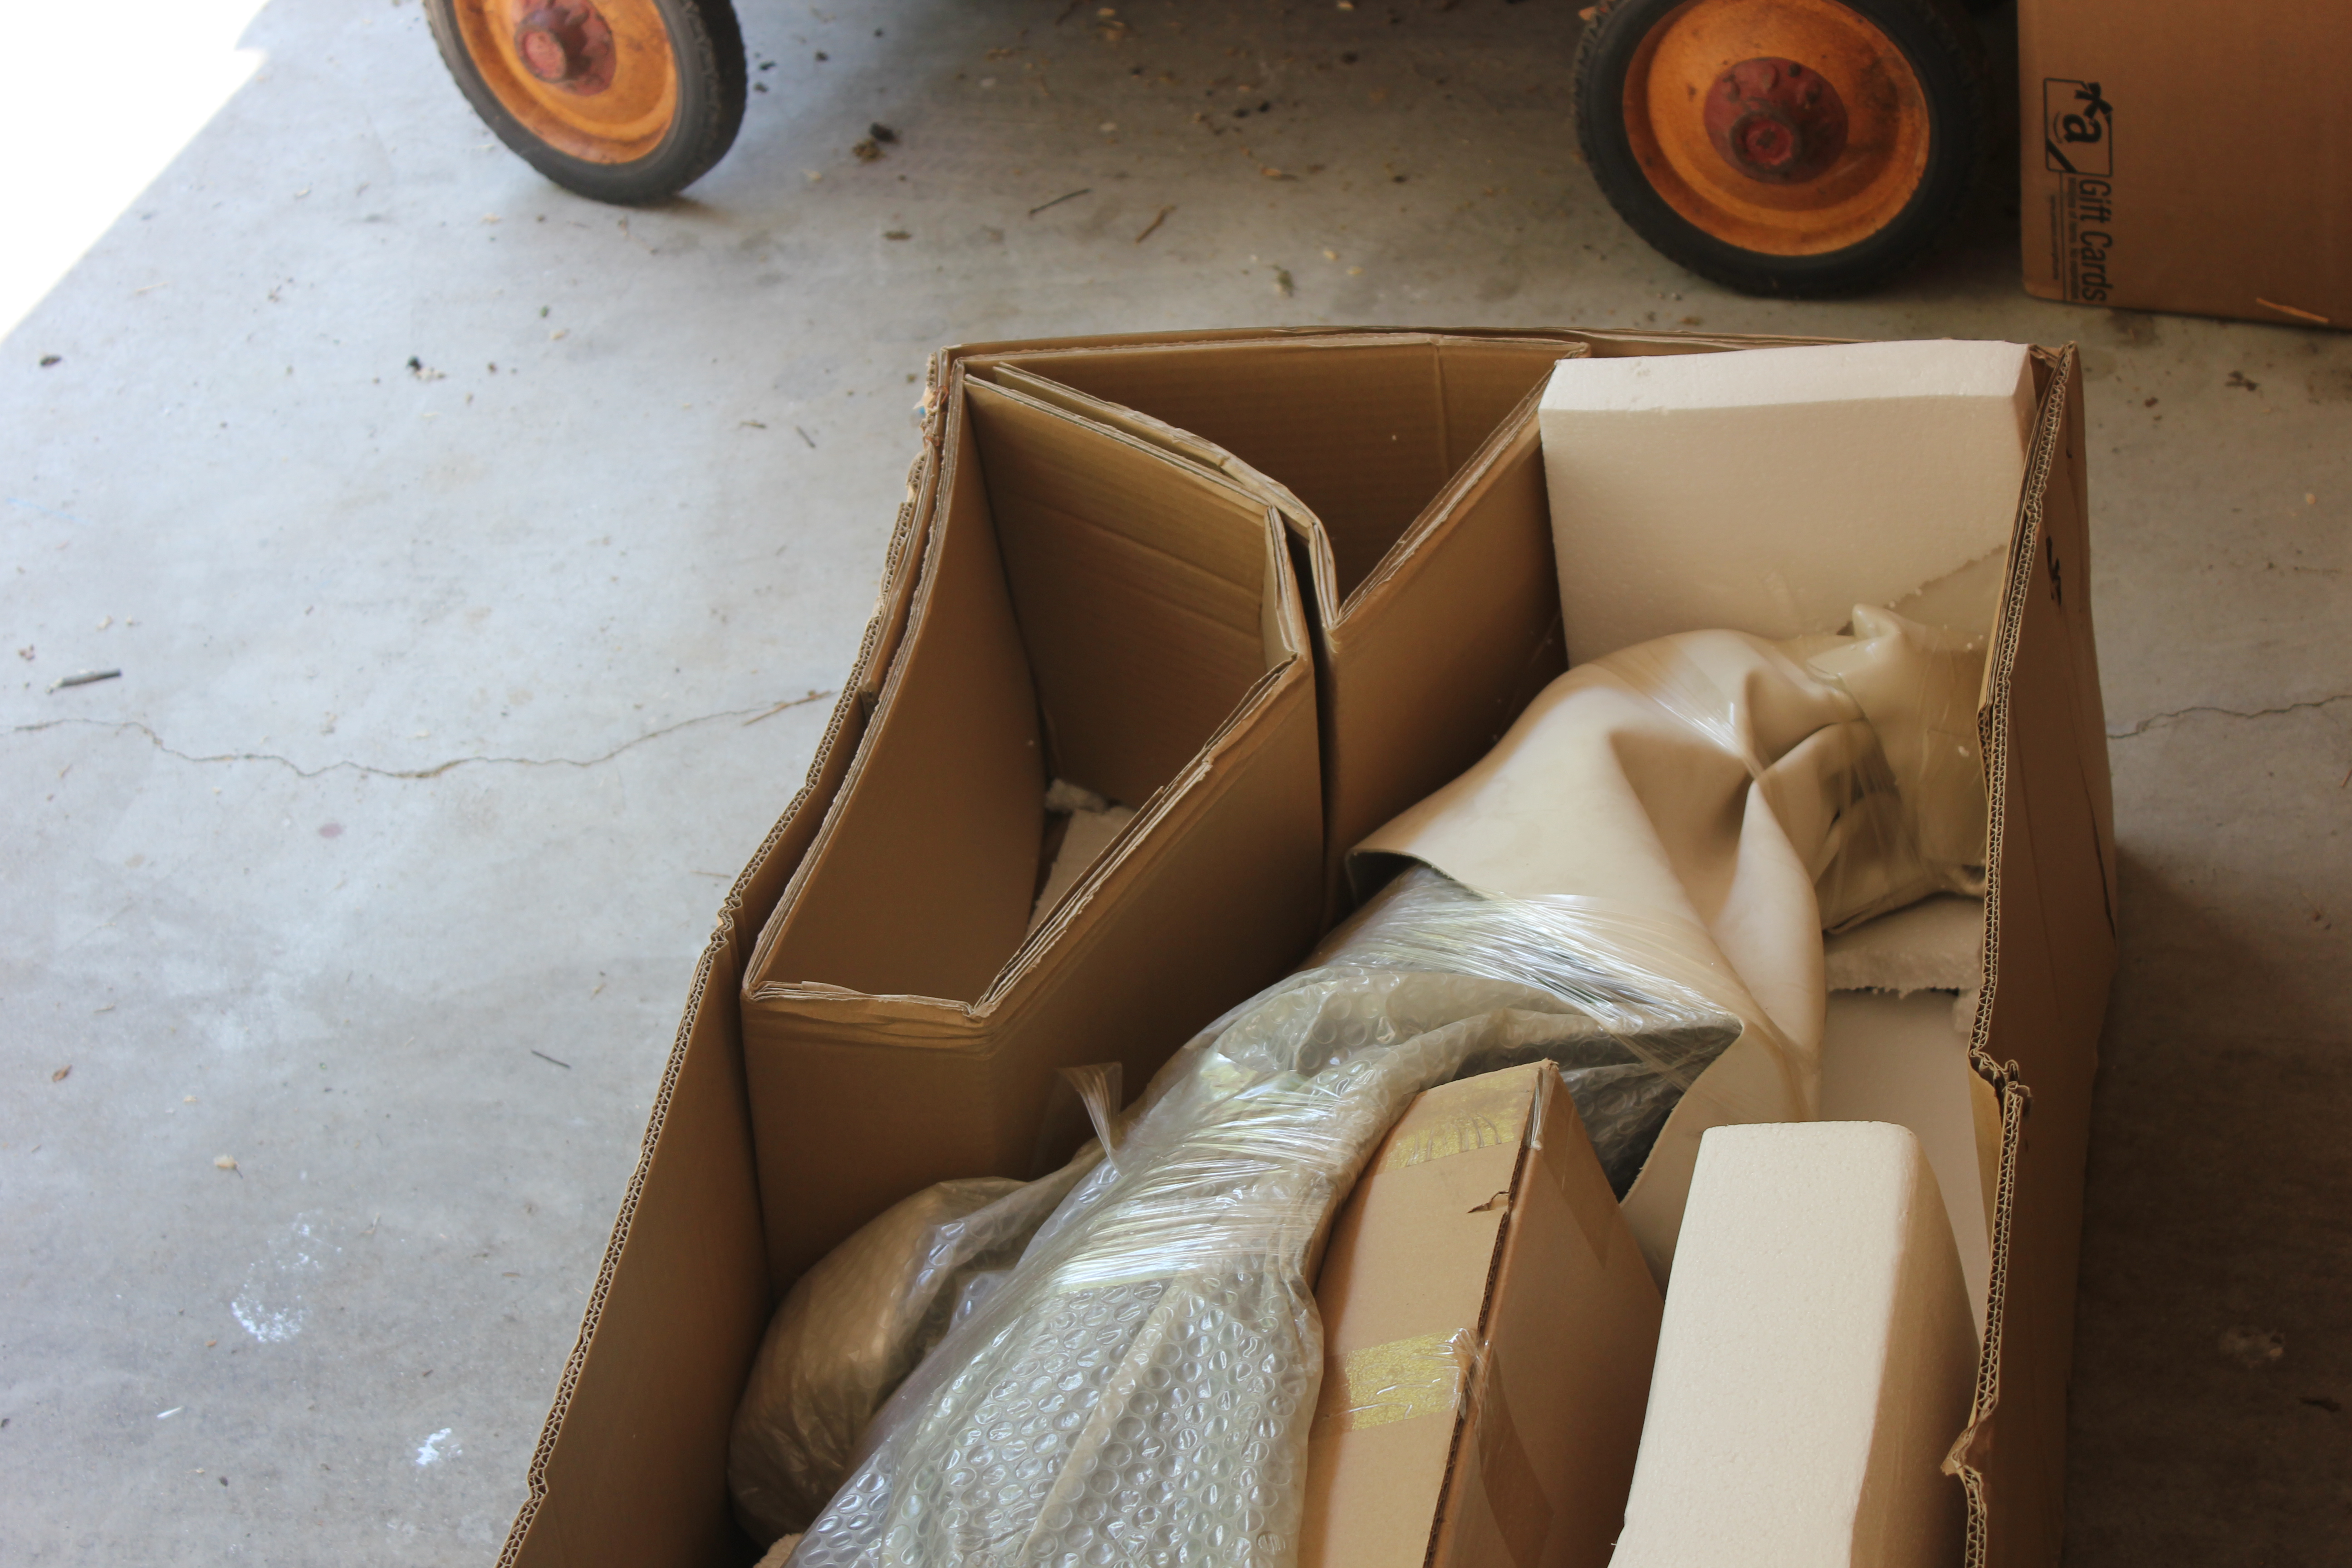
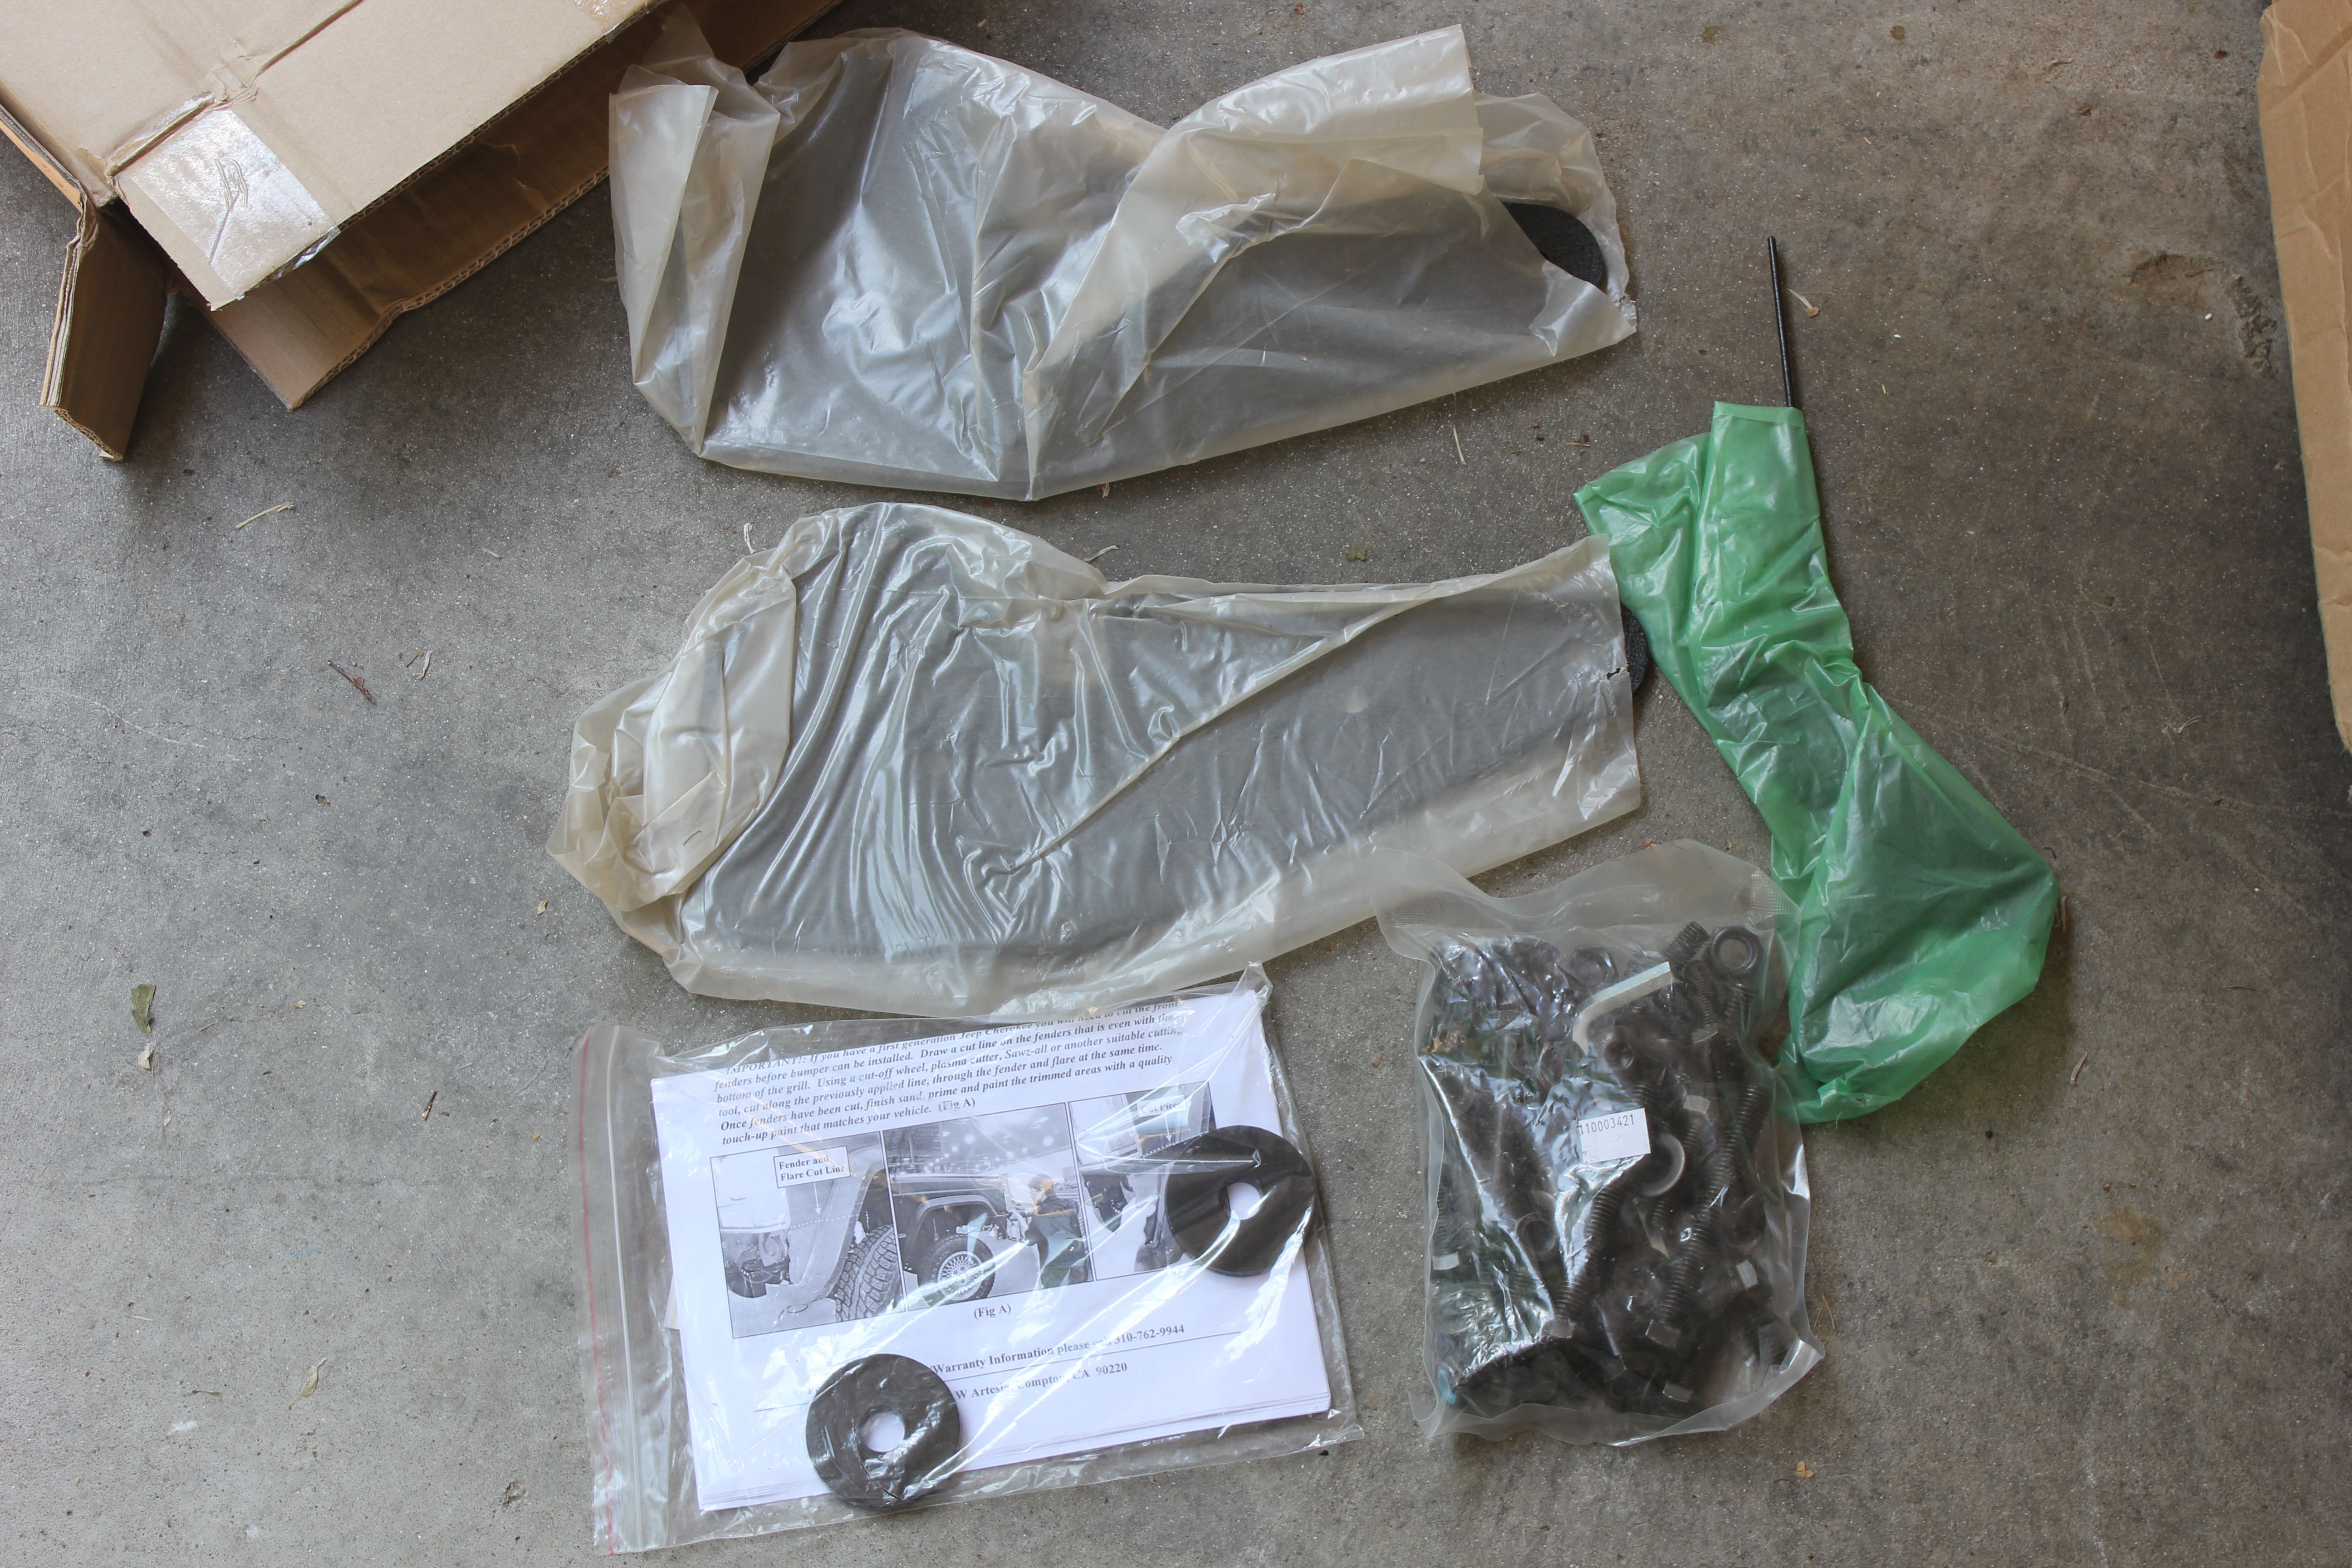
 Inside the hardware box.

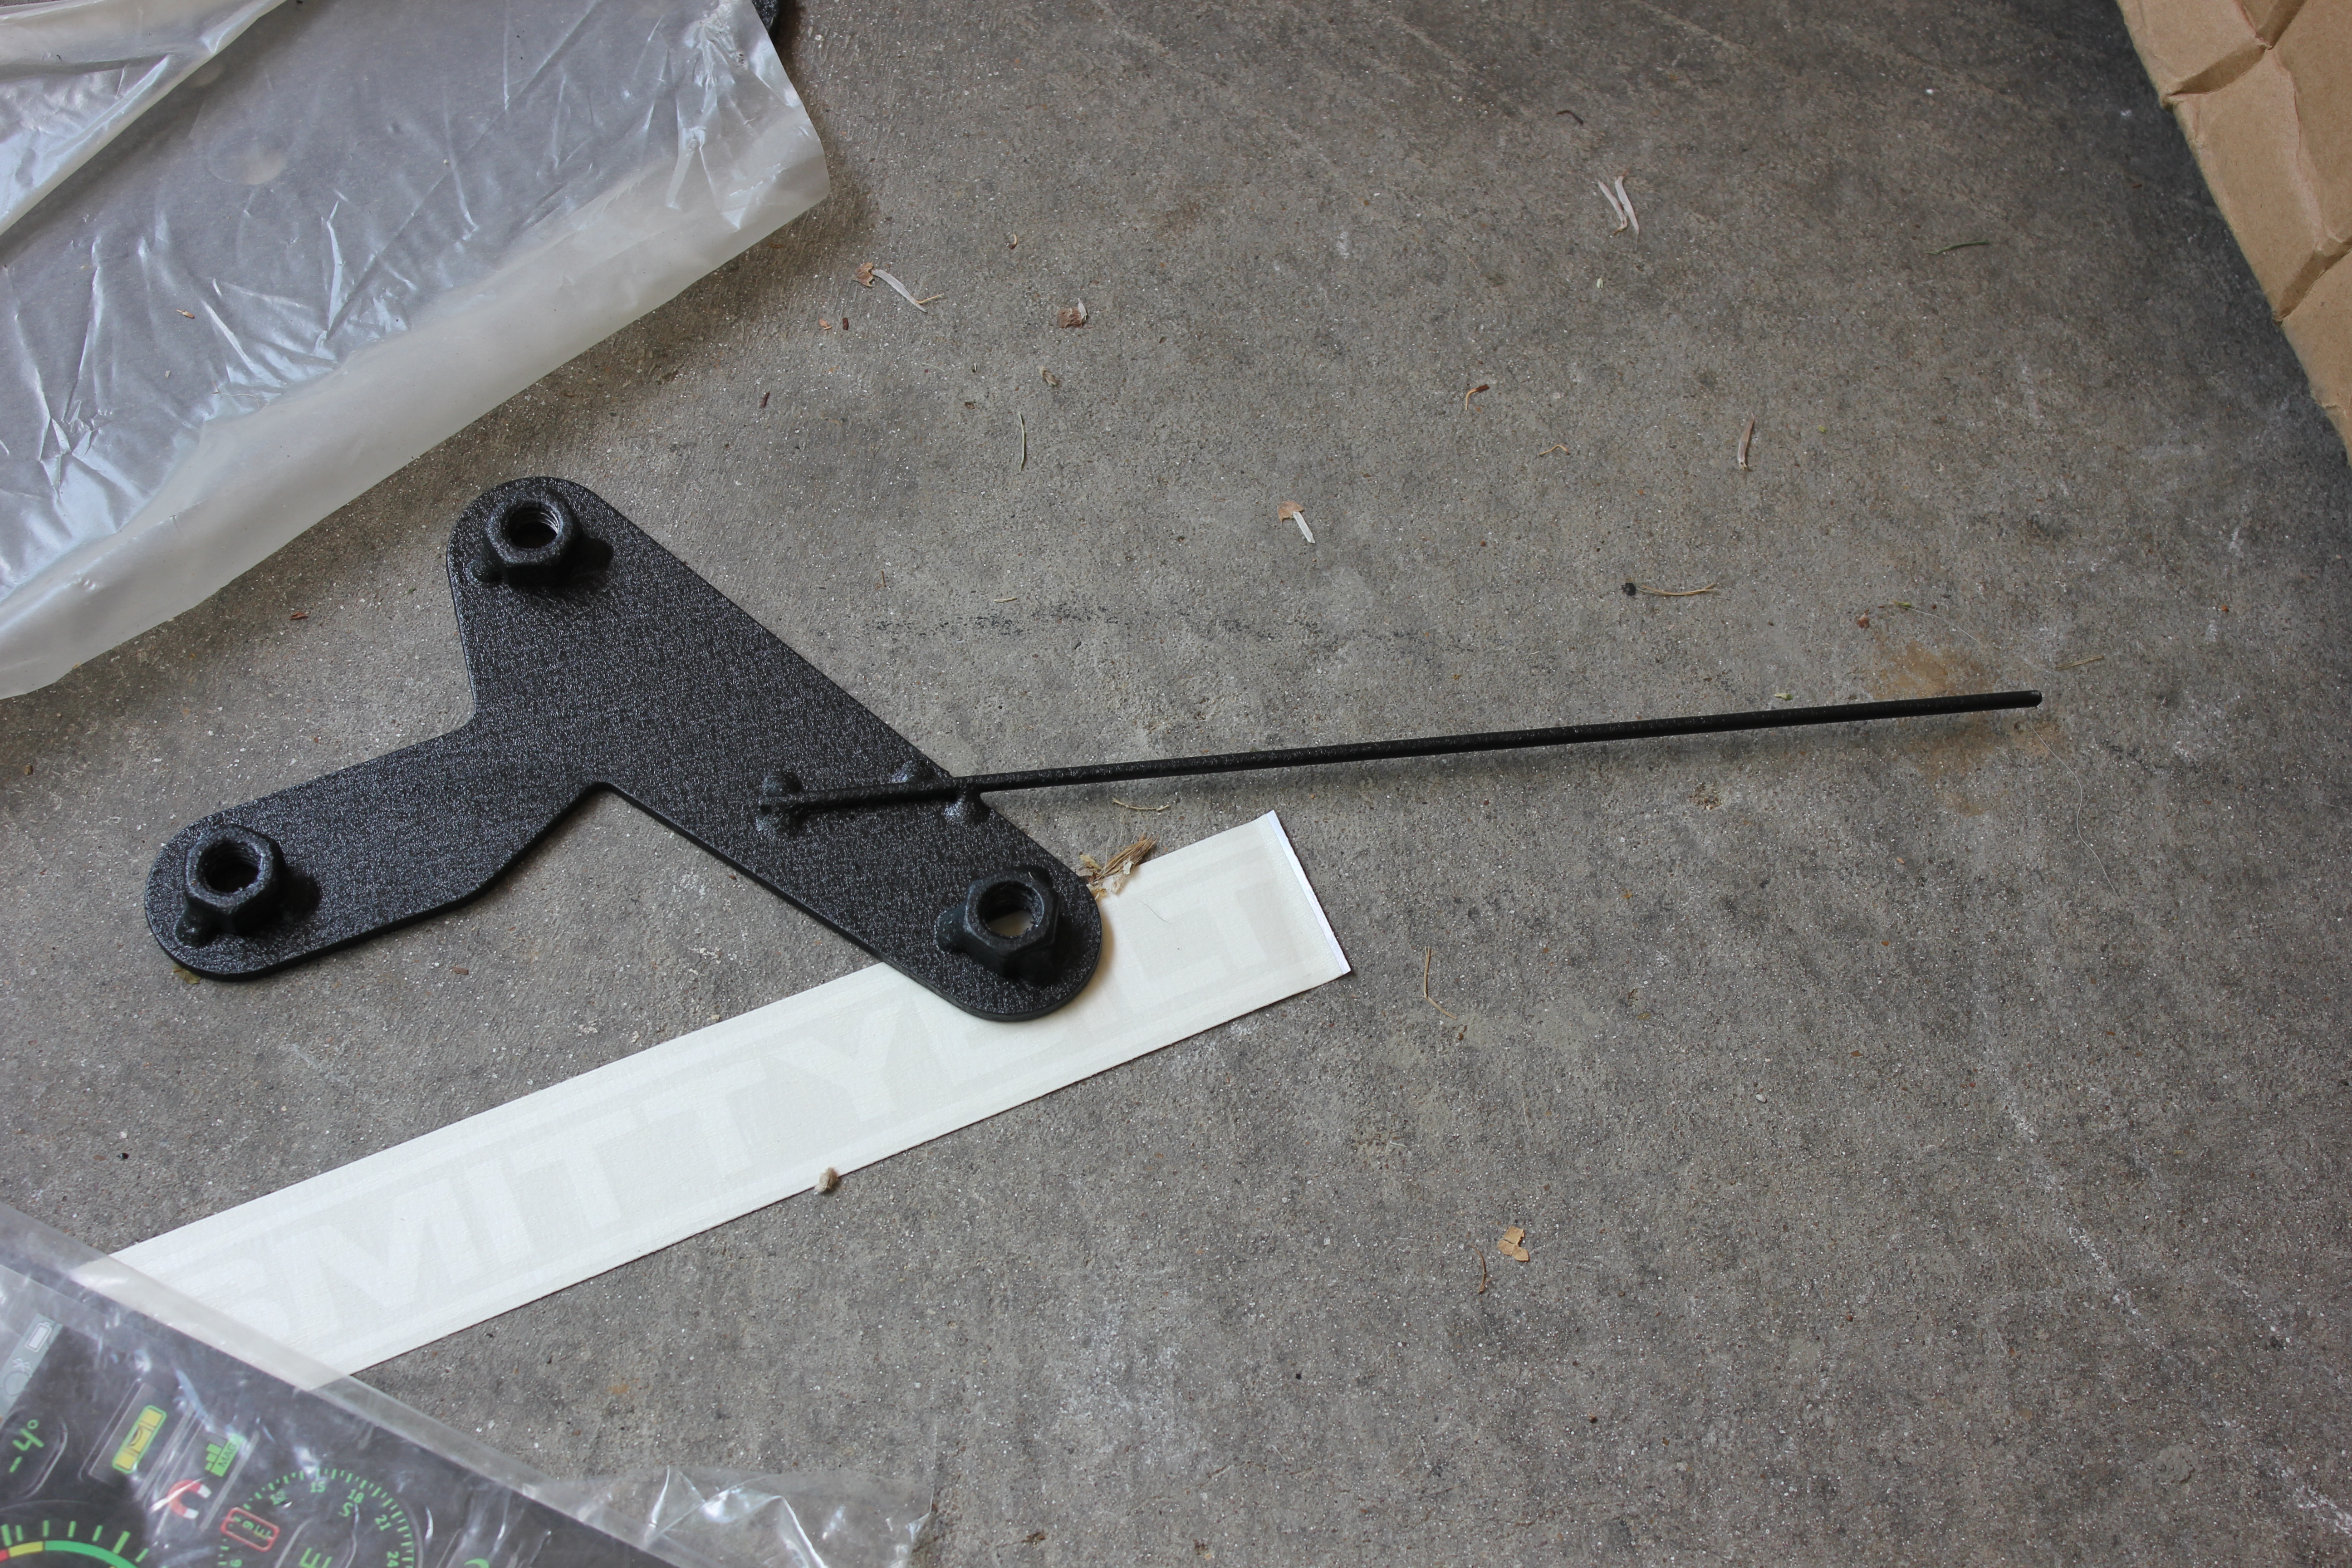
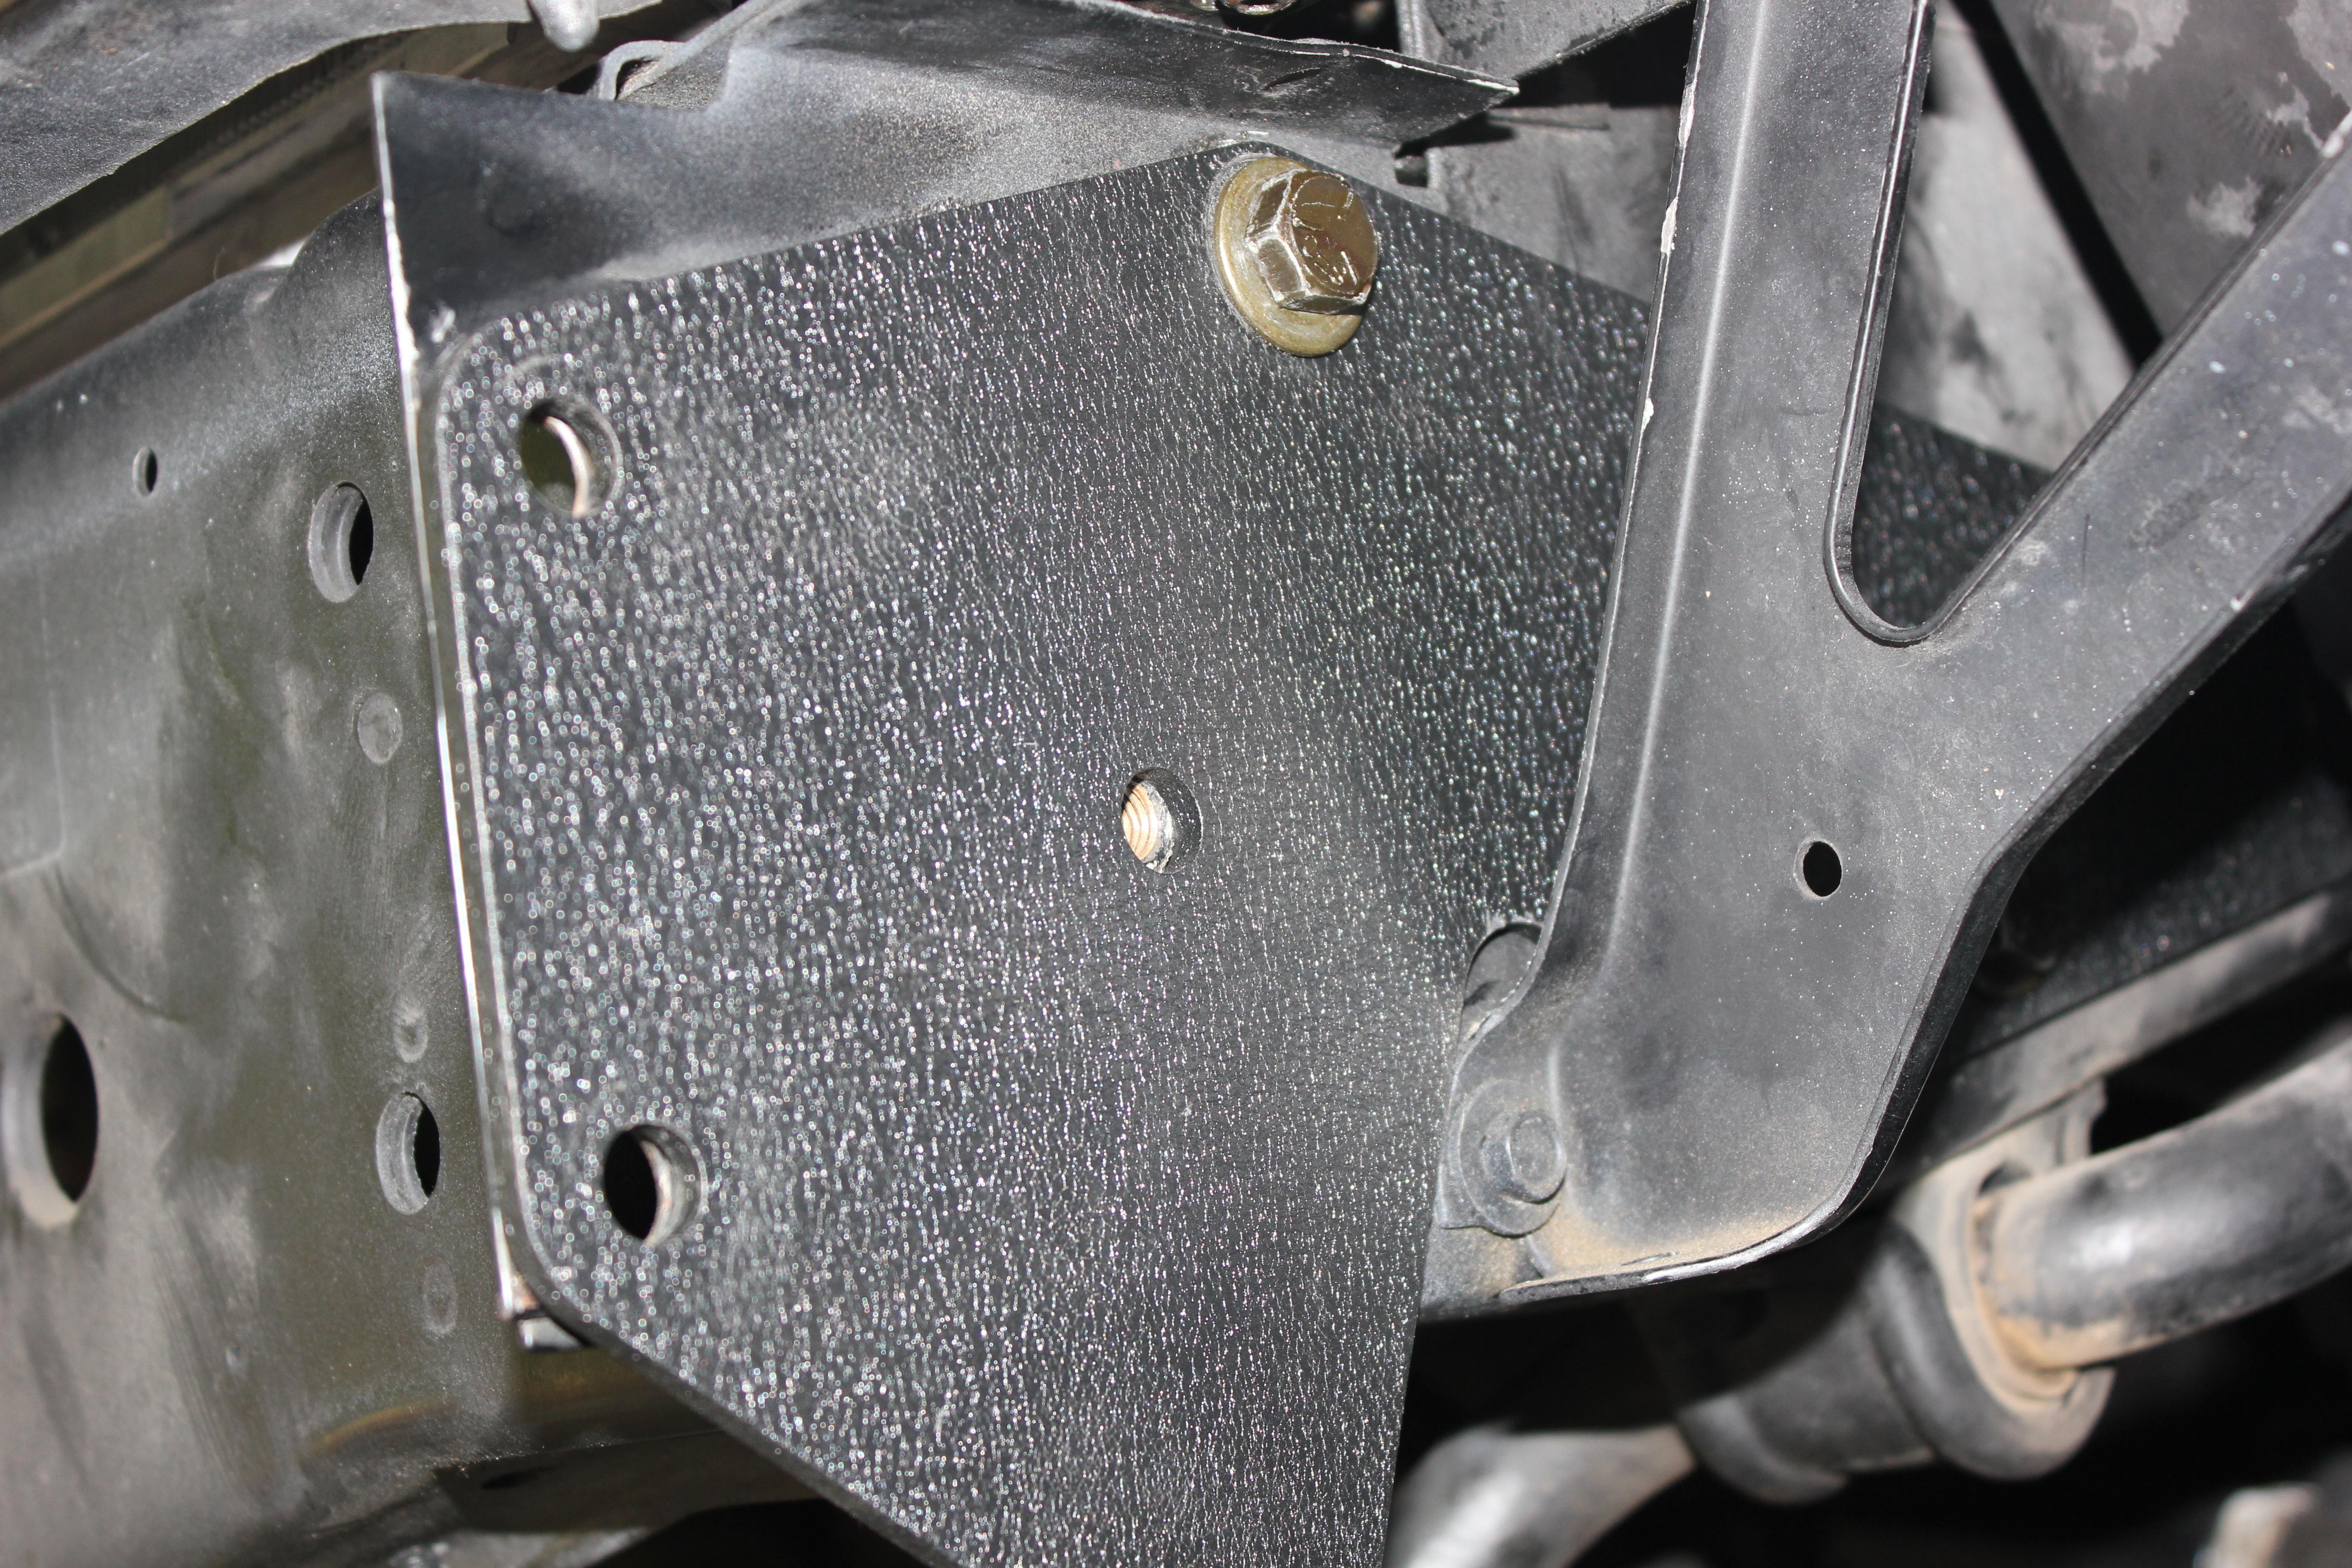
This is the nut plate. On the driver side, you have the steering box to hold the bolts in place, but on the passenger side you have to use this. The long wire is so that you can fish it into place.
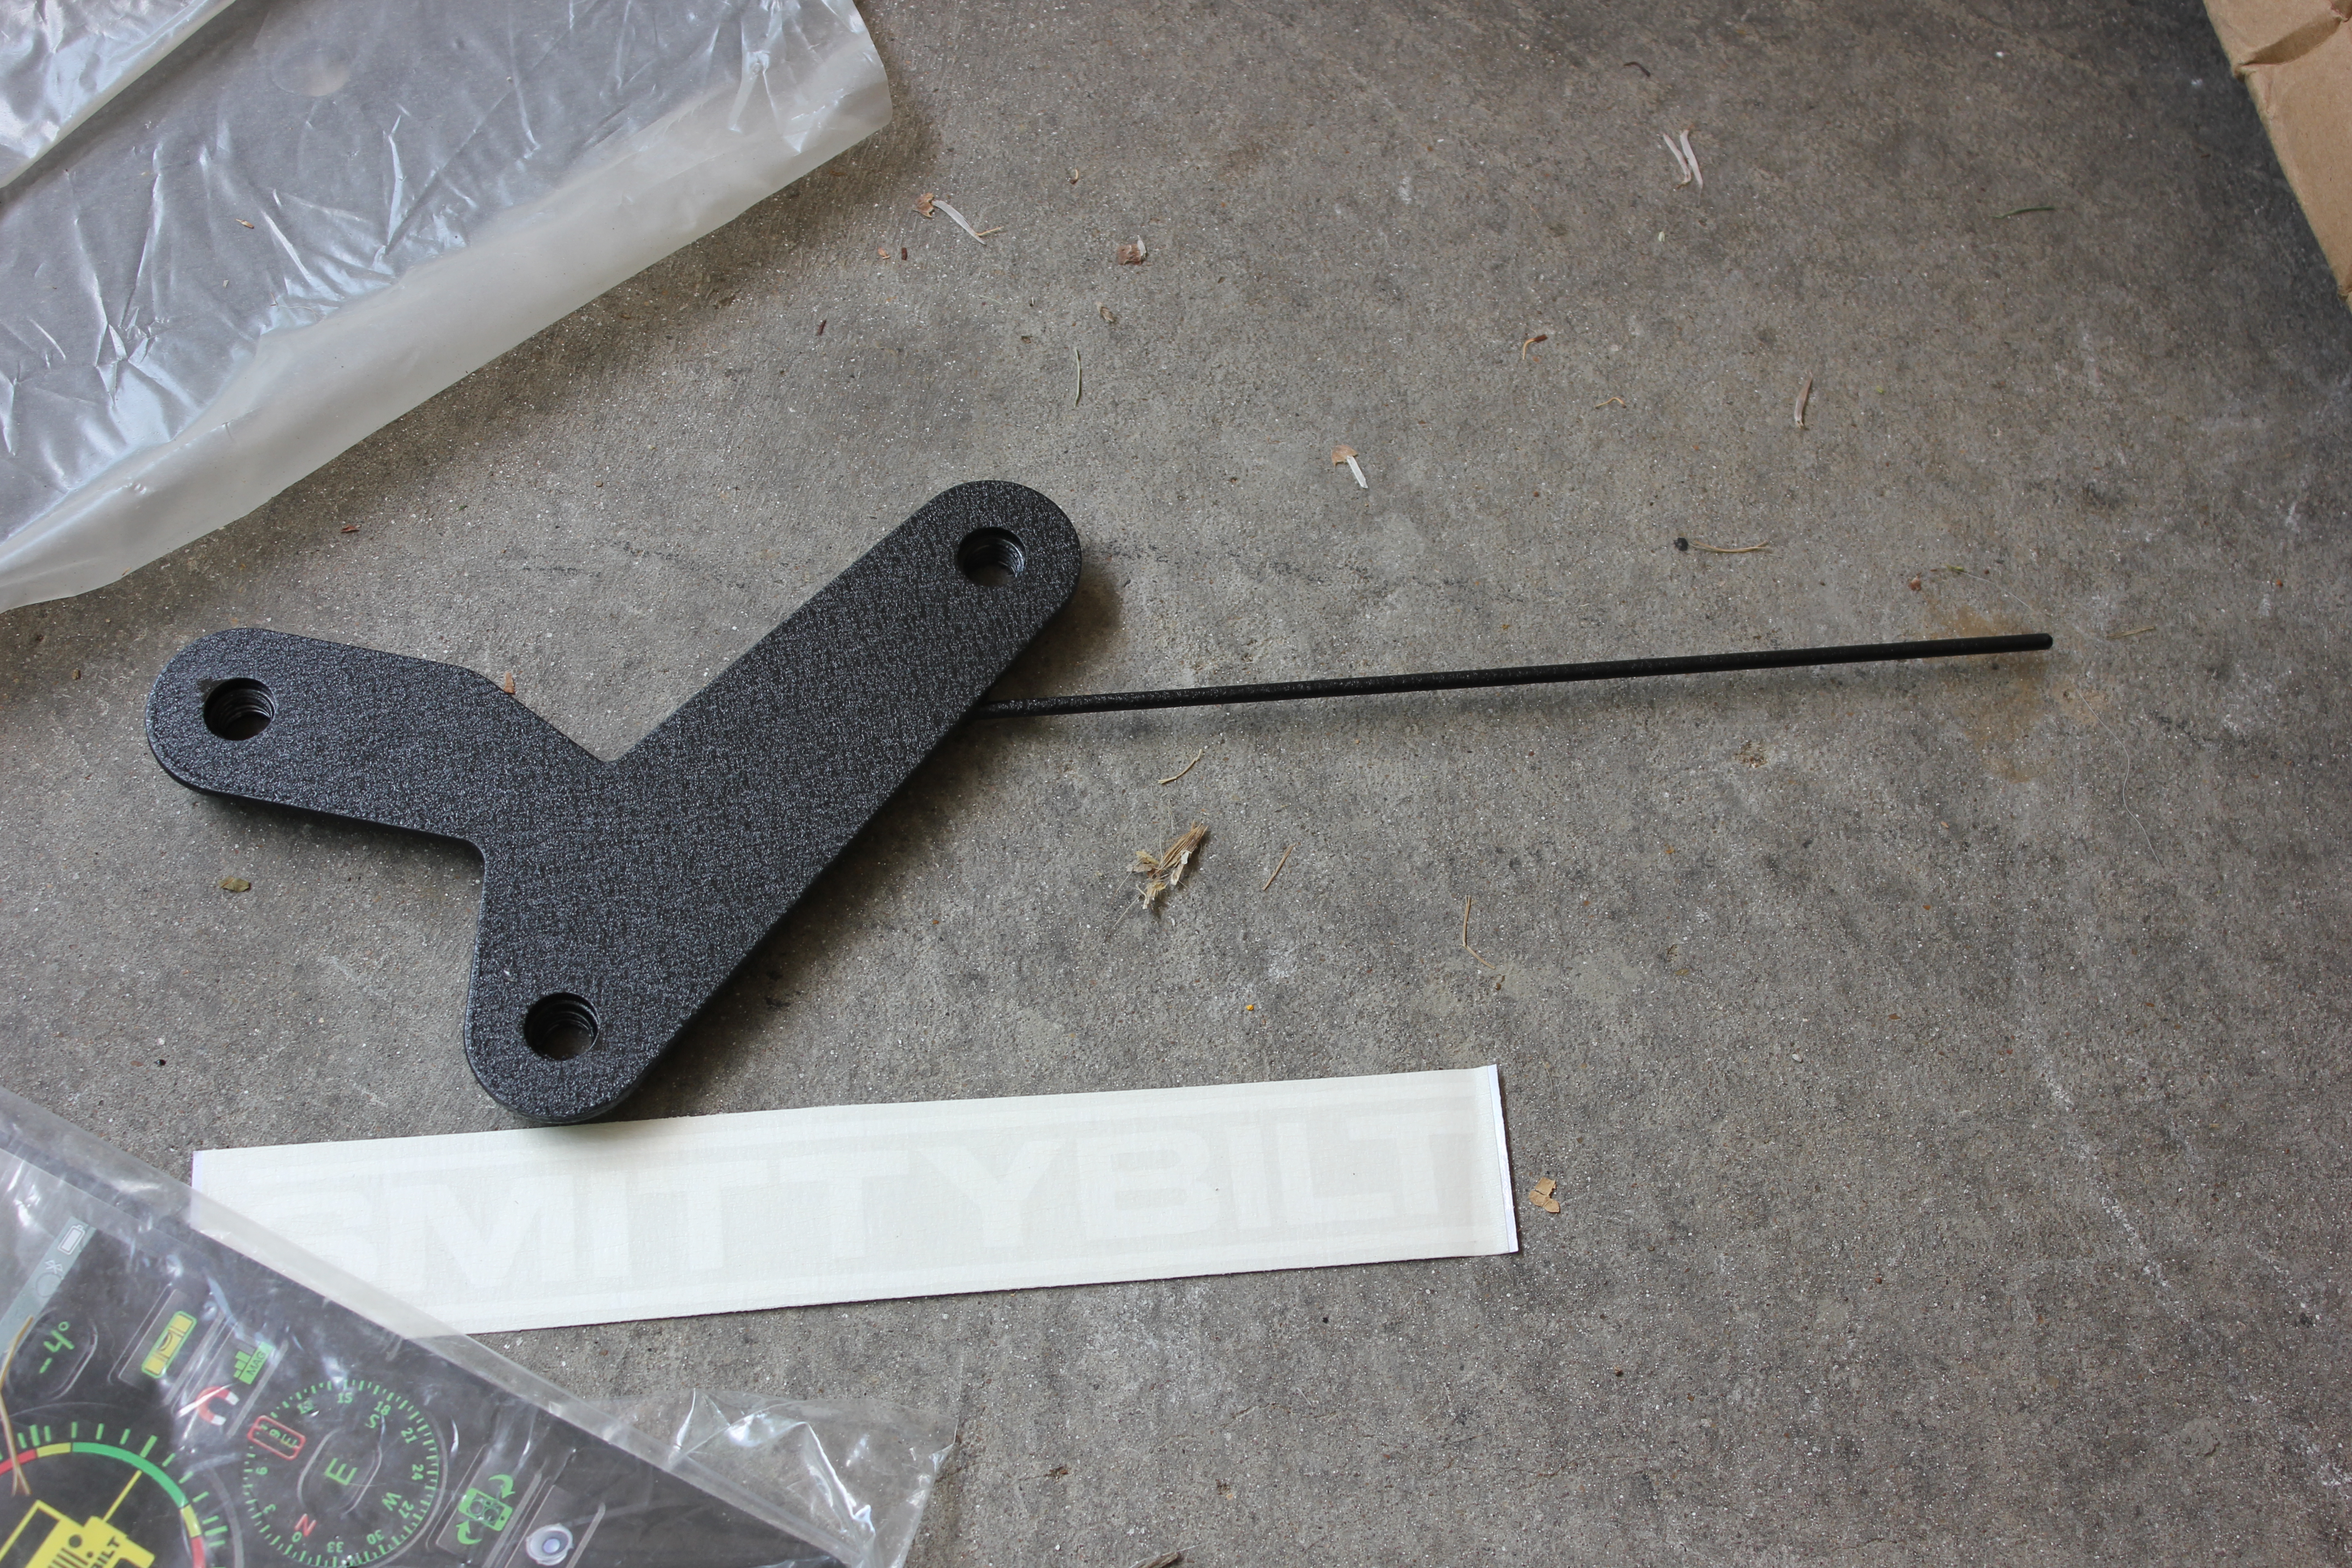
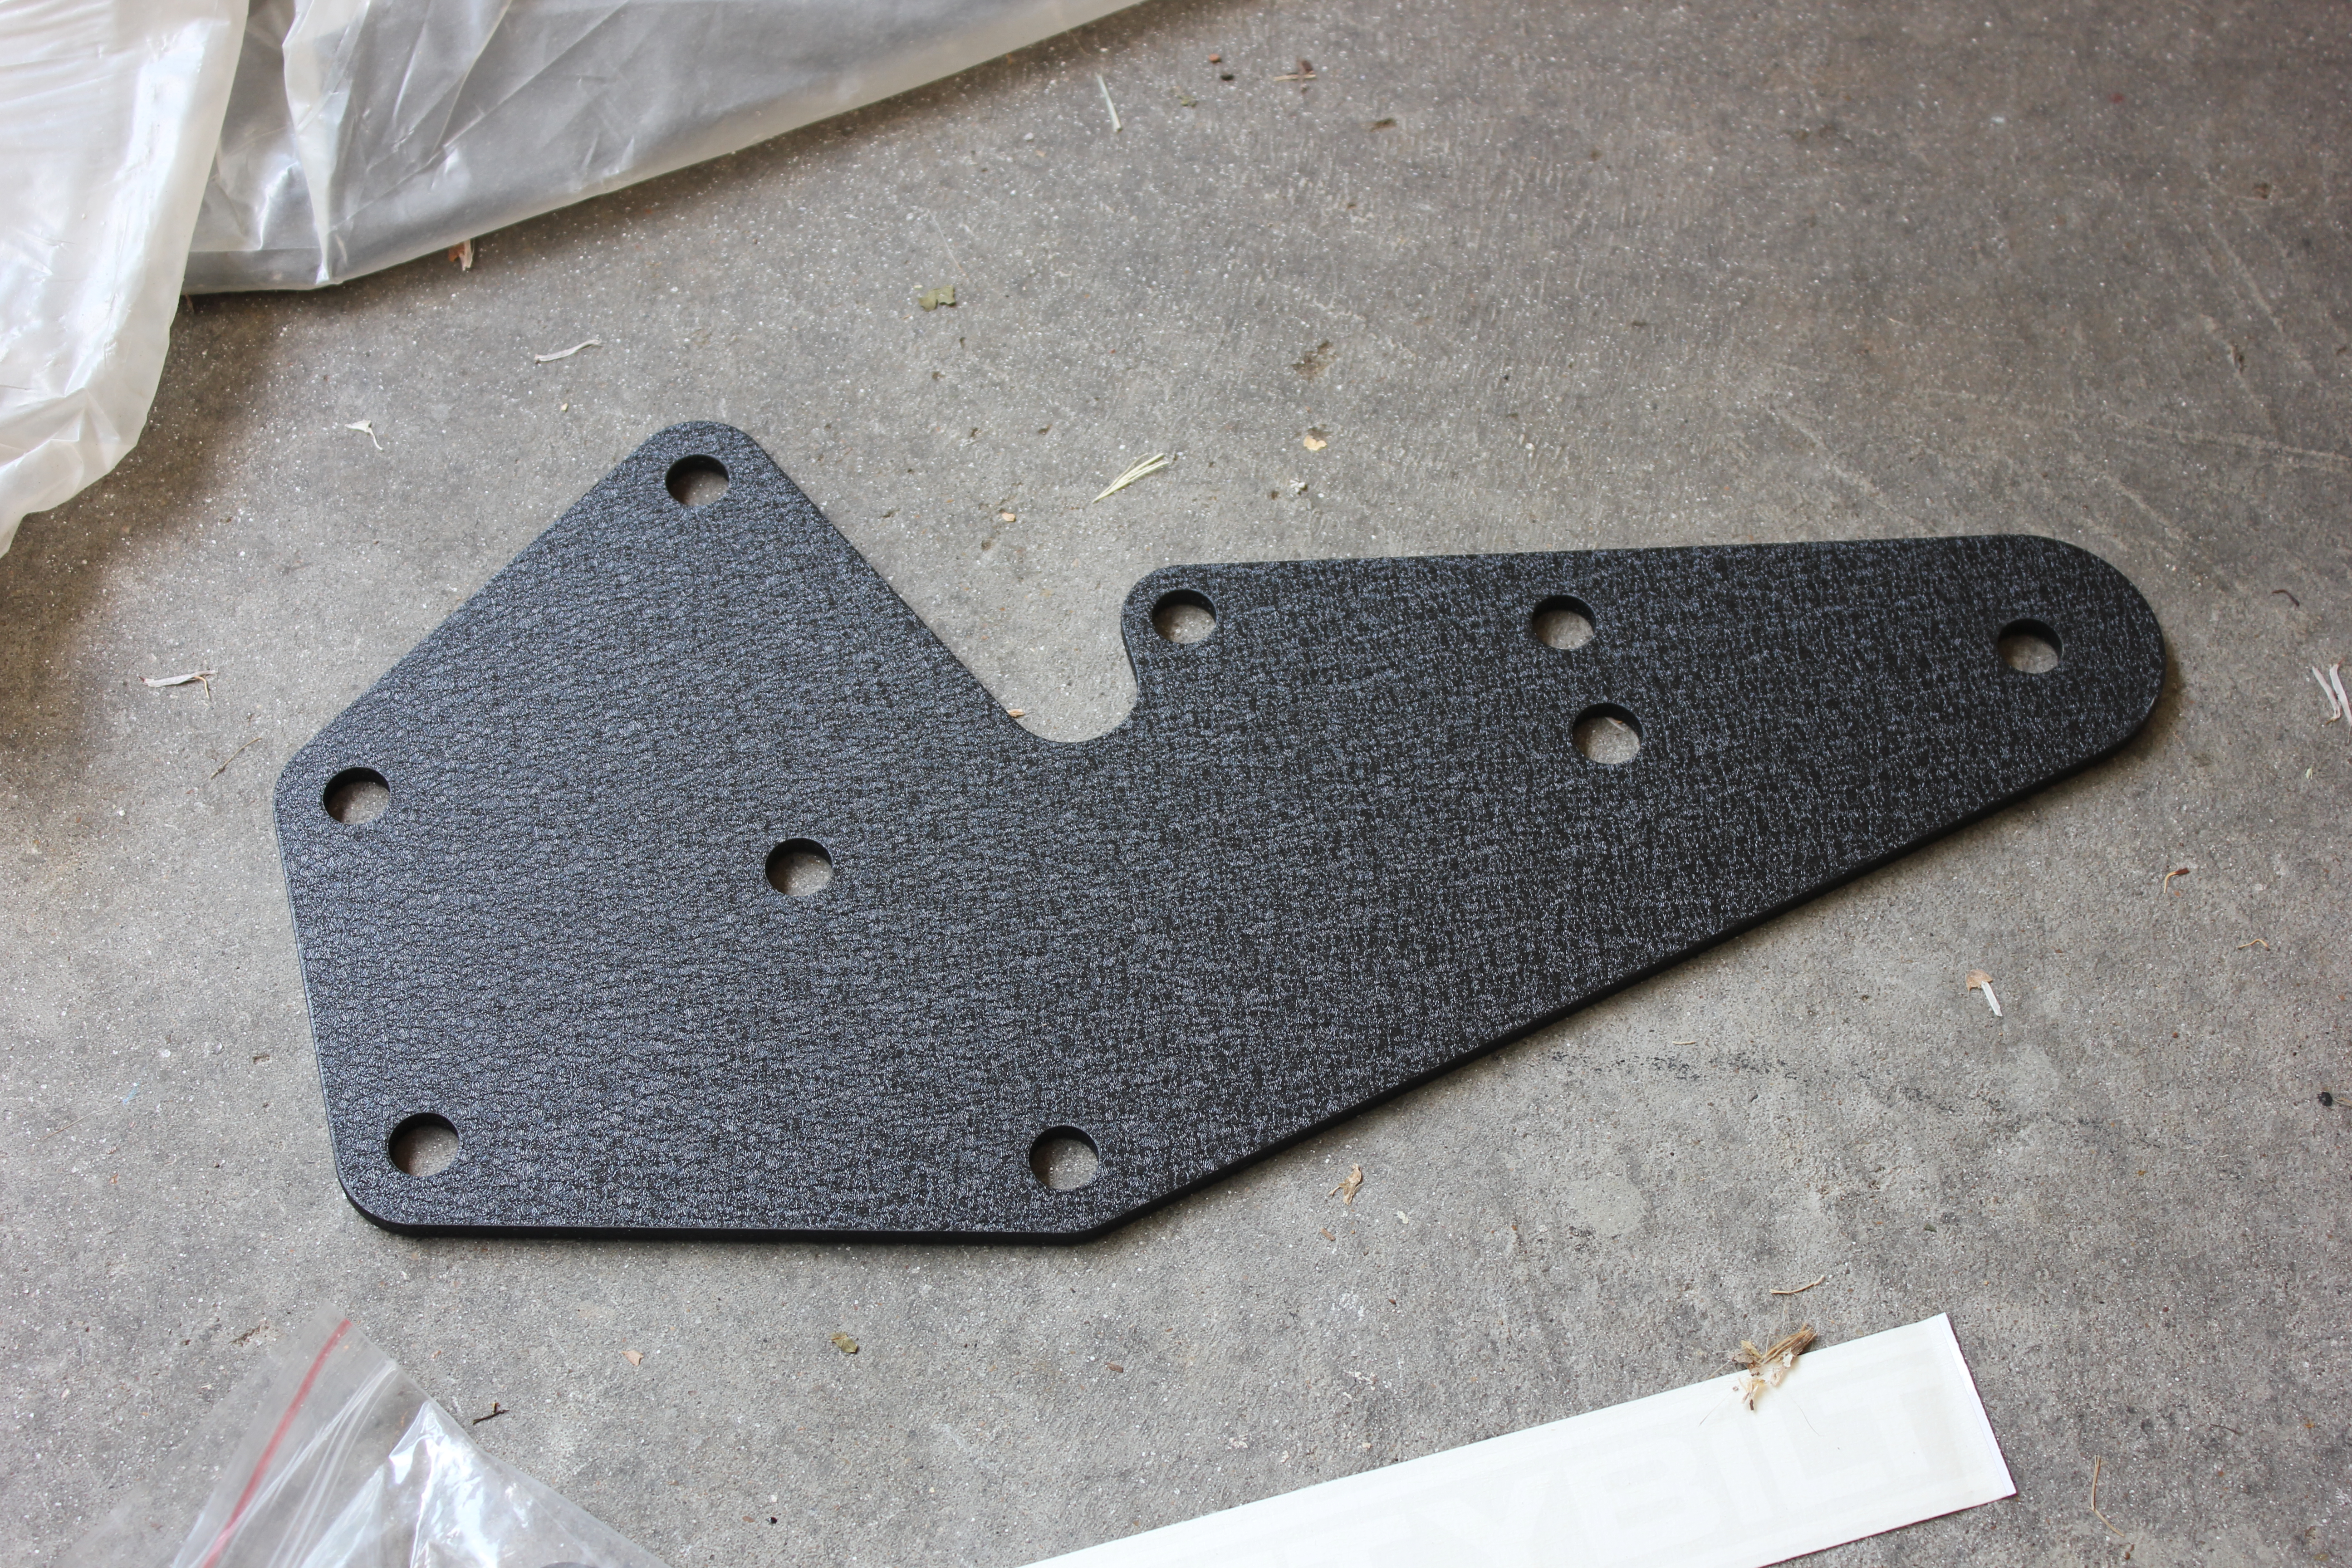
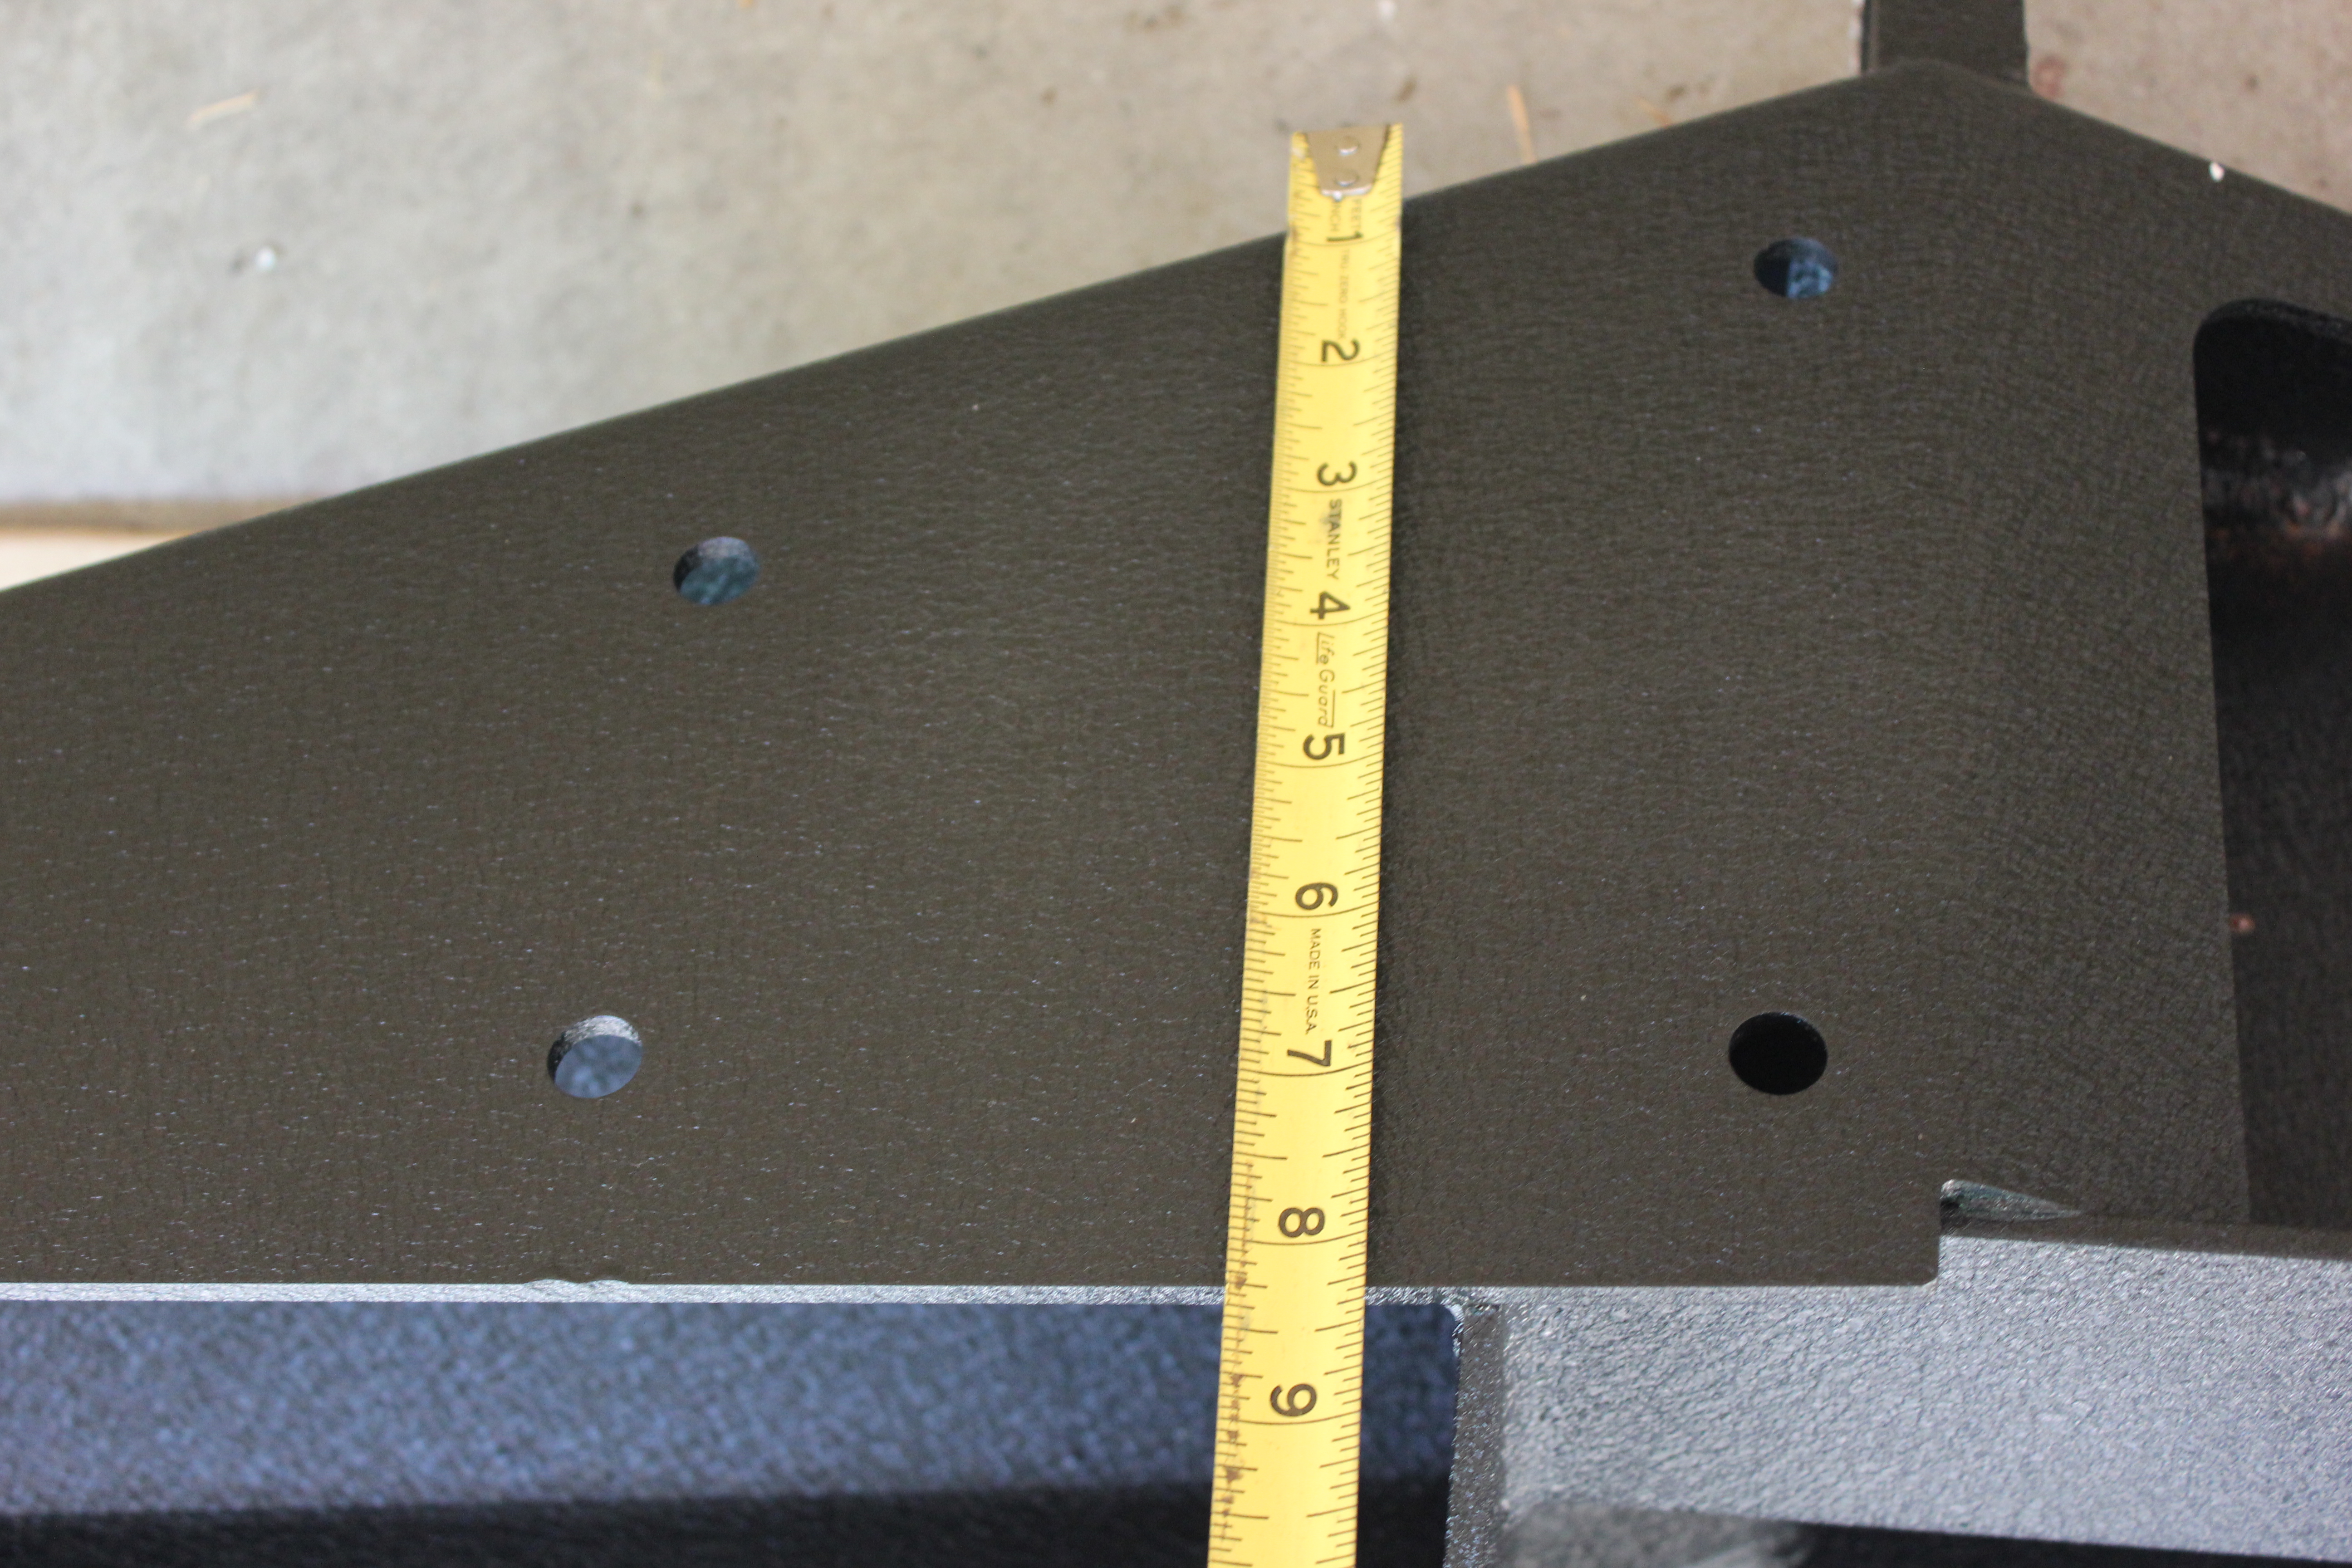
The bumper brackets

Measurements and other first impressions
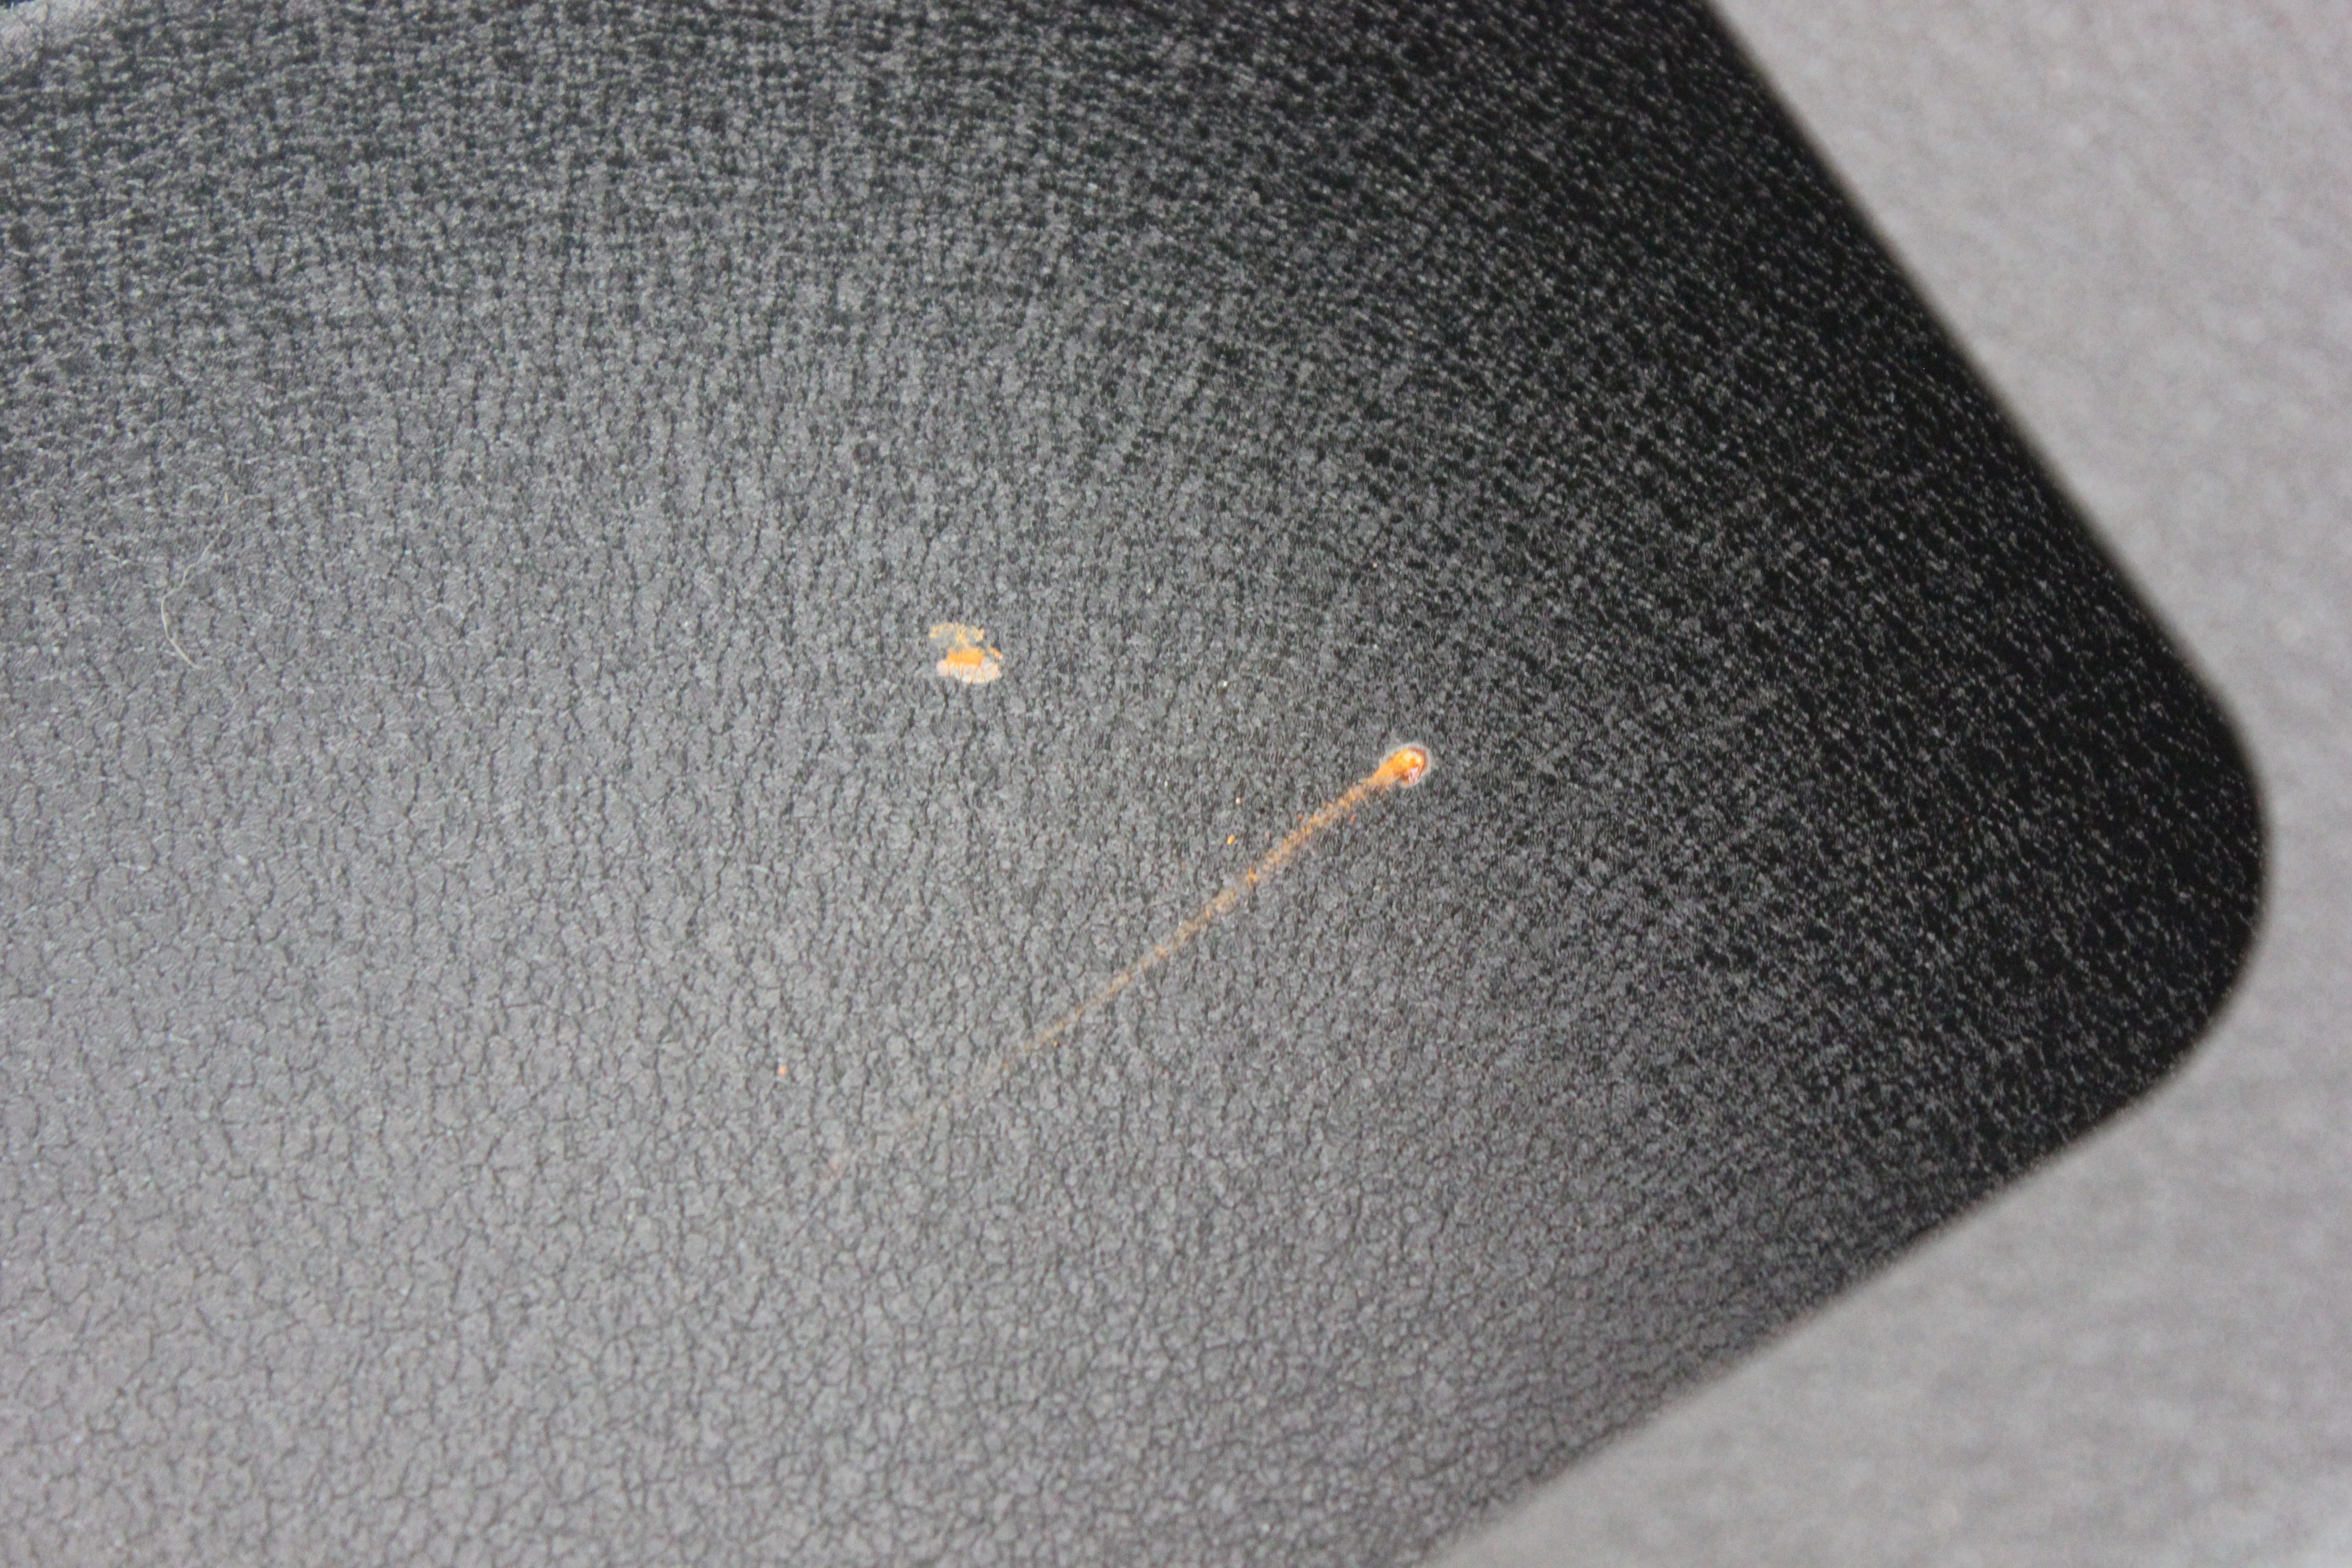
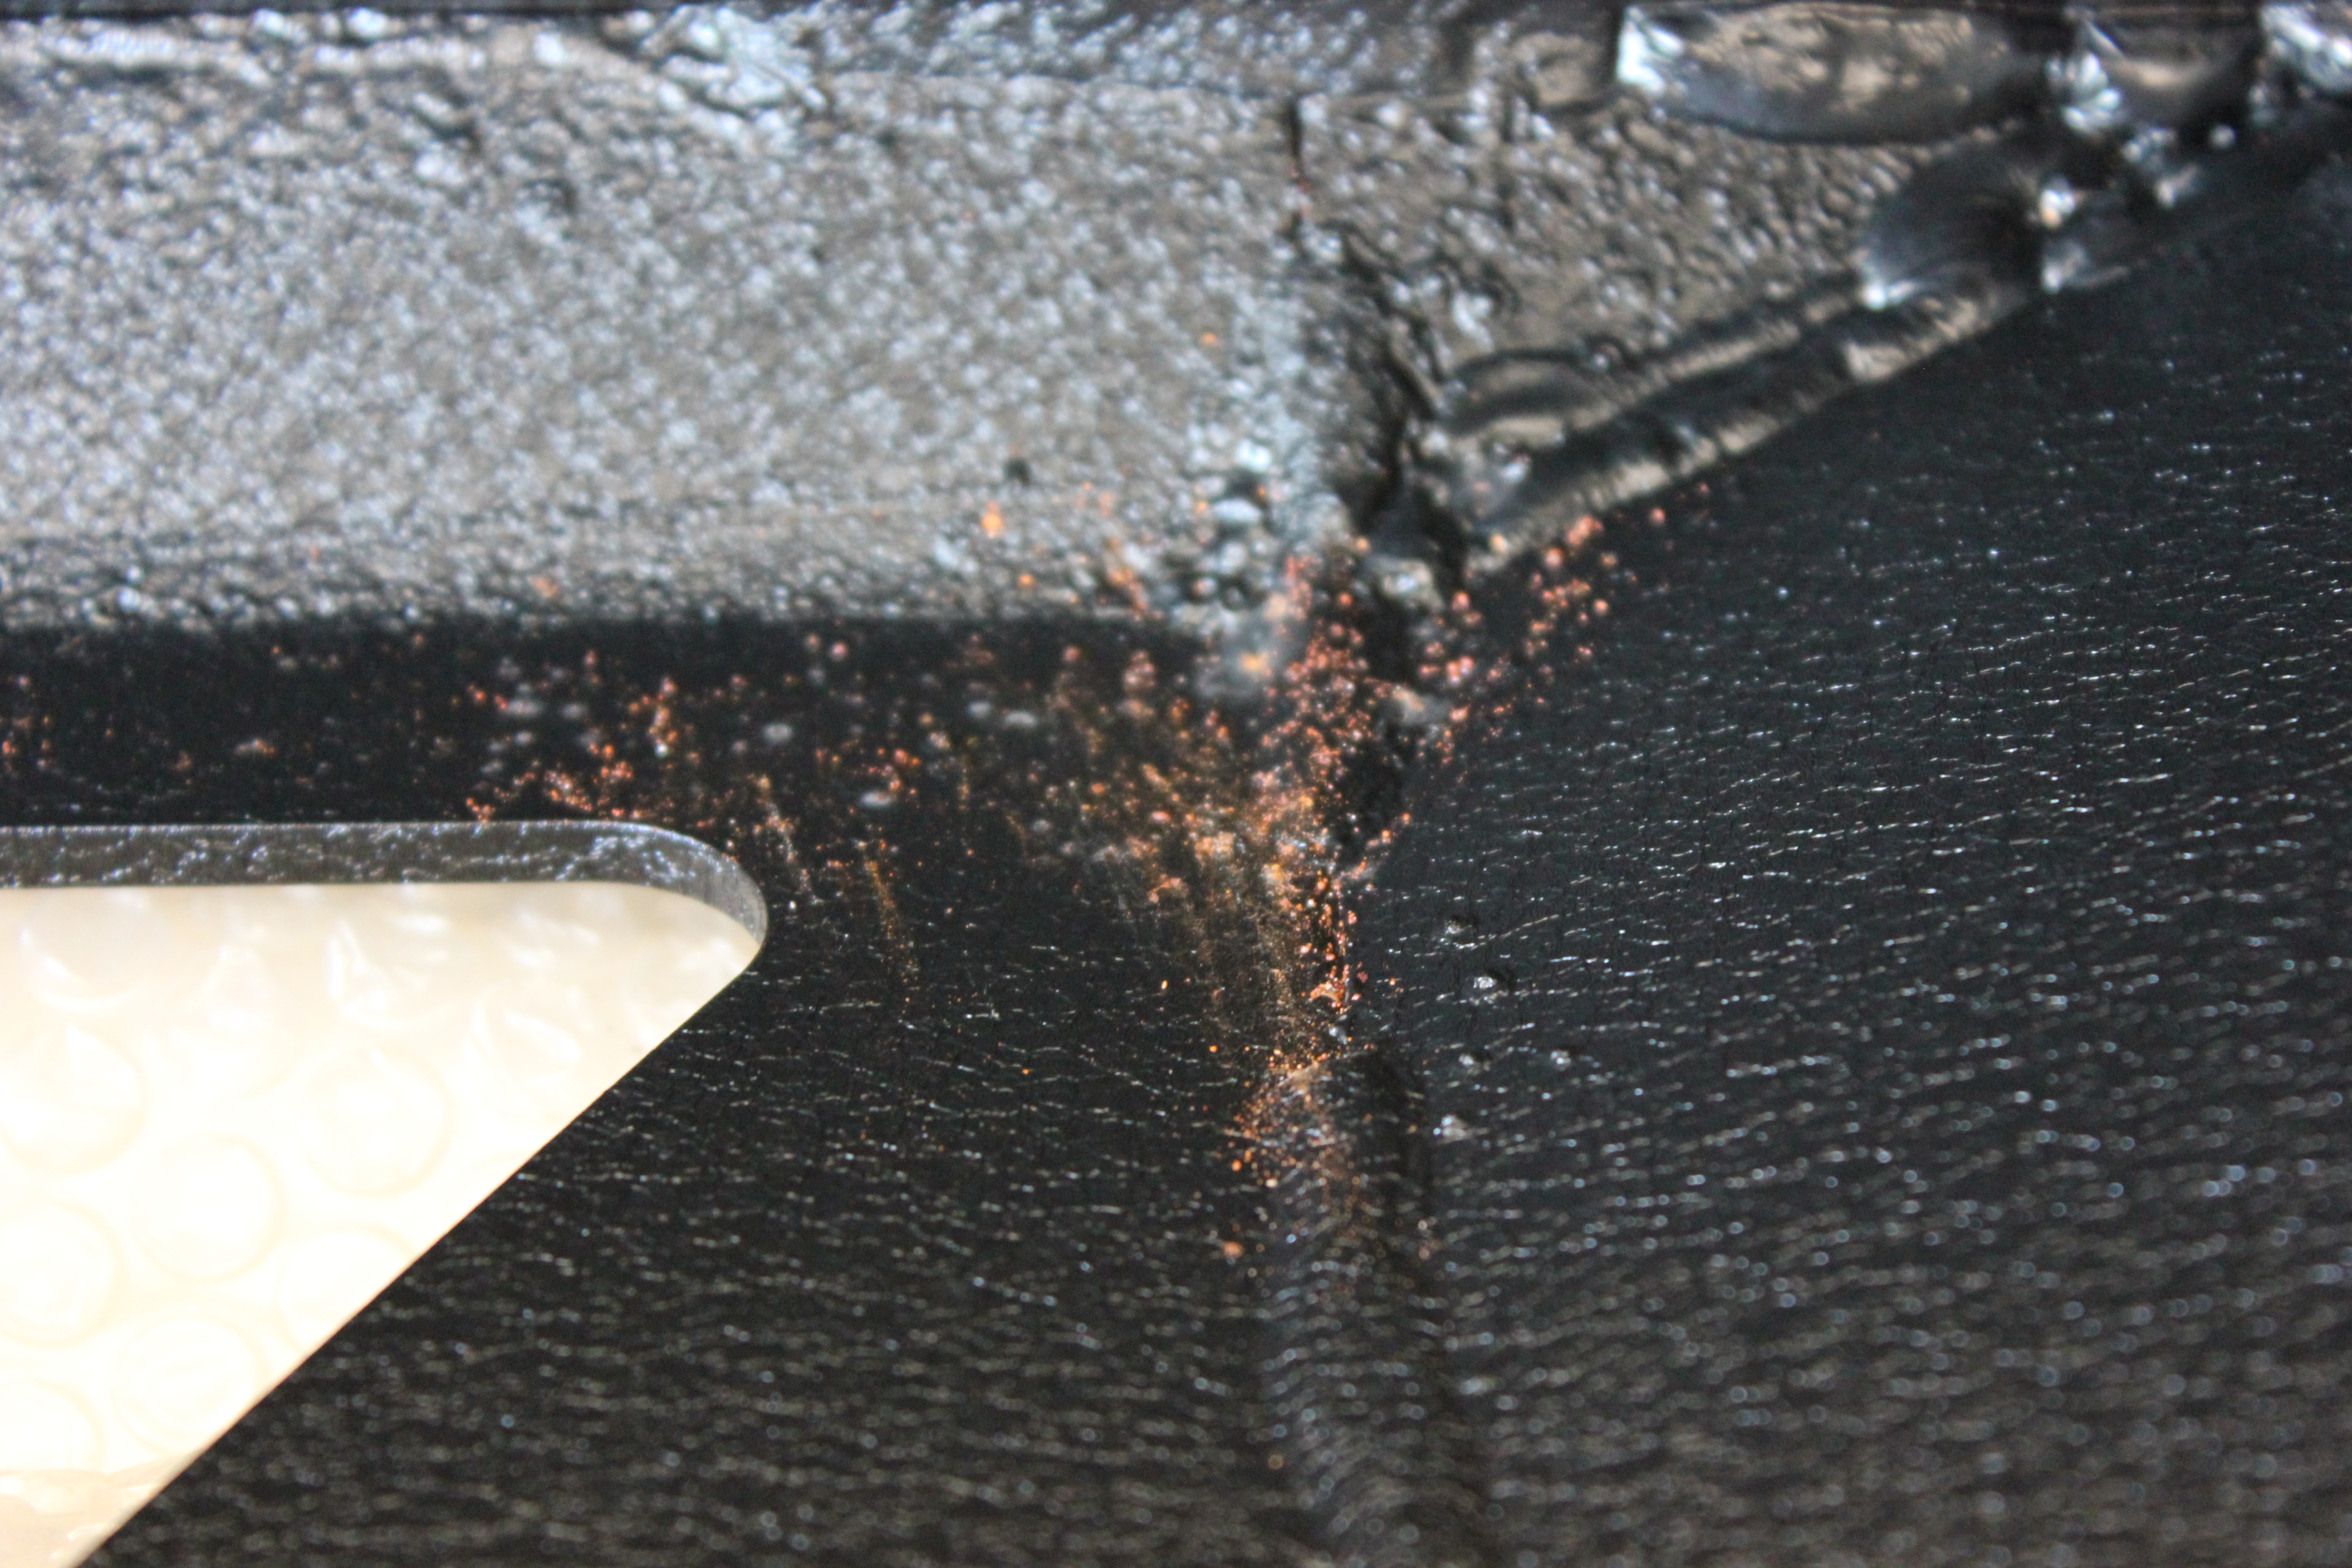
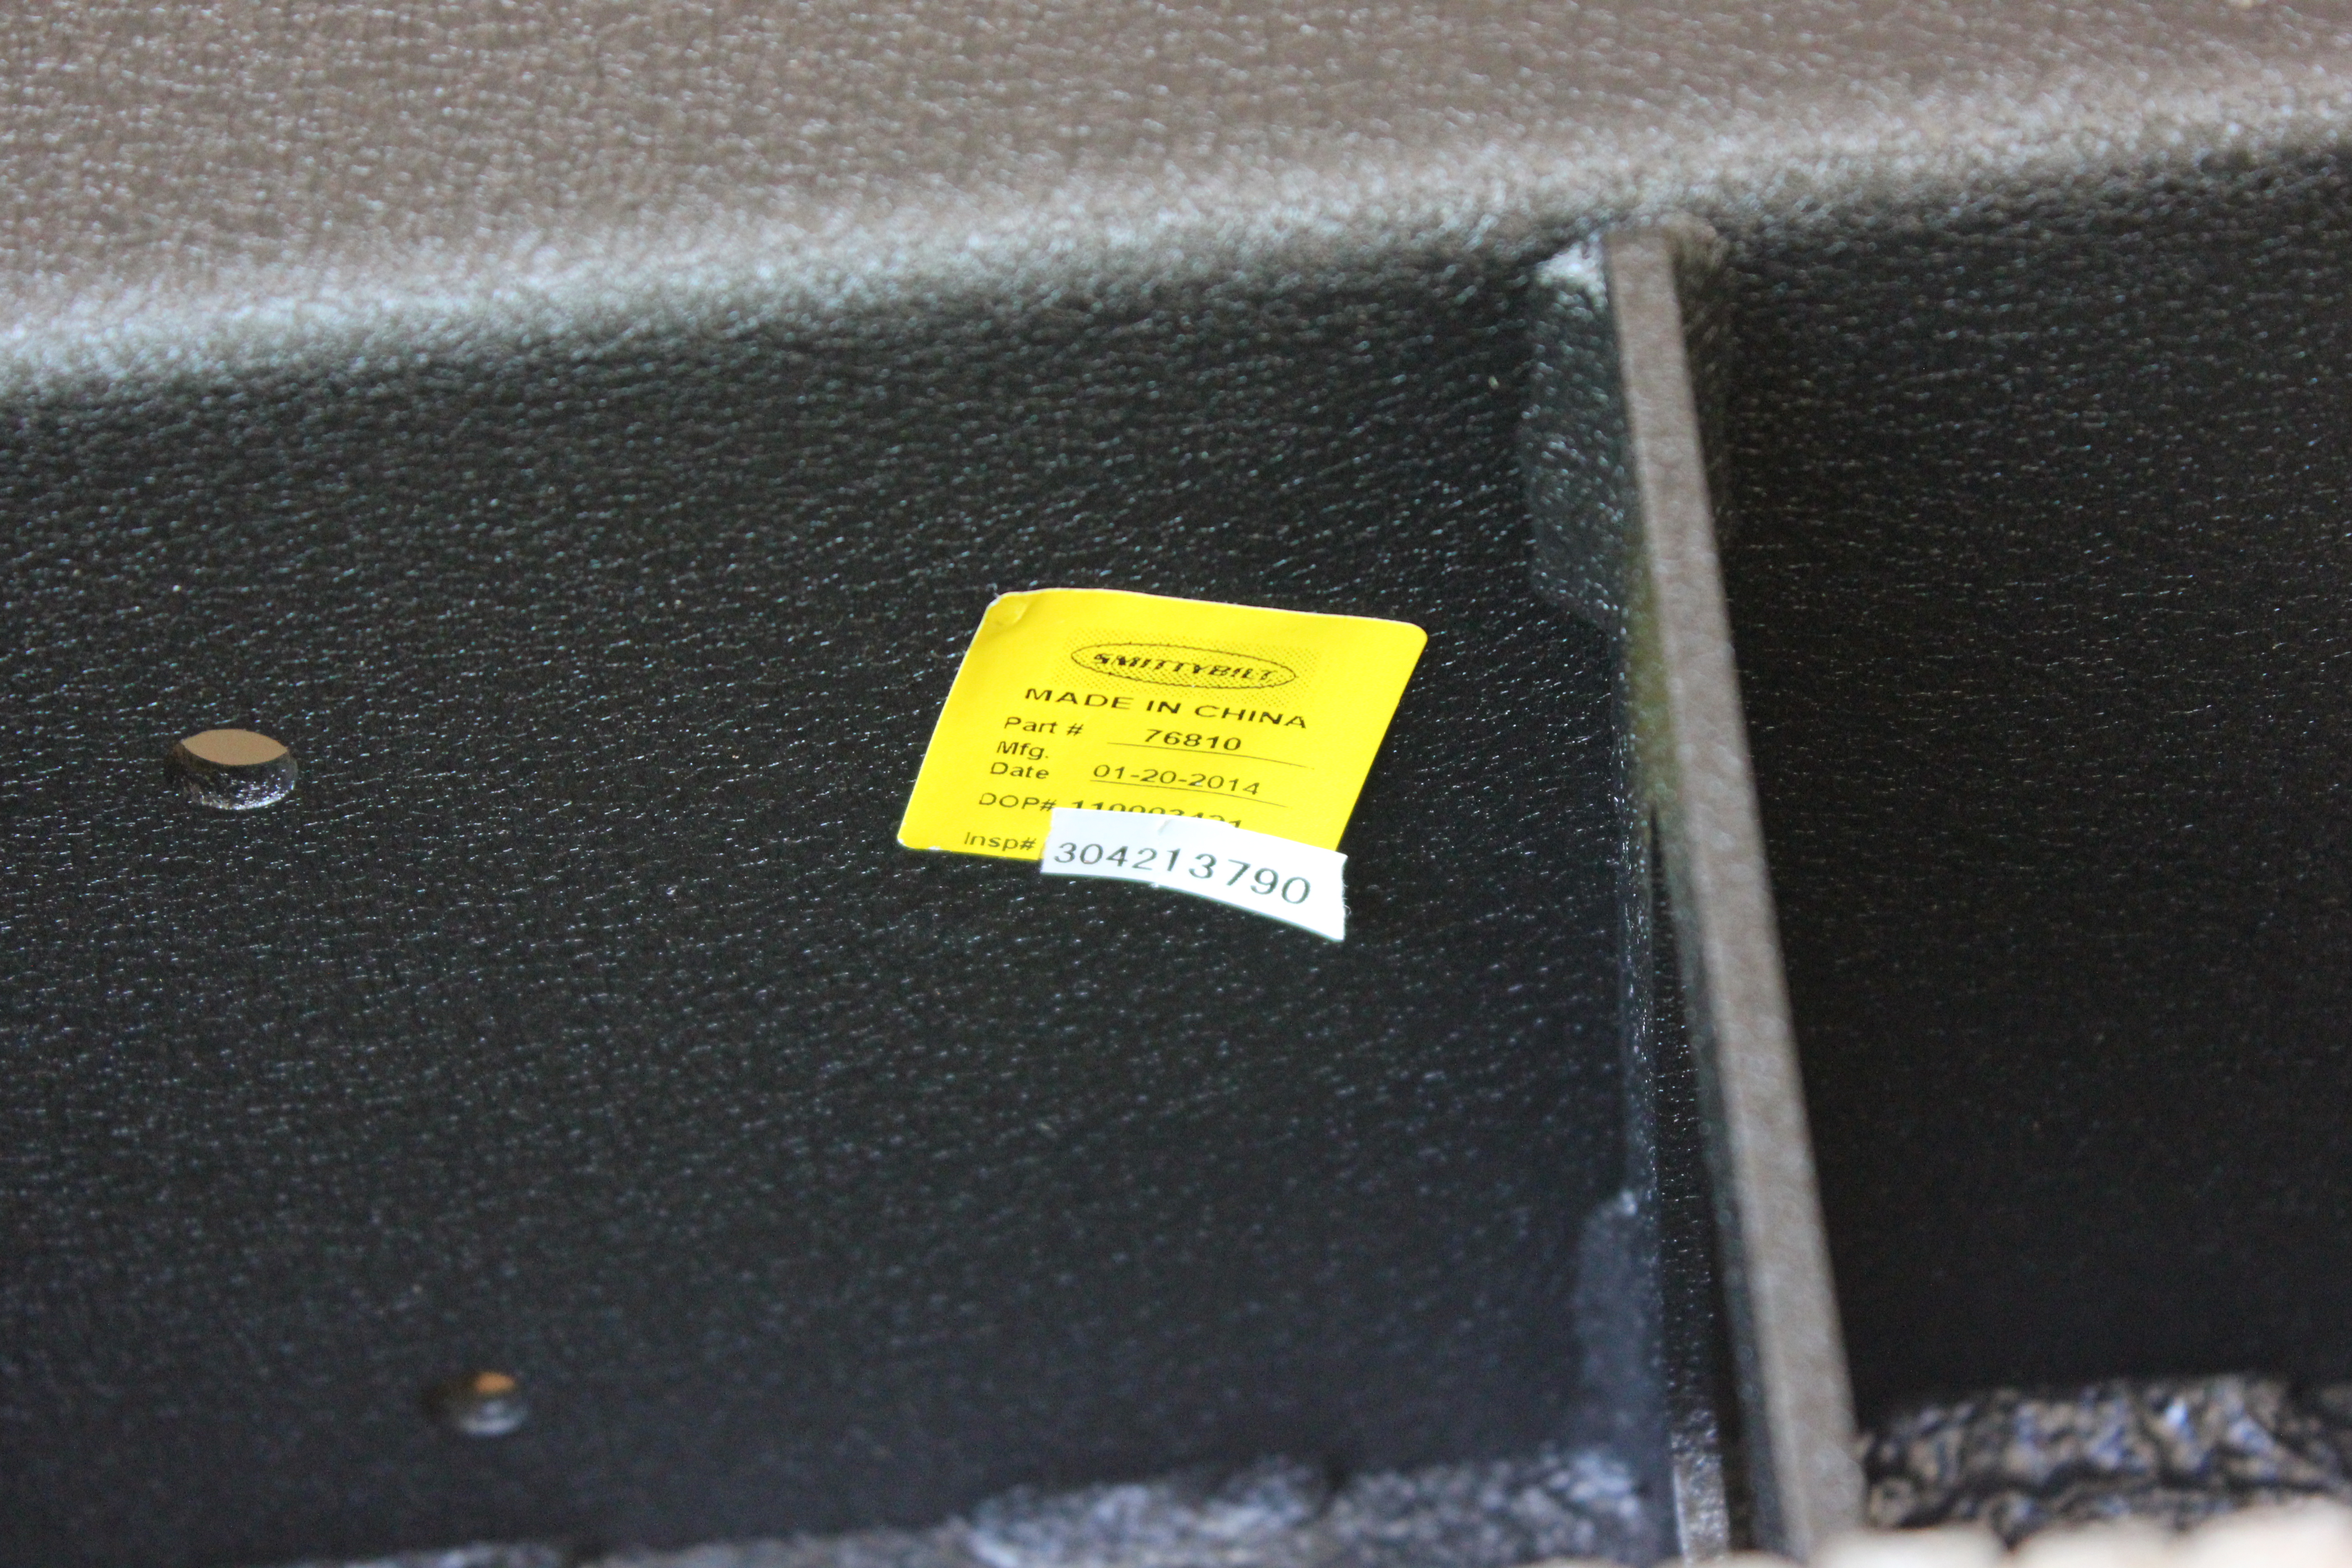
This was practically the first thing I noticed. On my brand new bumper, there were a couple of rust spots where, I guess, the coating chipped off at some point during shipping and started to corrode:
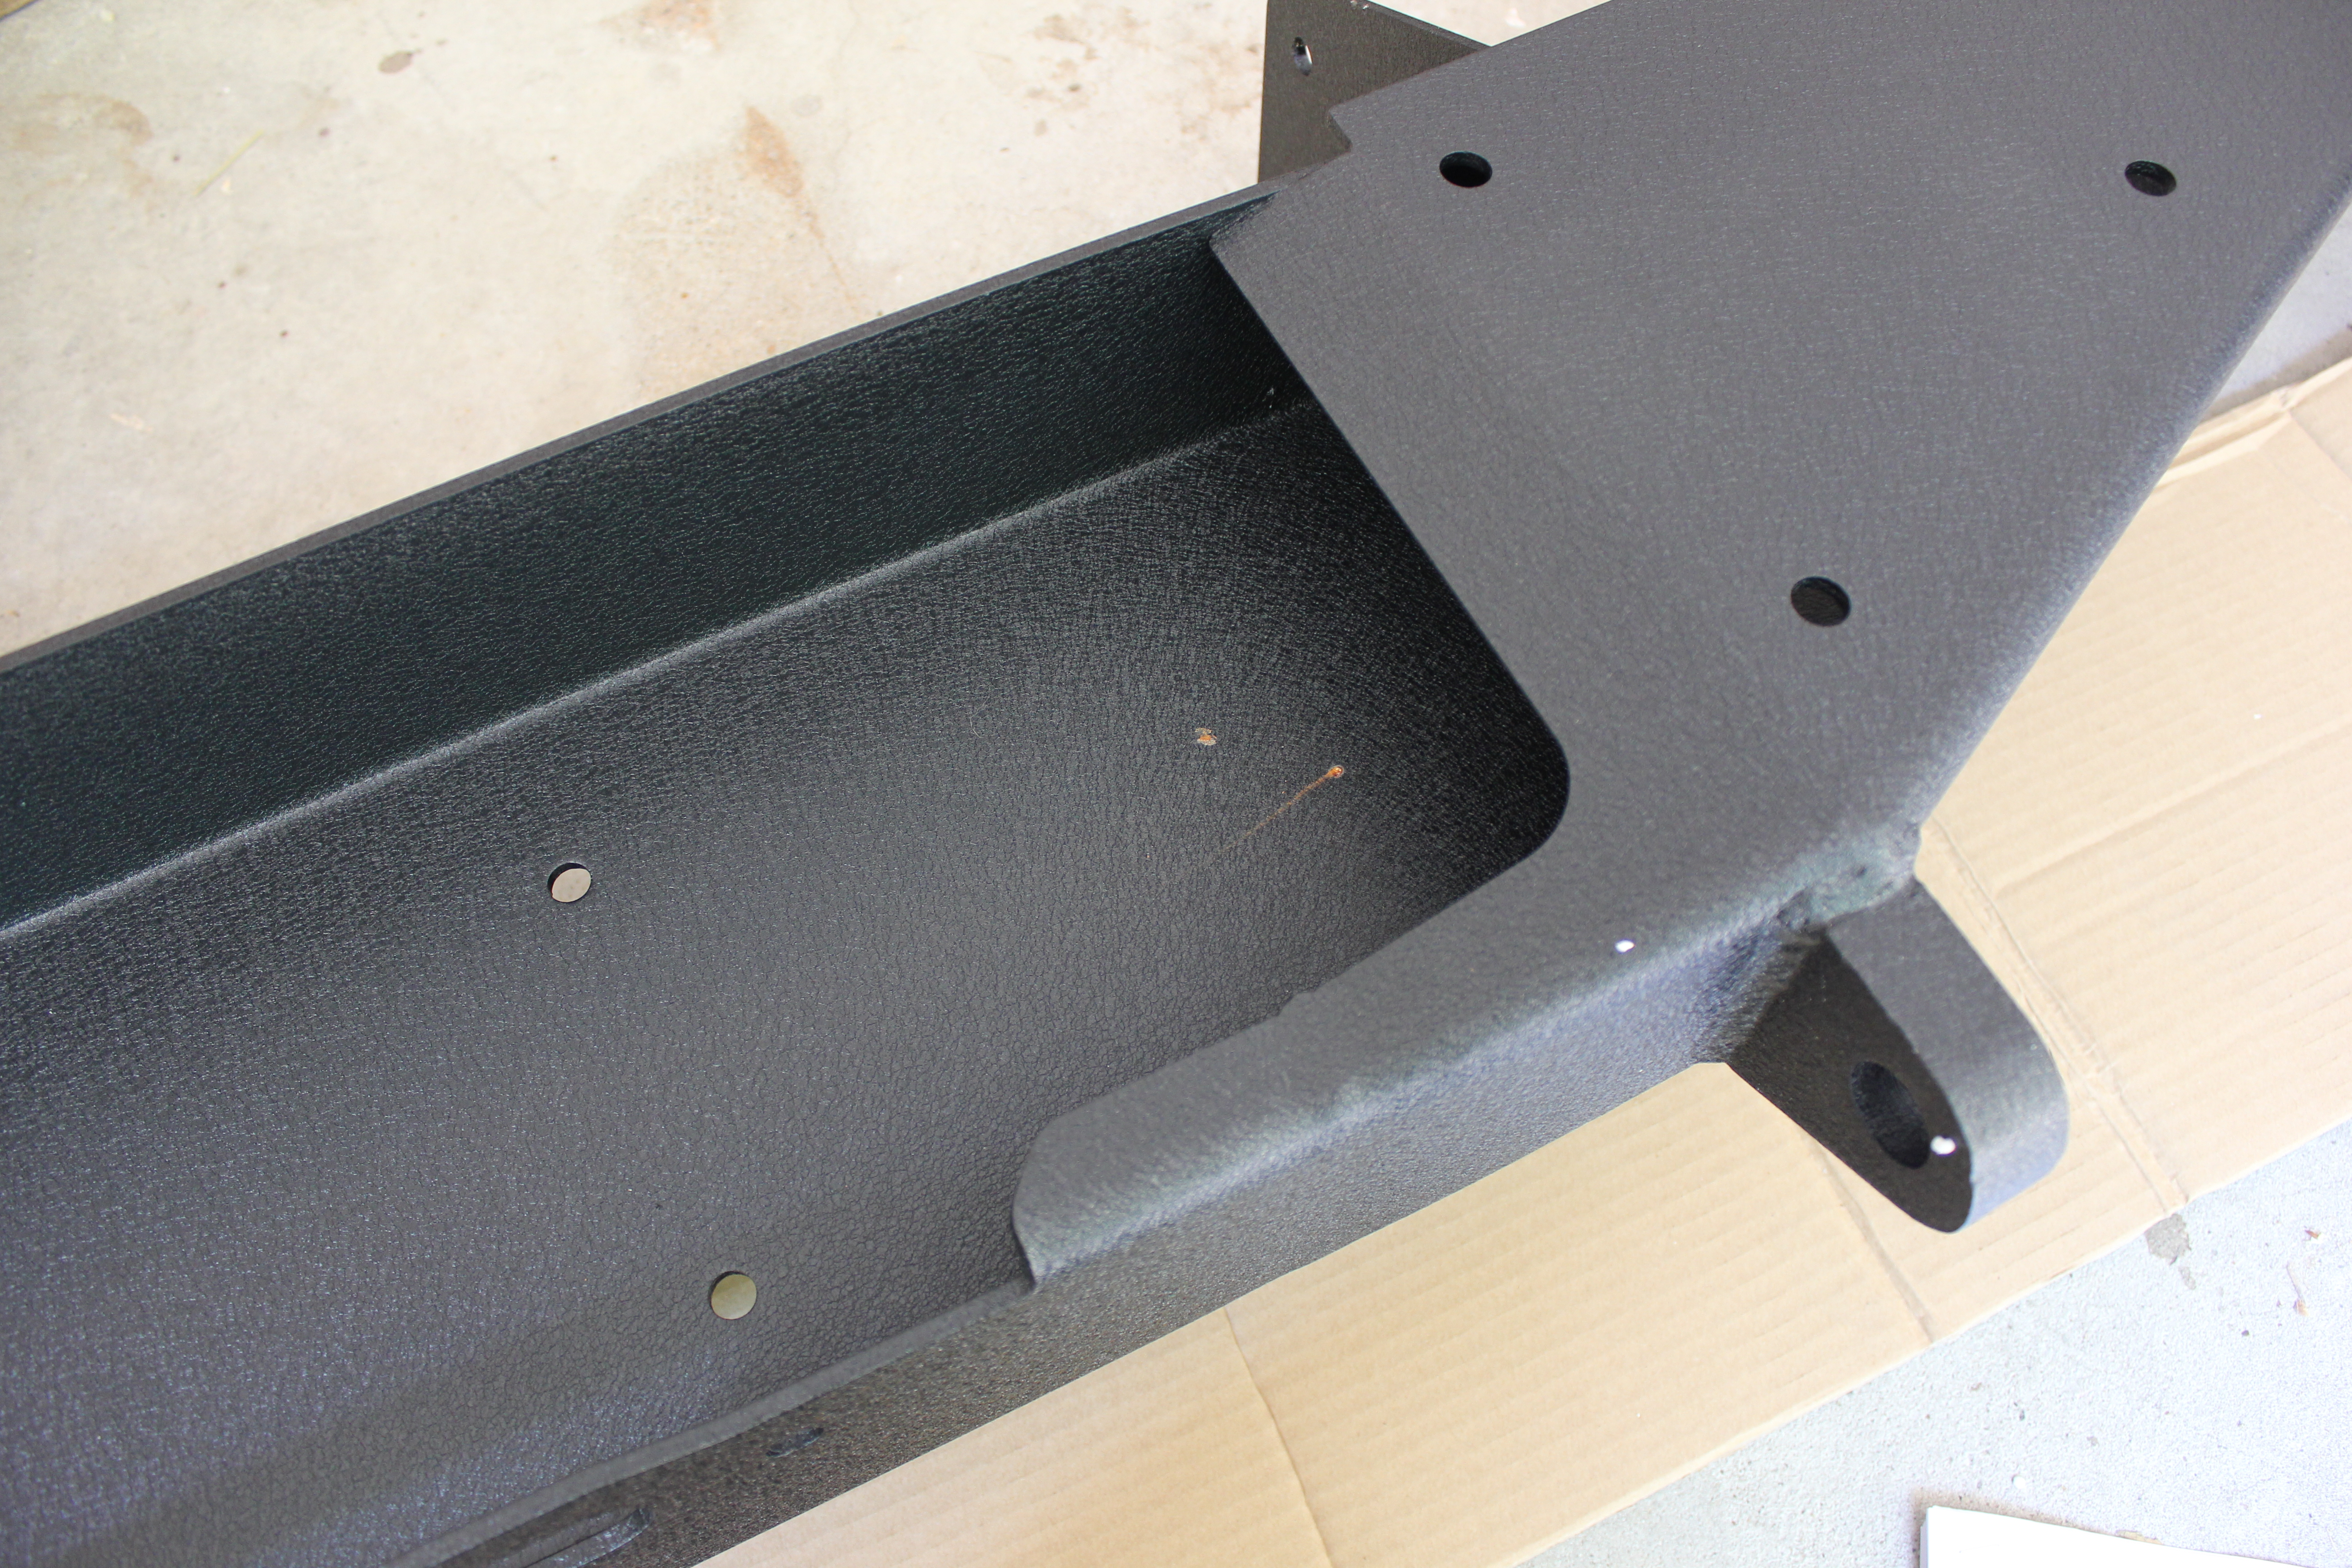
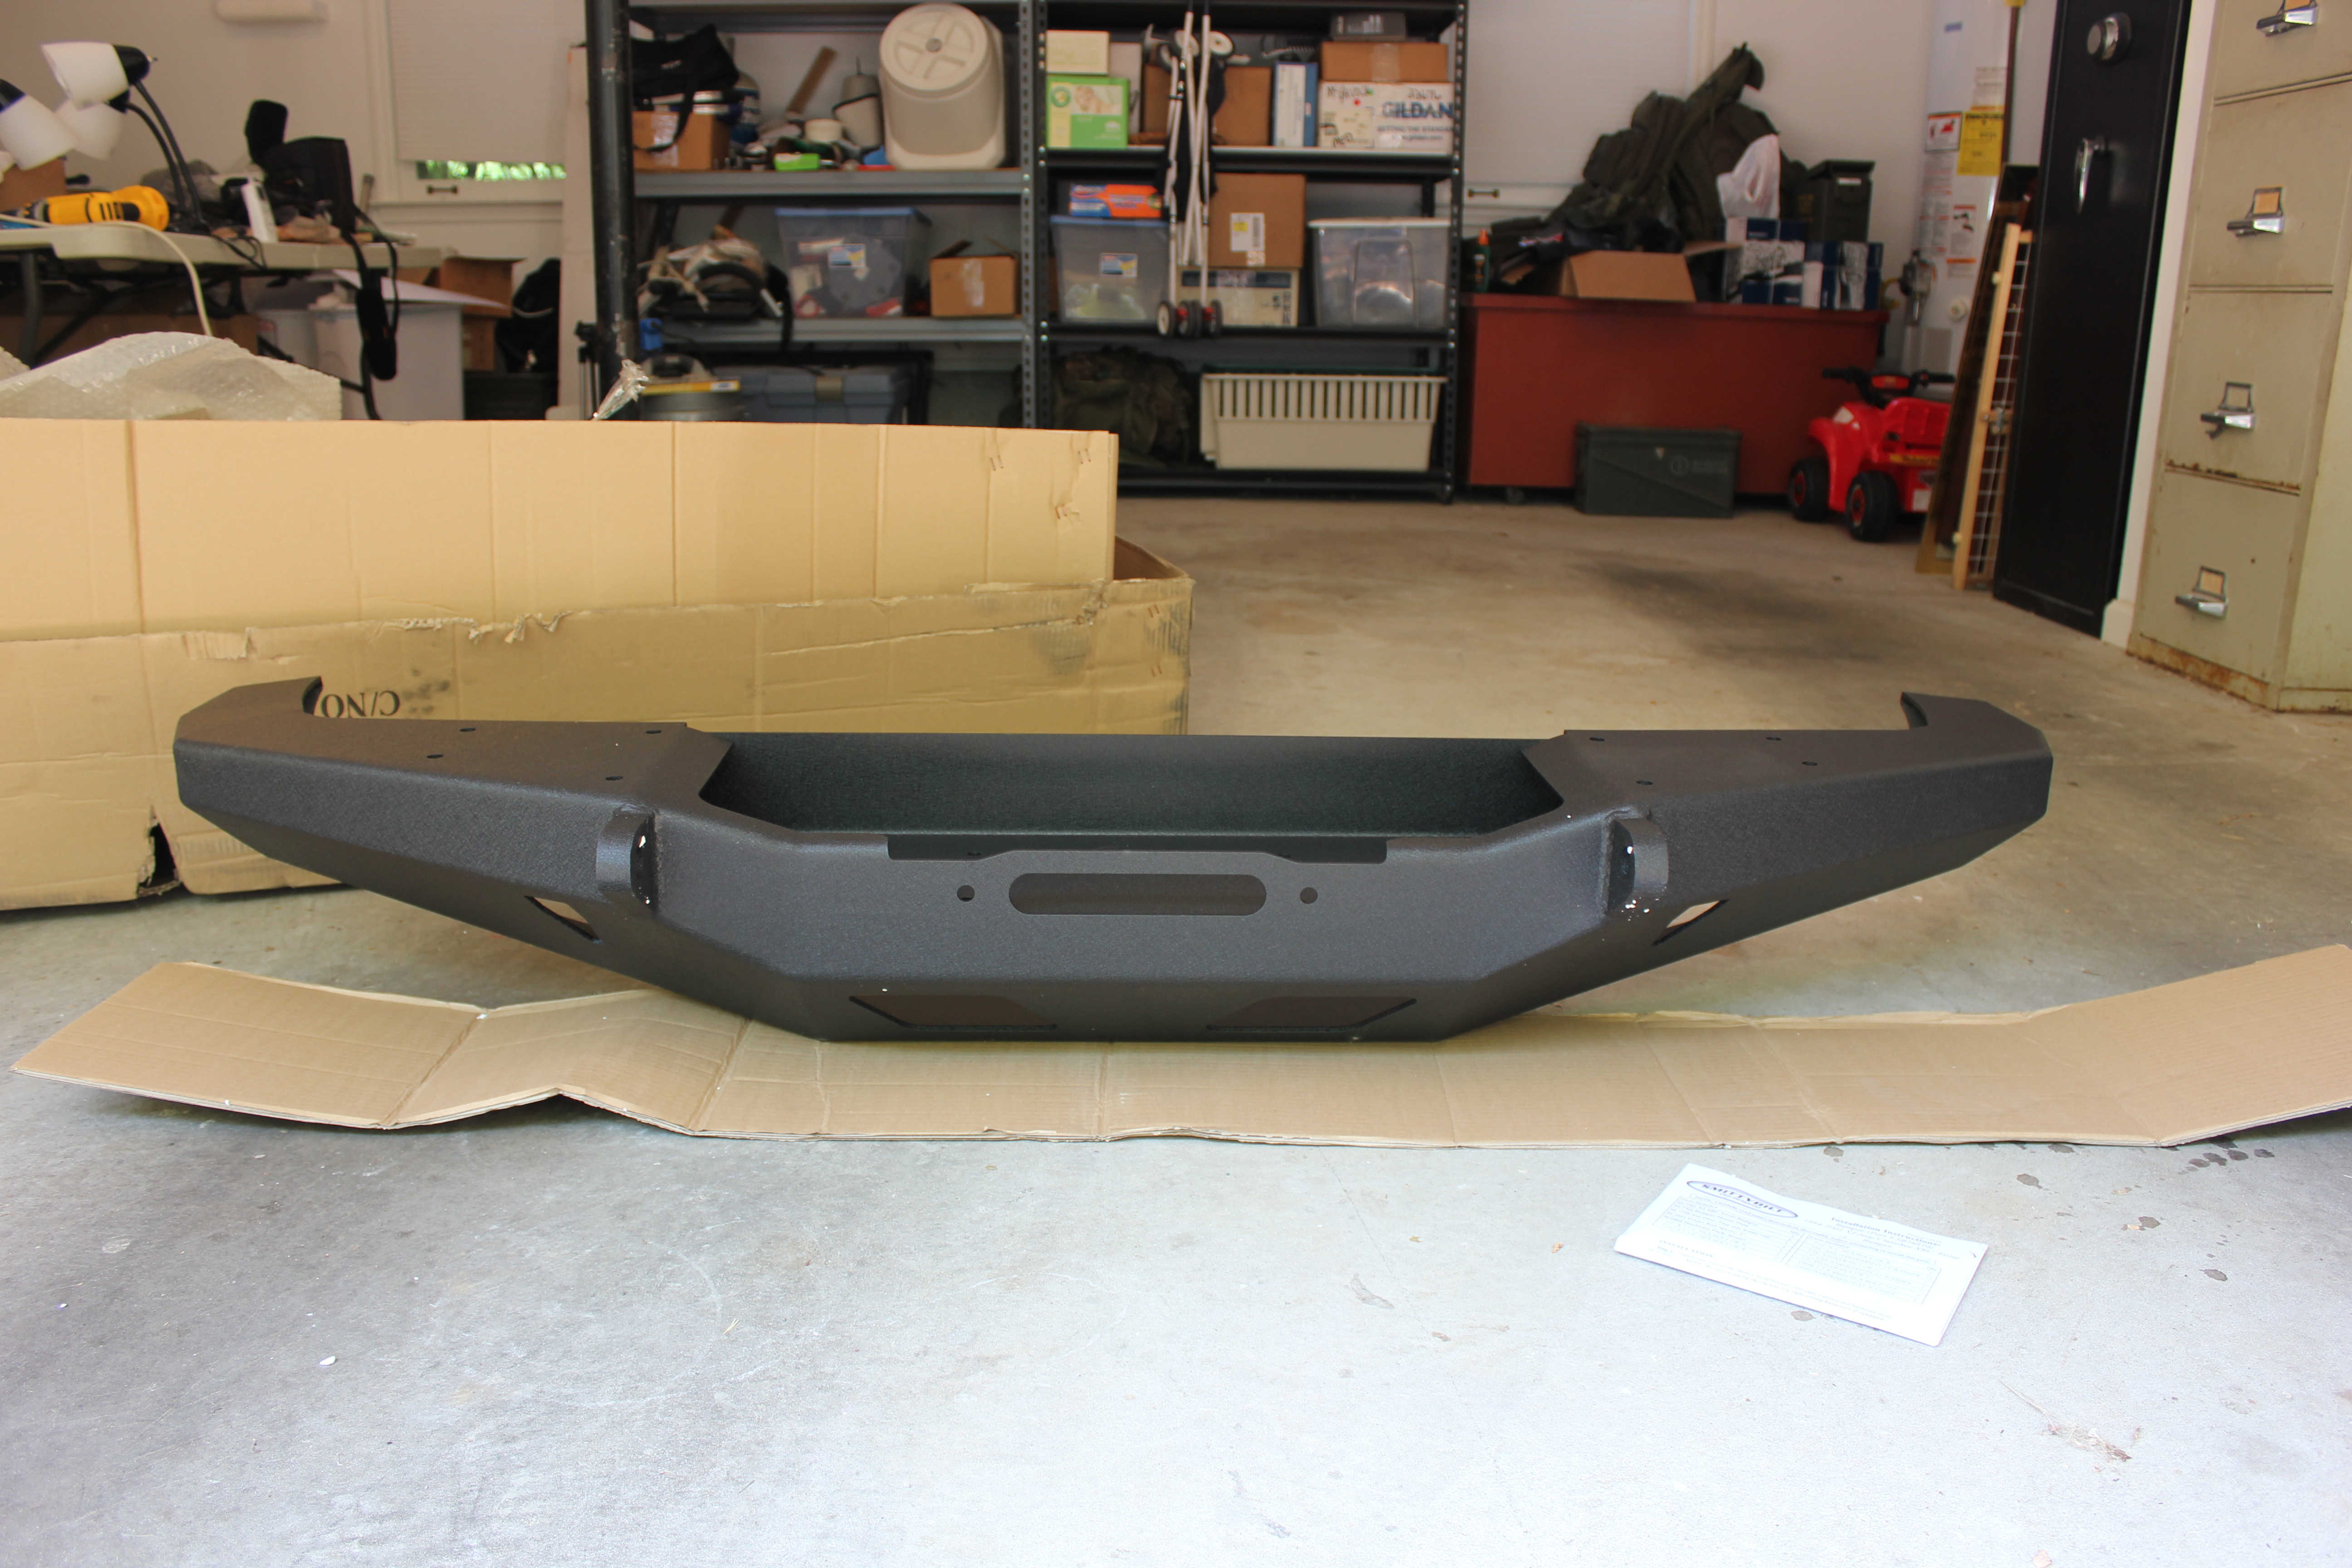
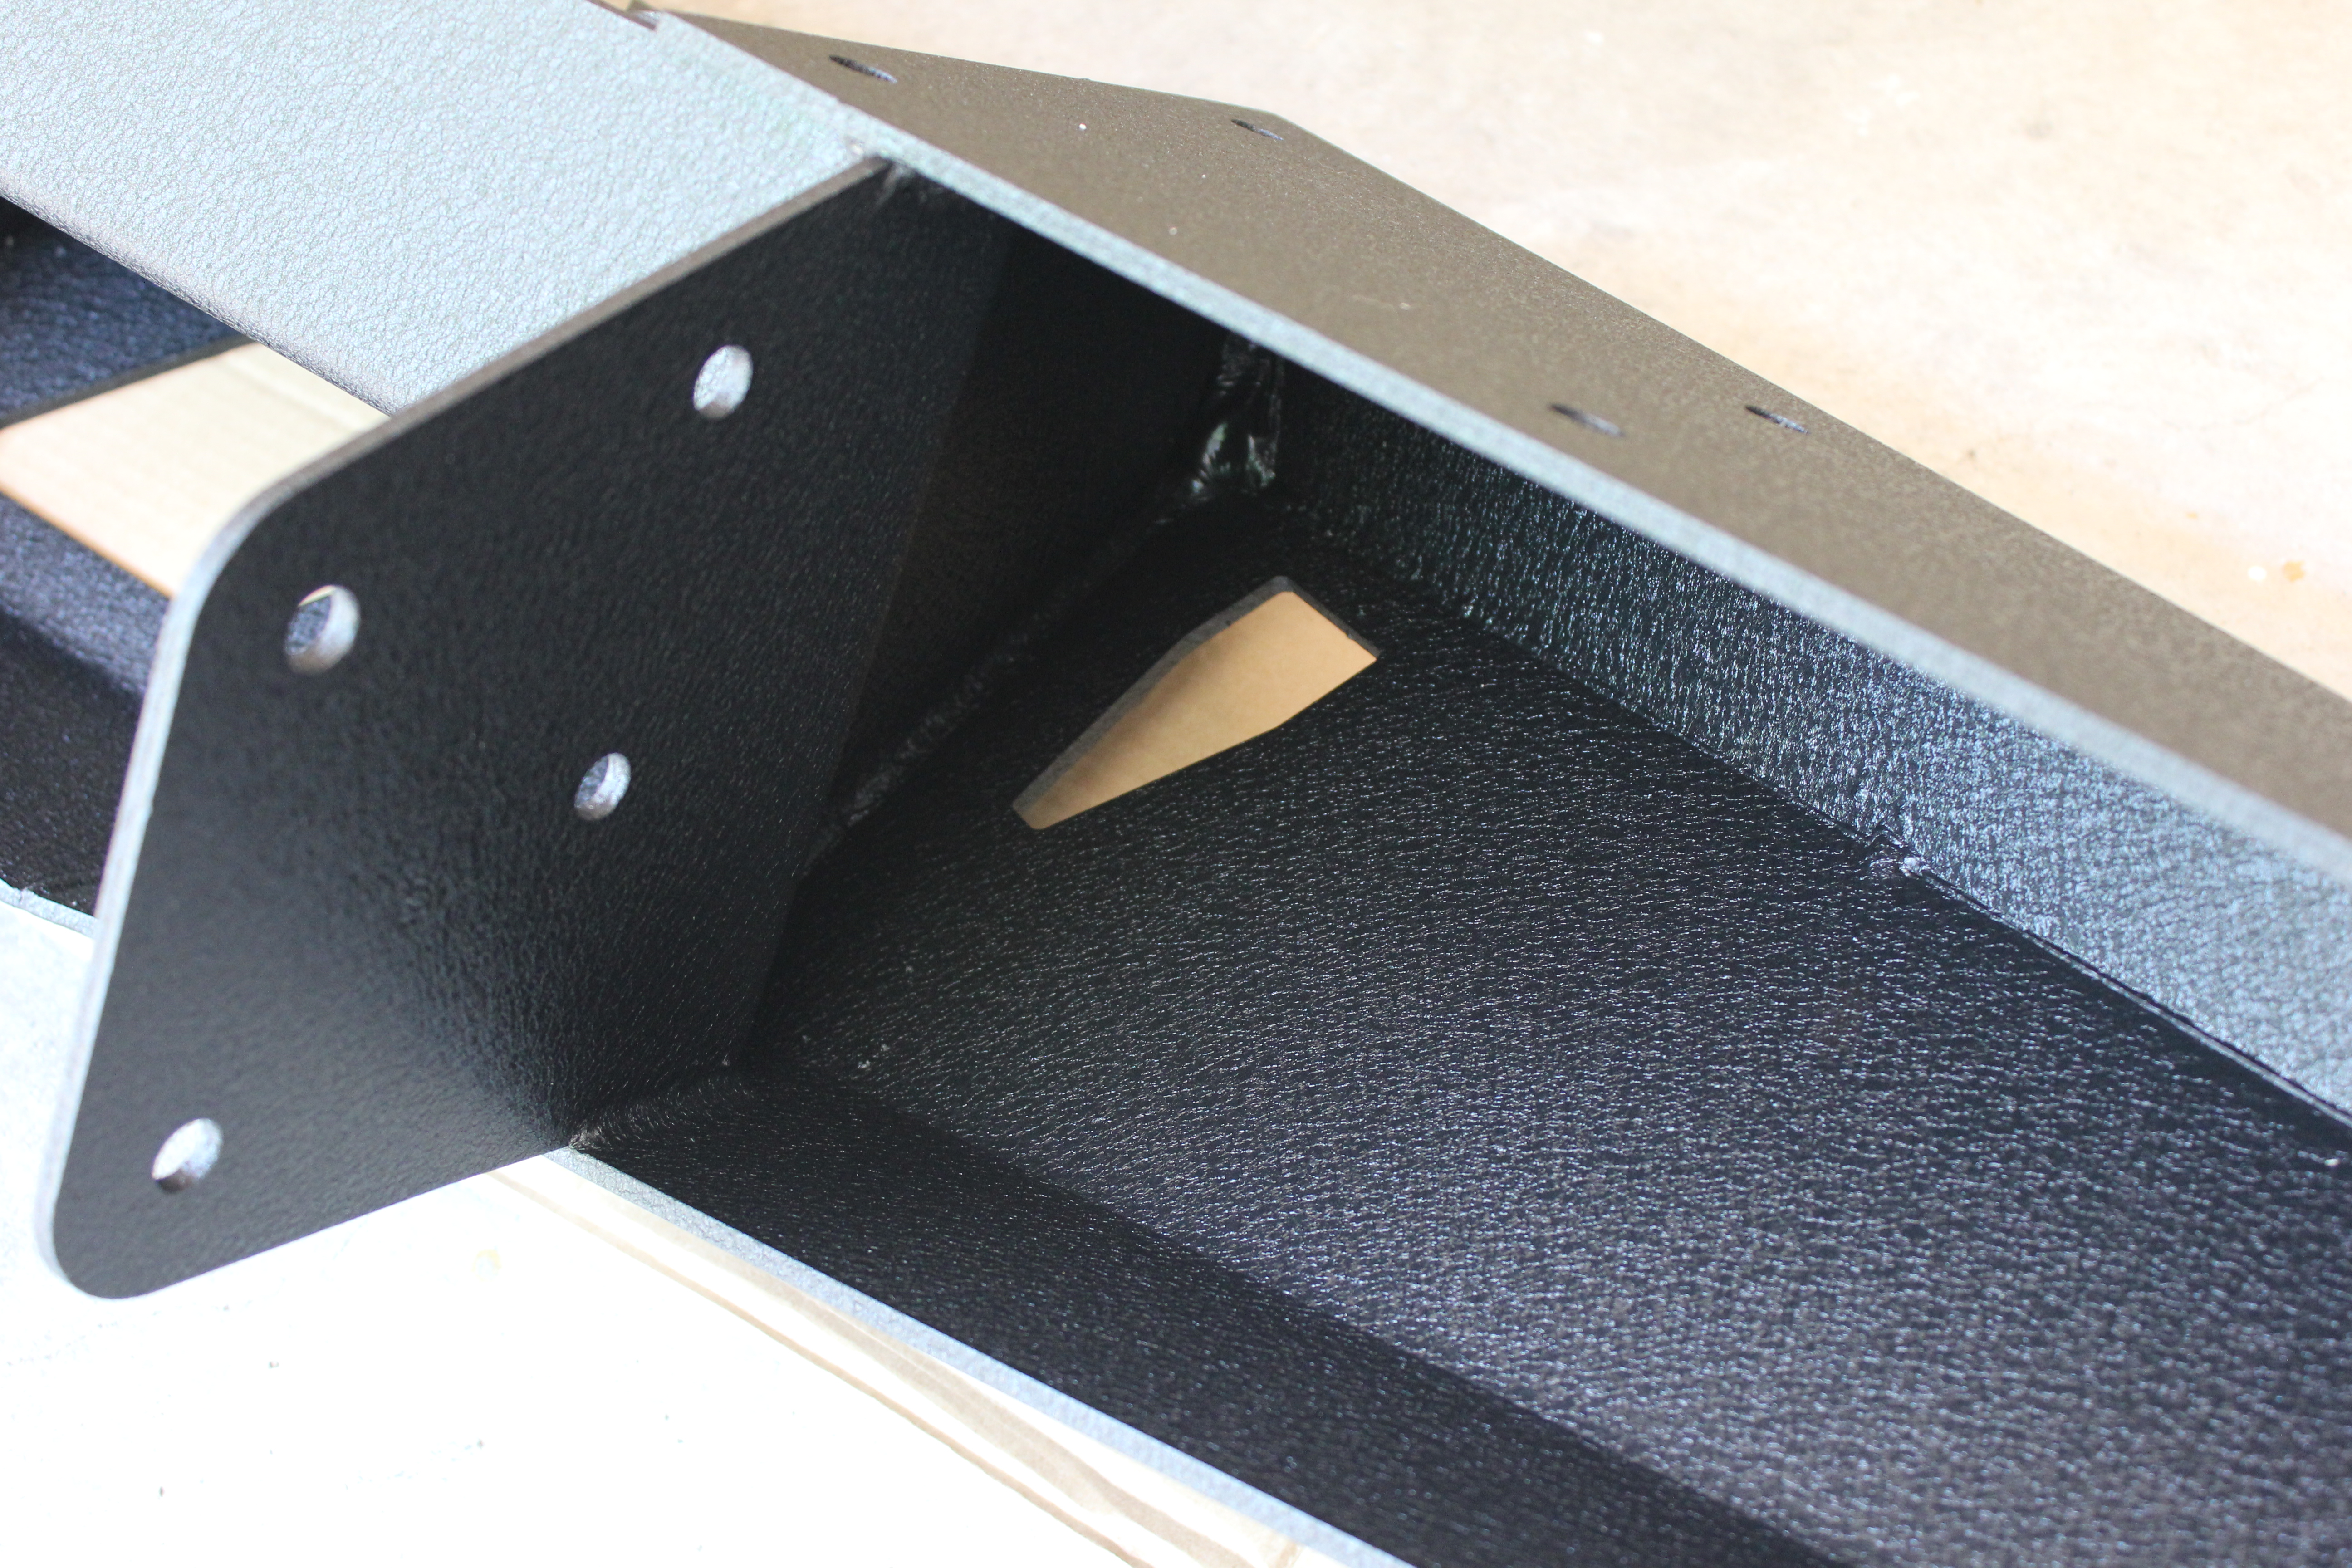
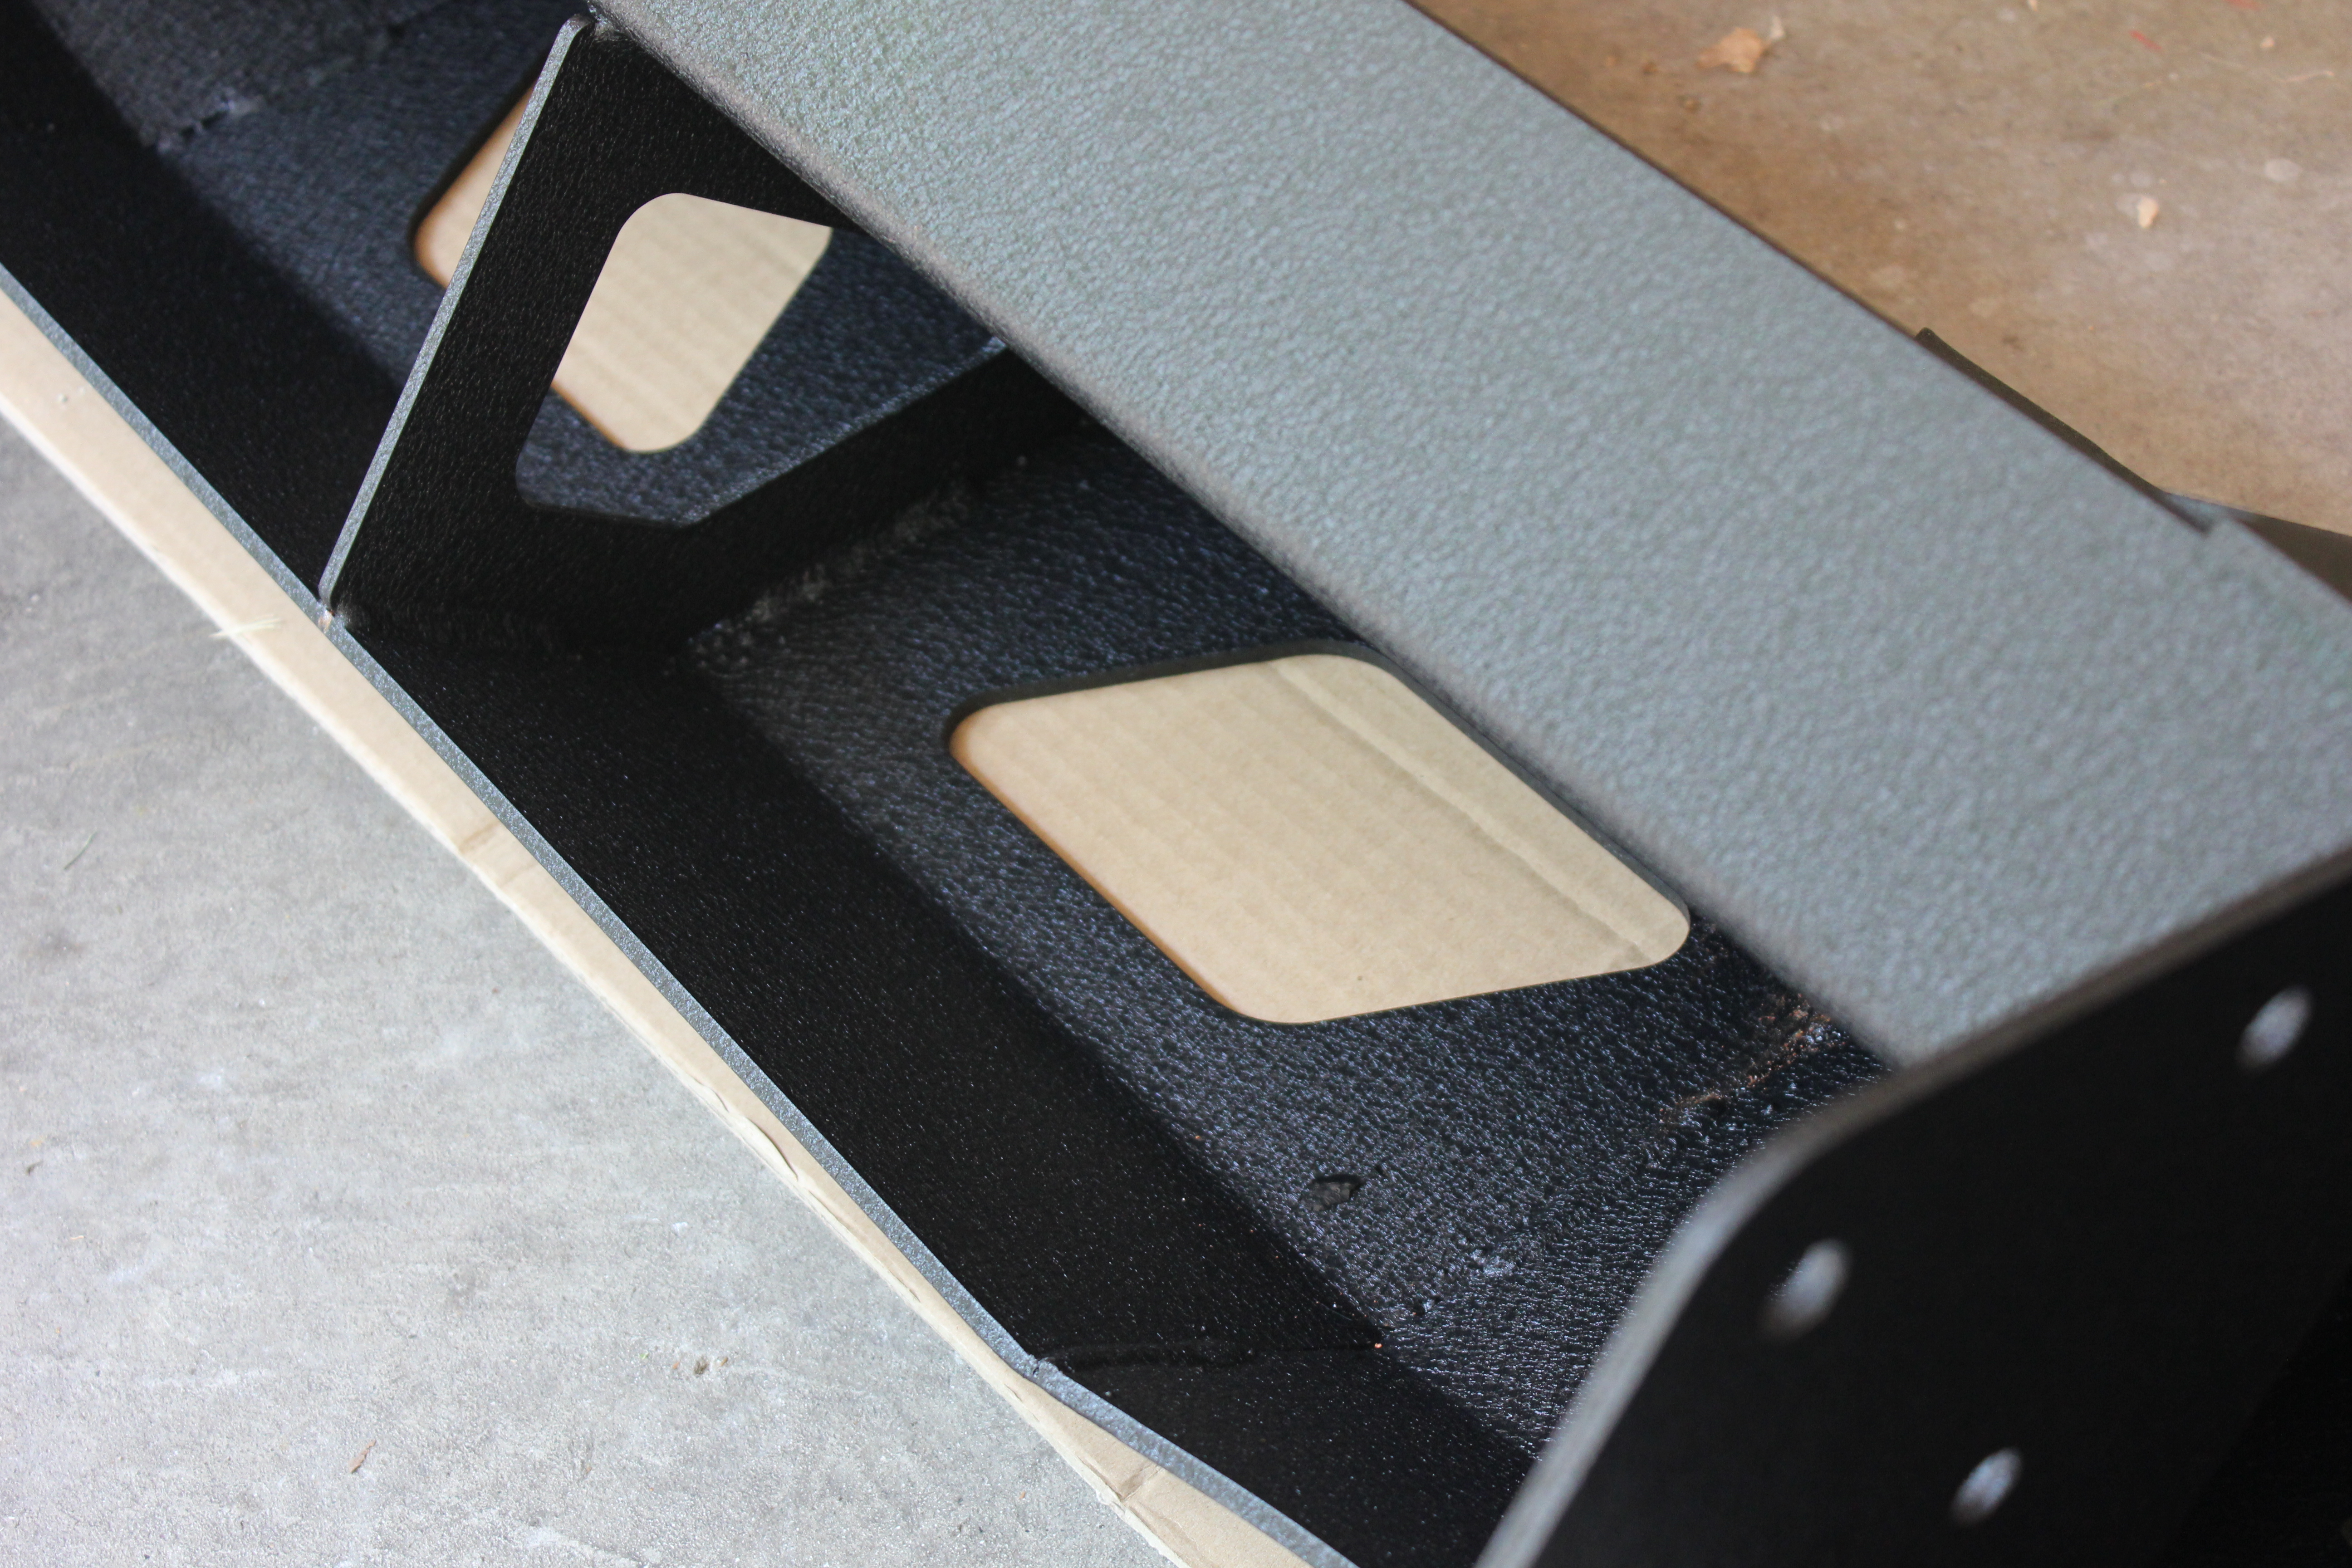
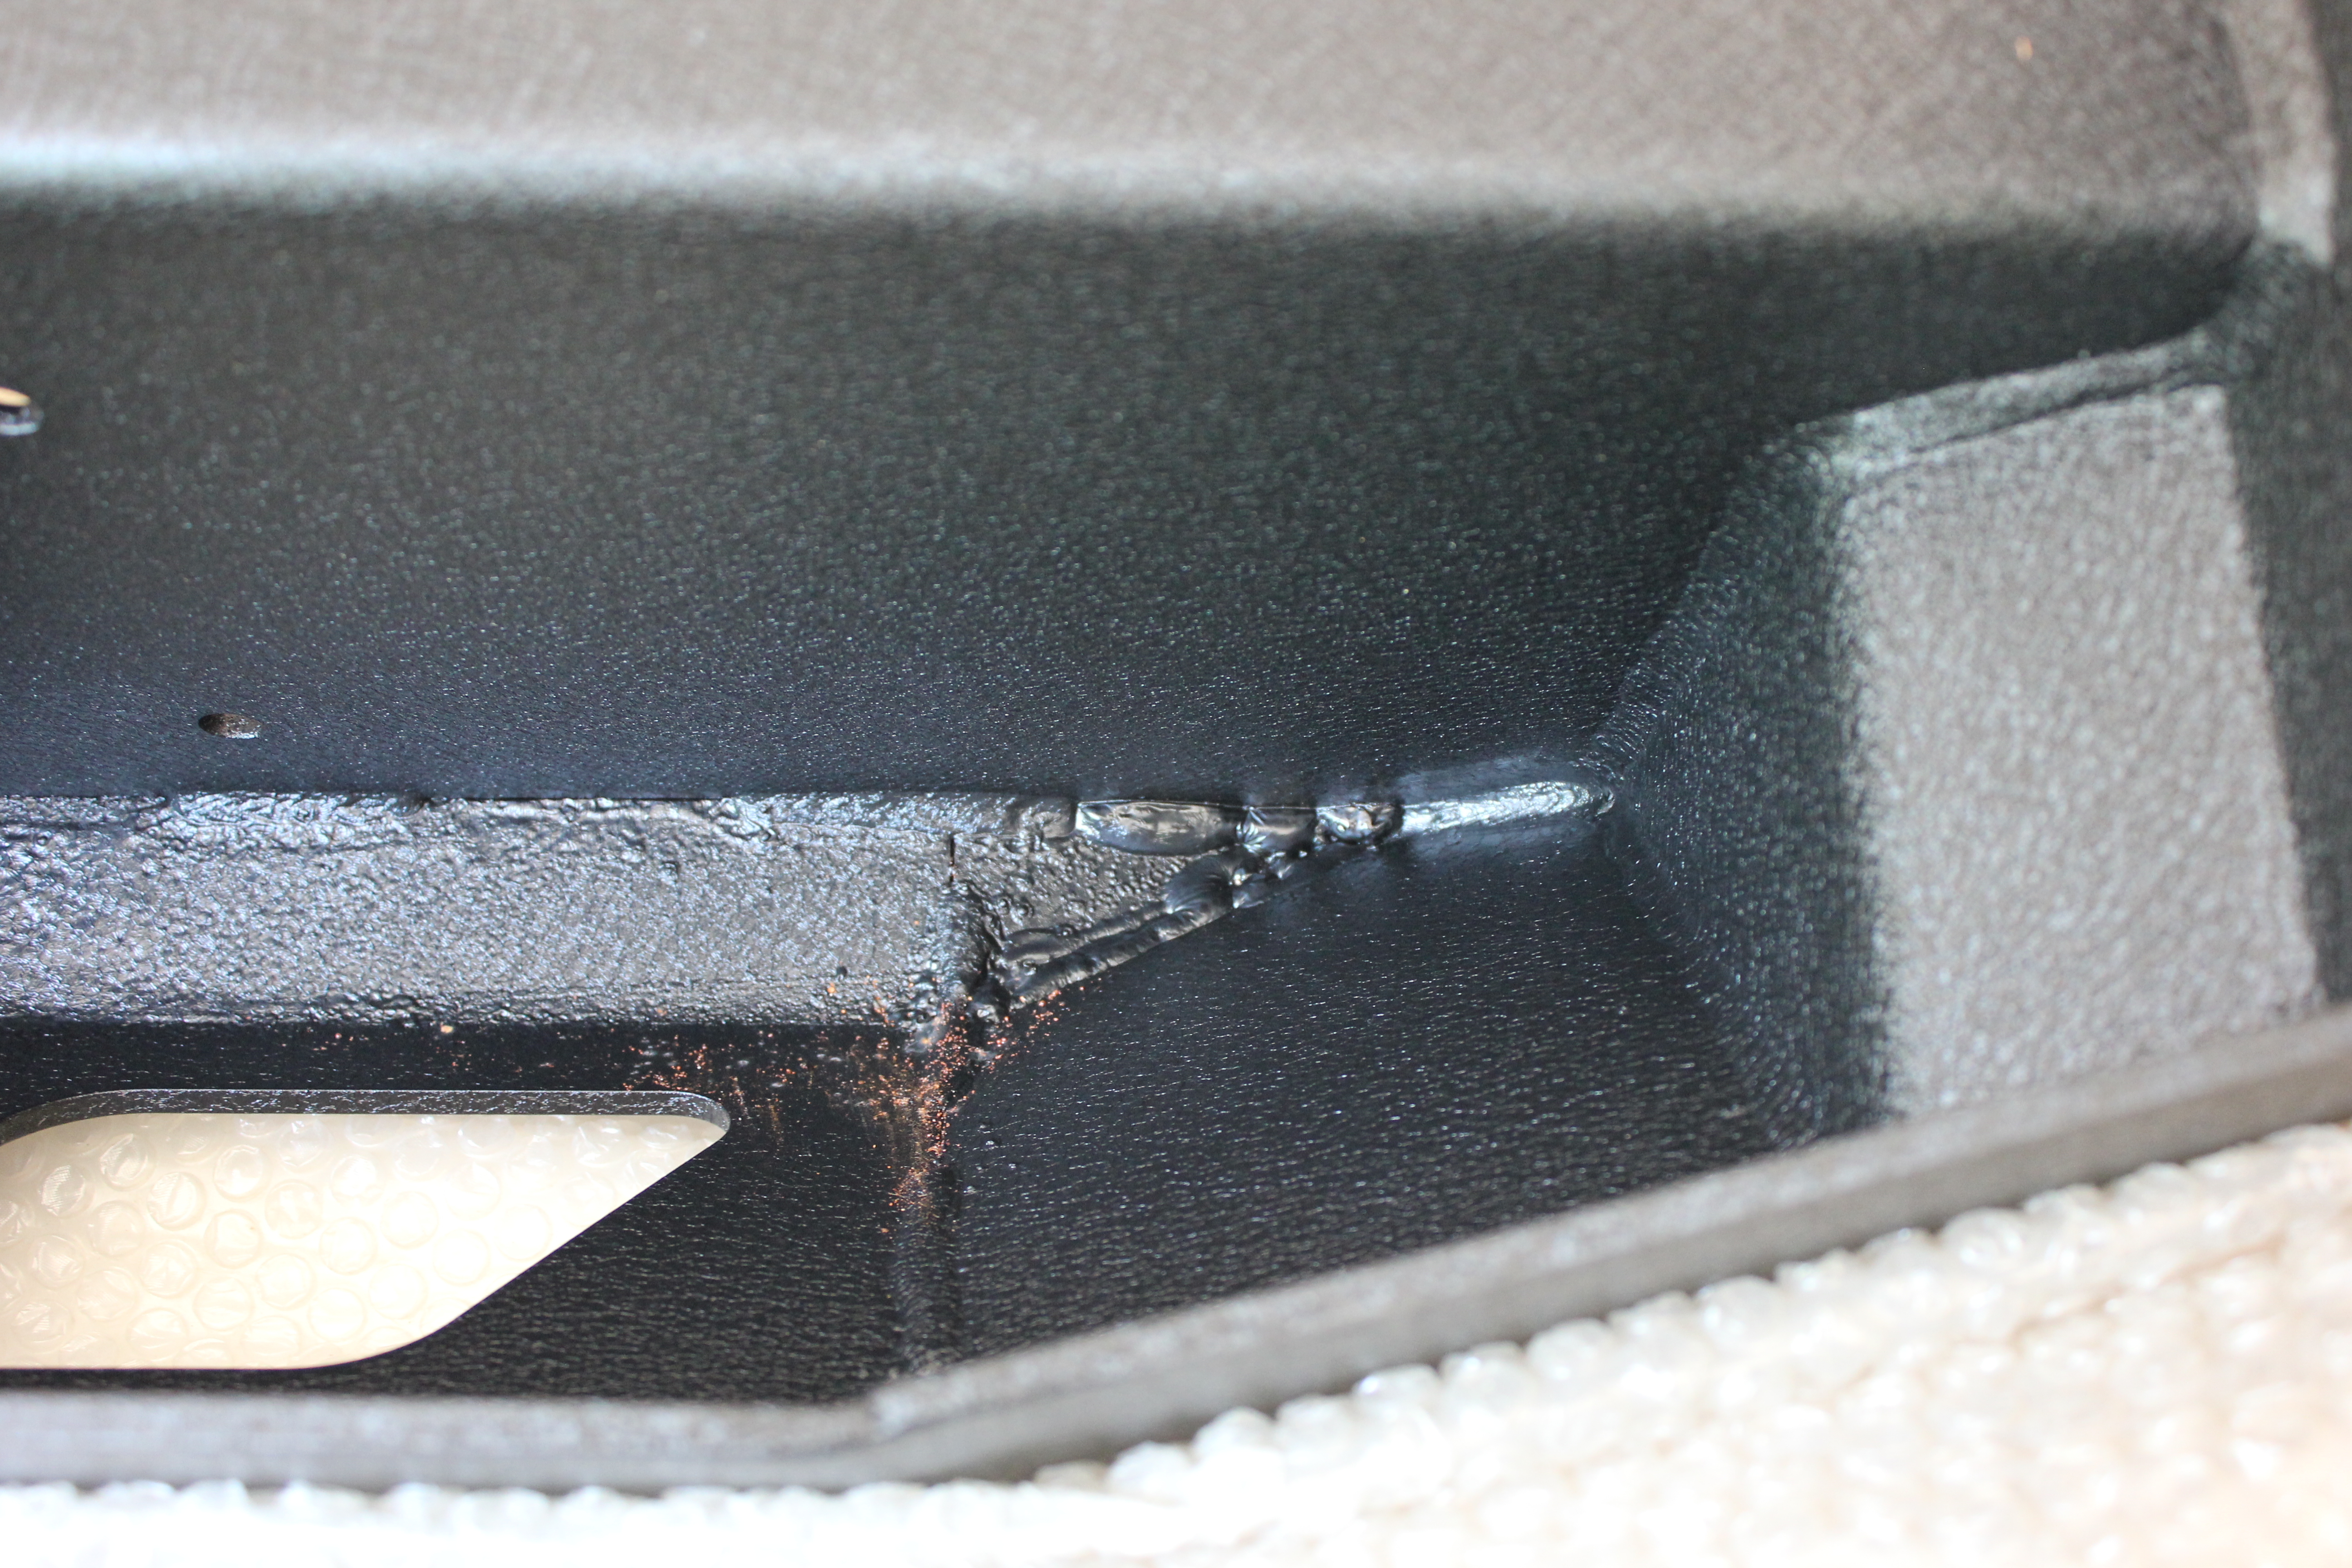
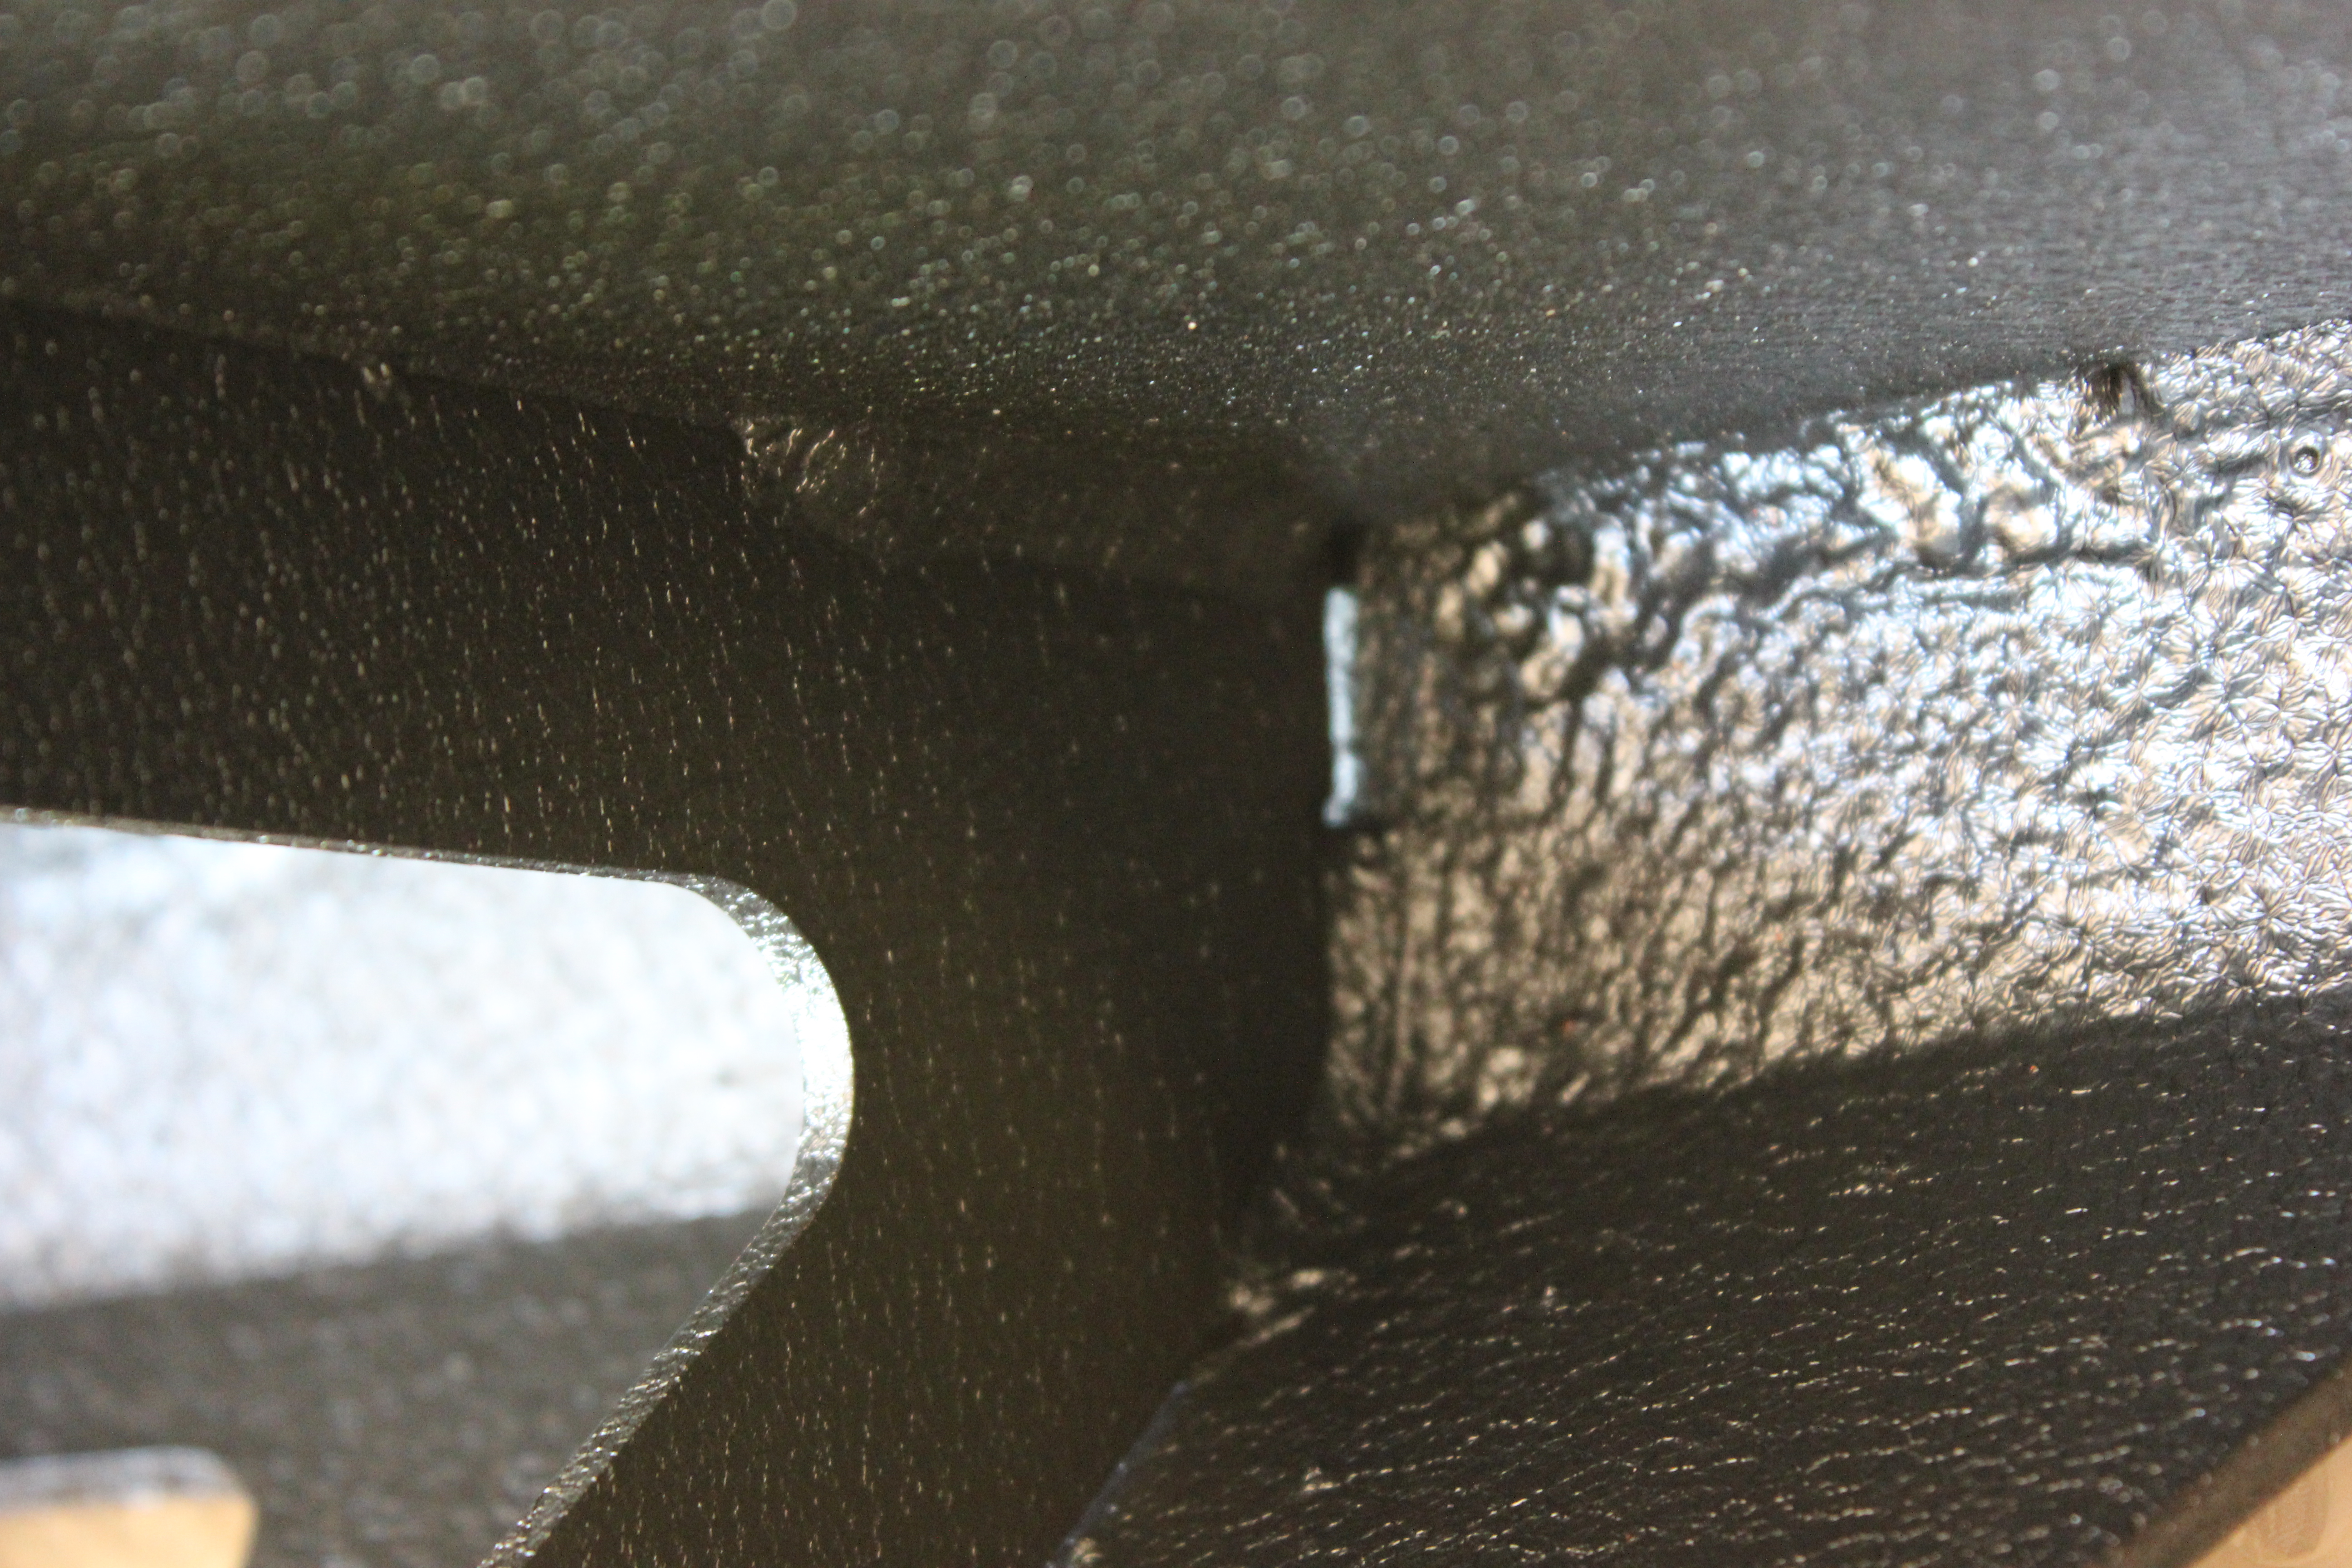
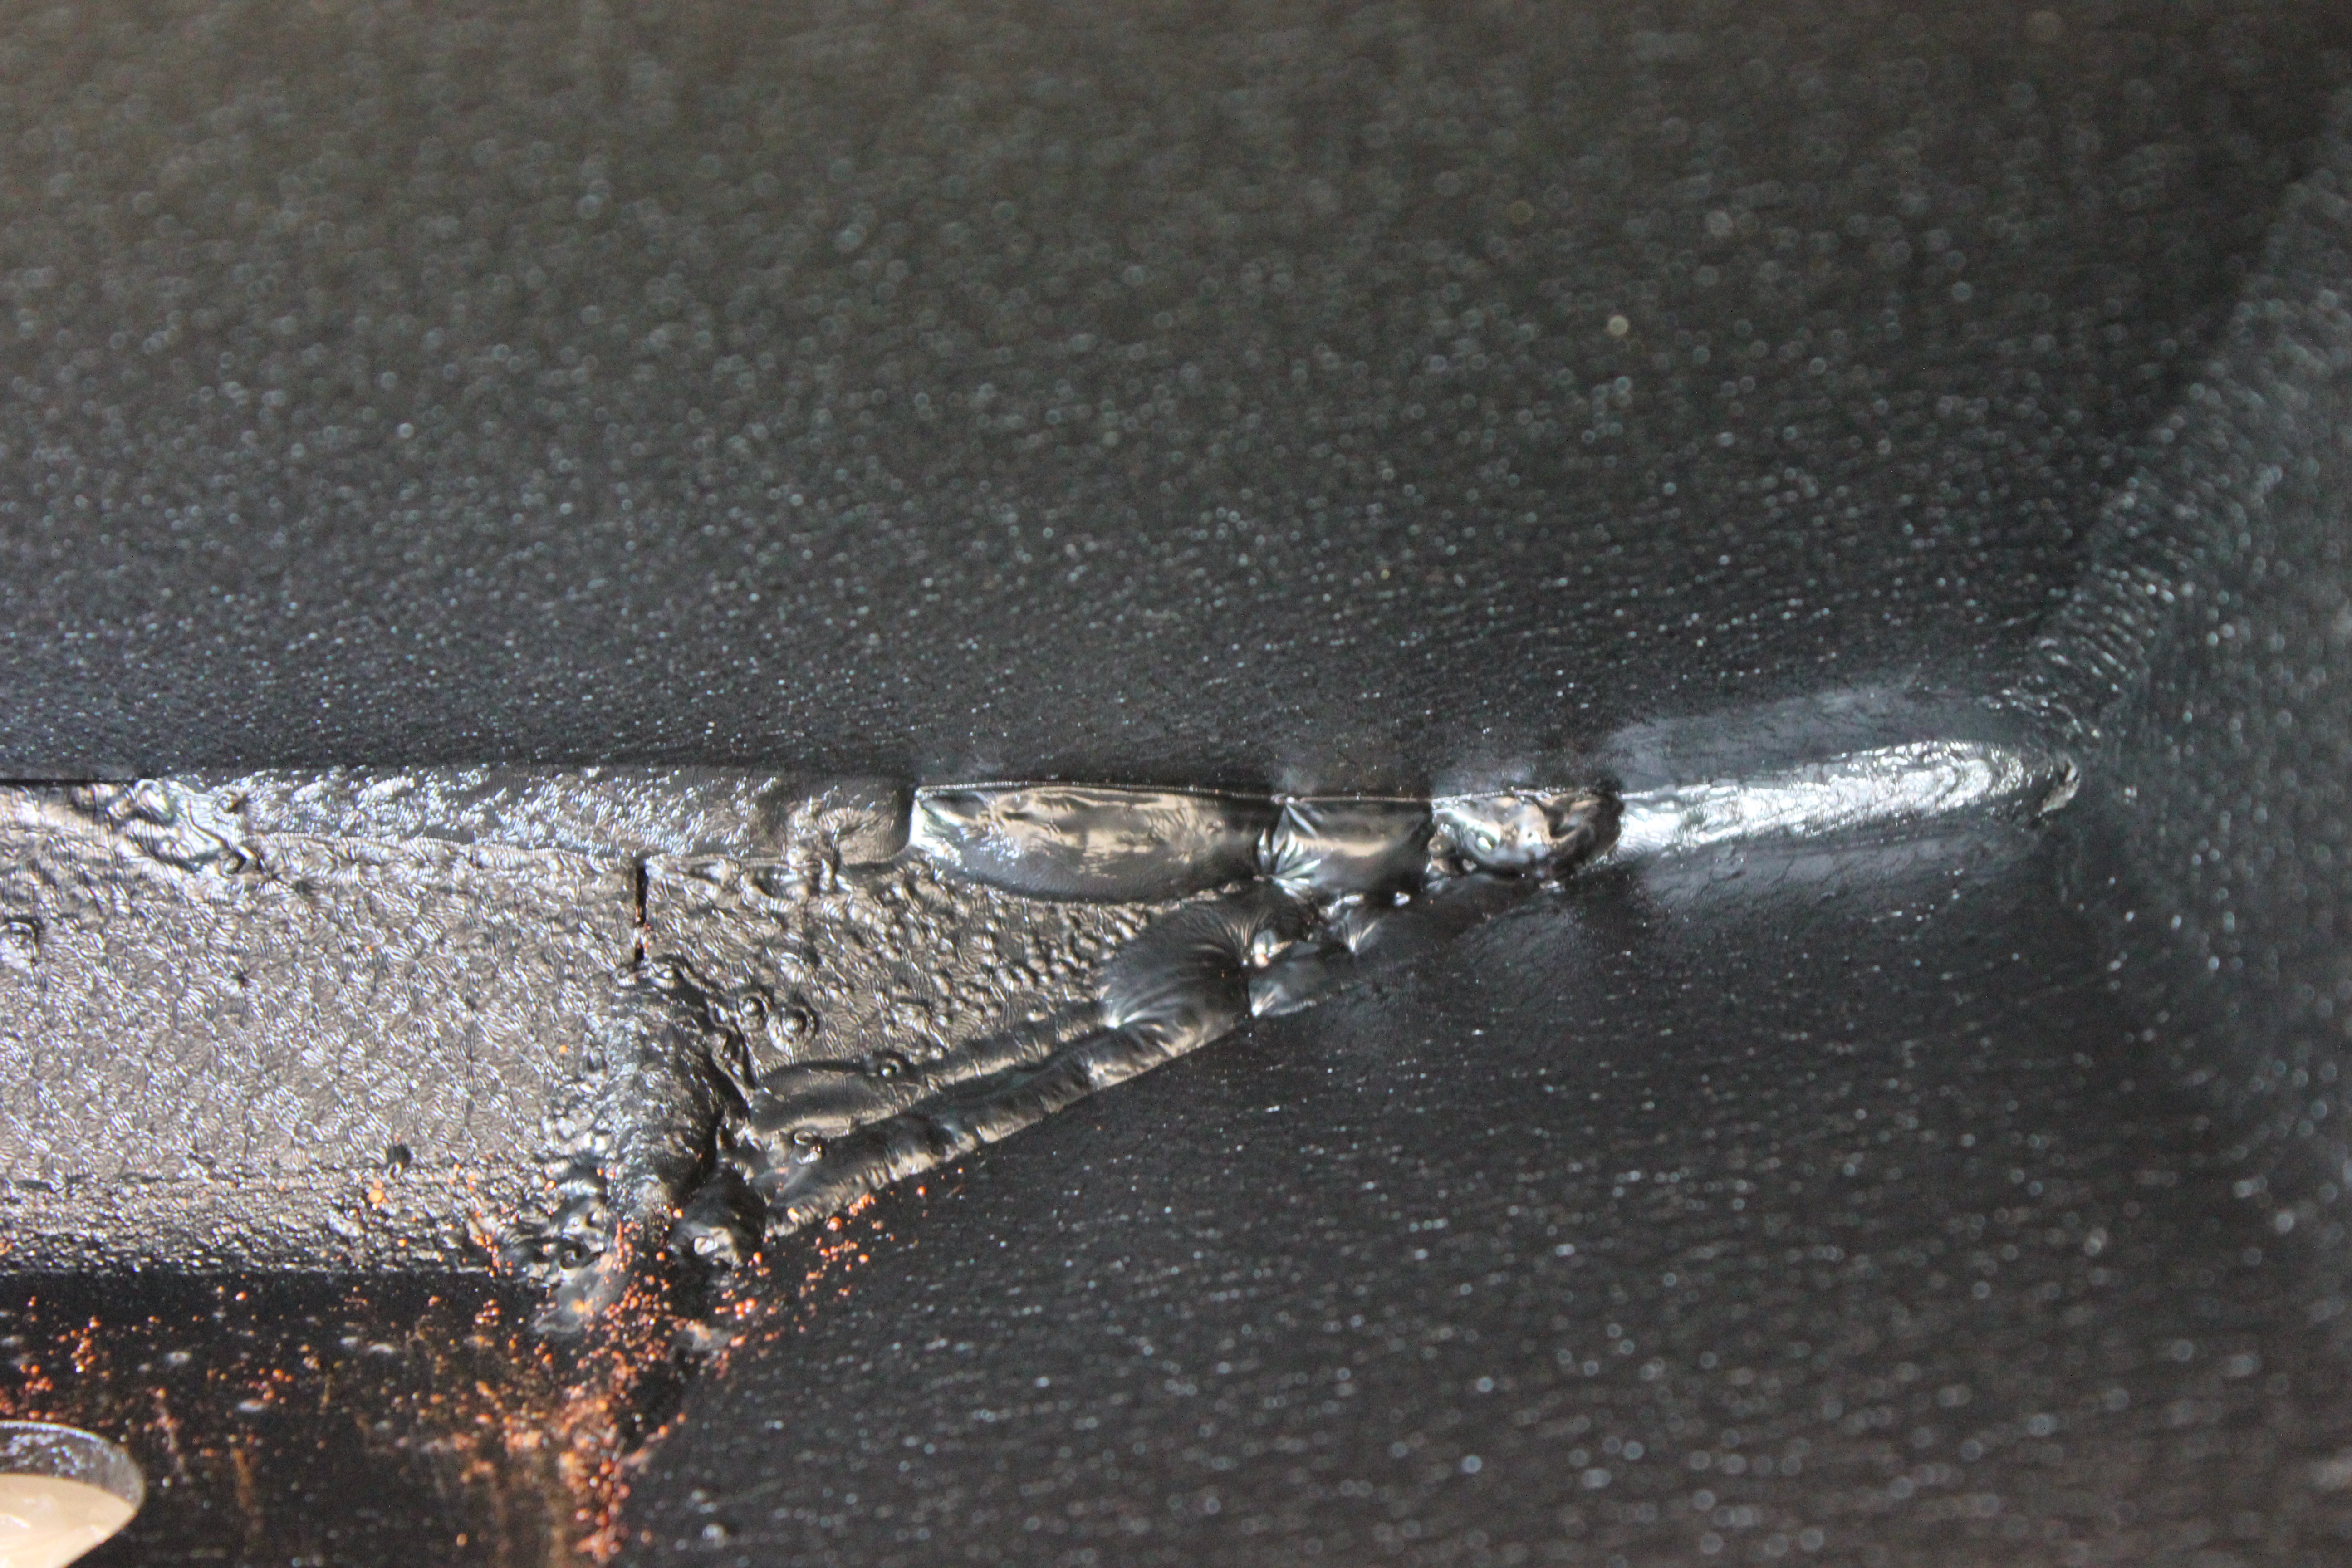
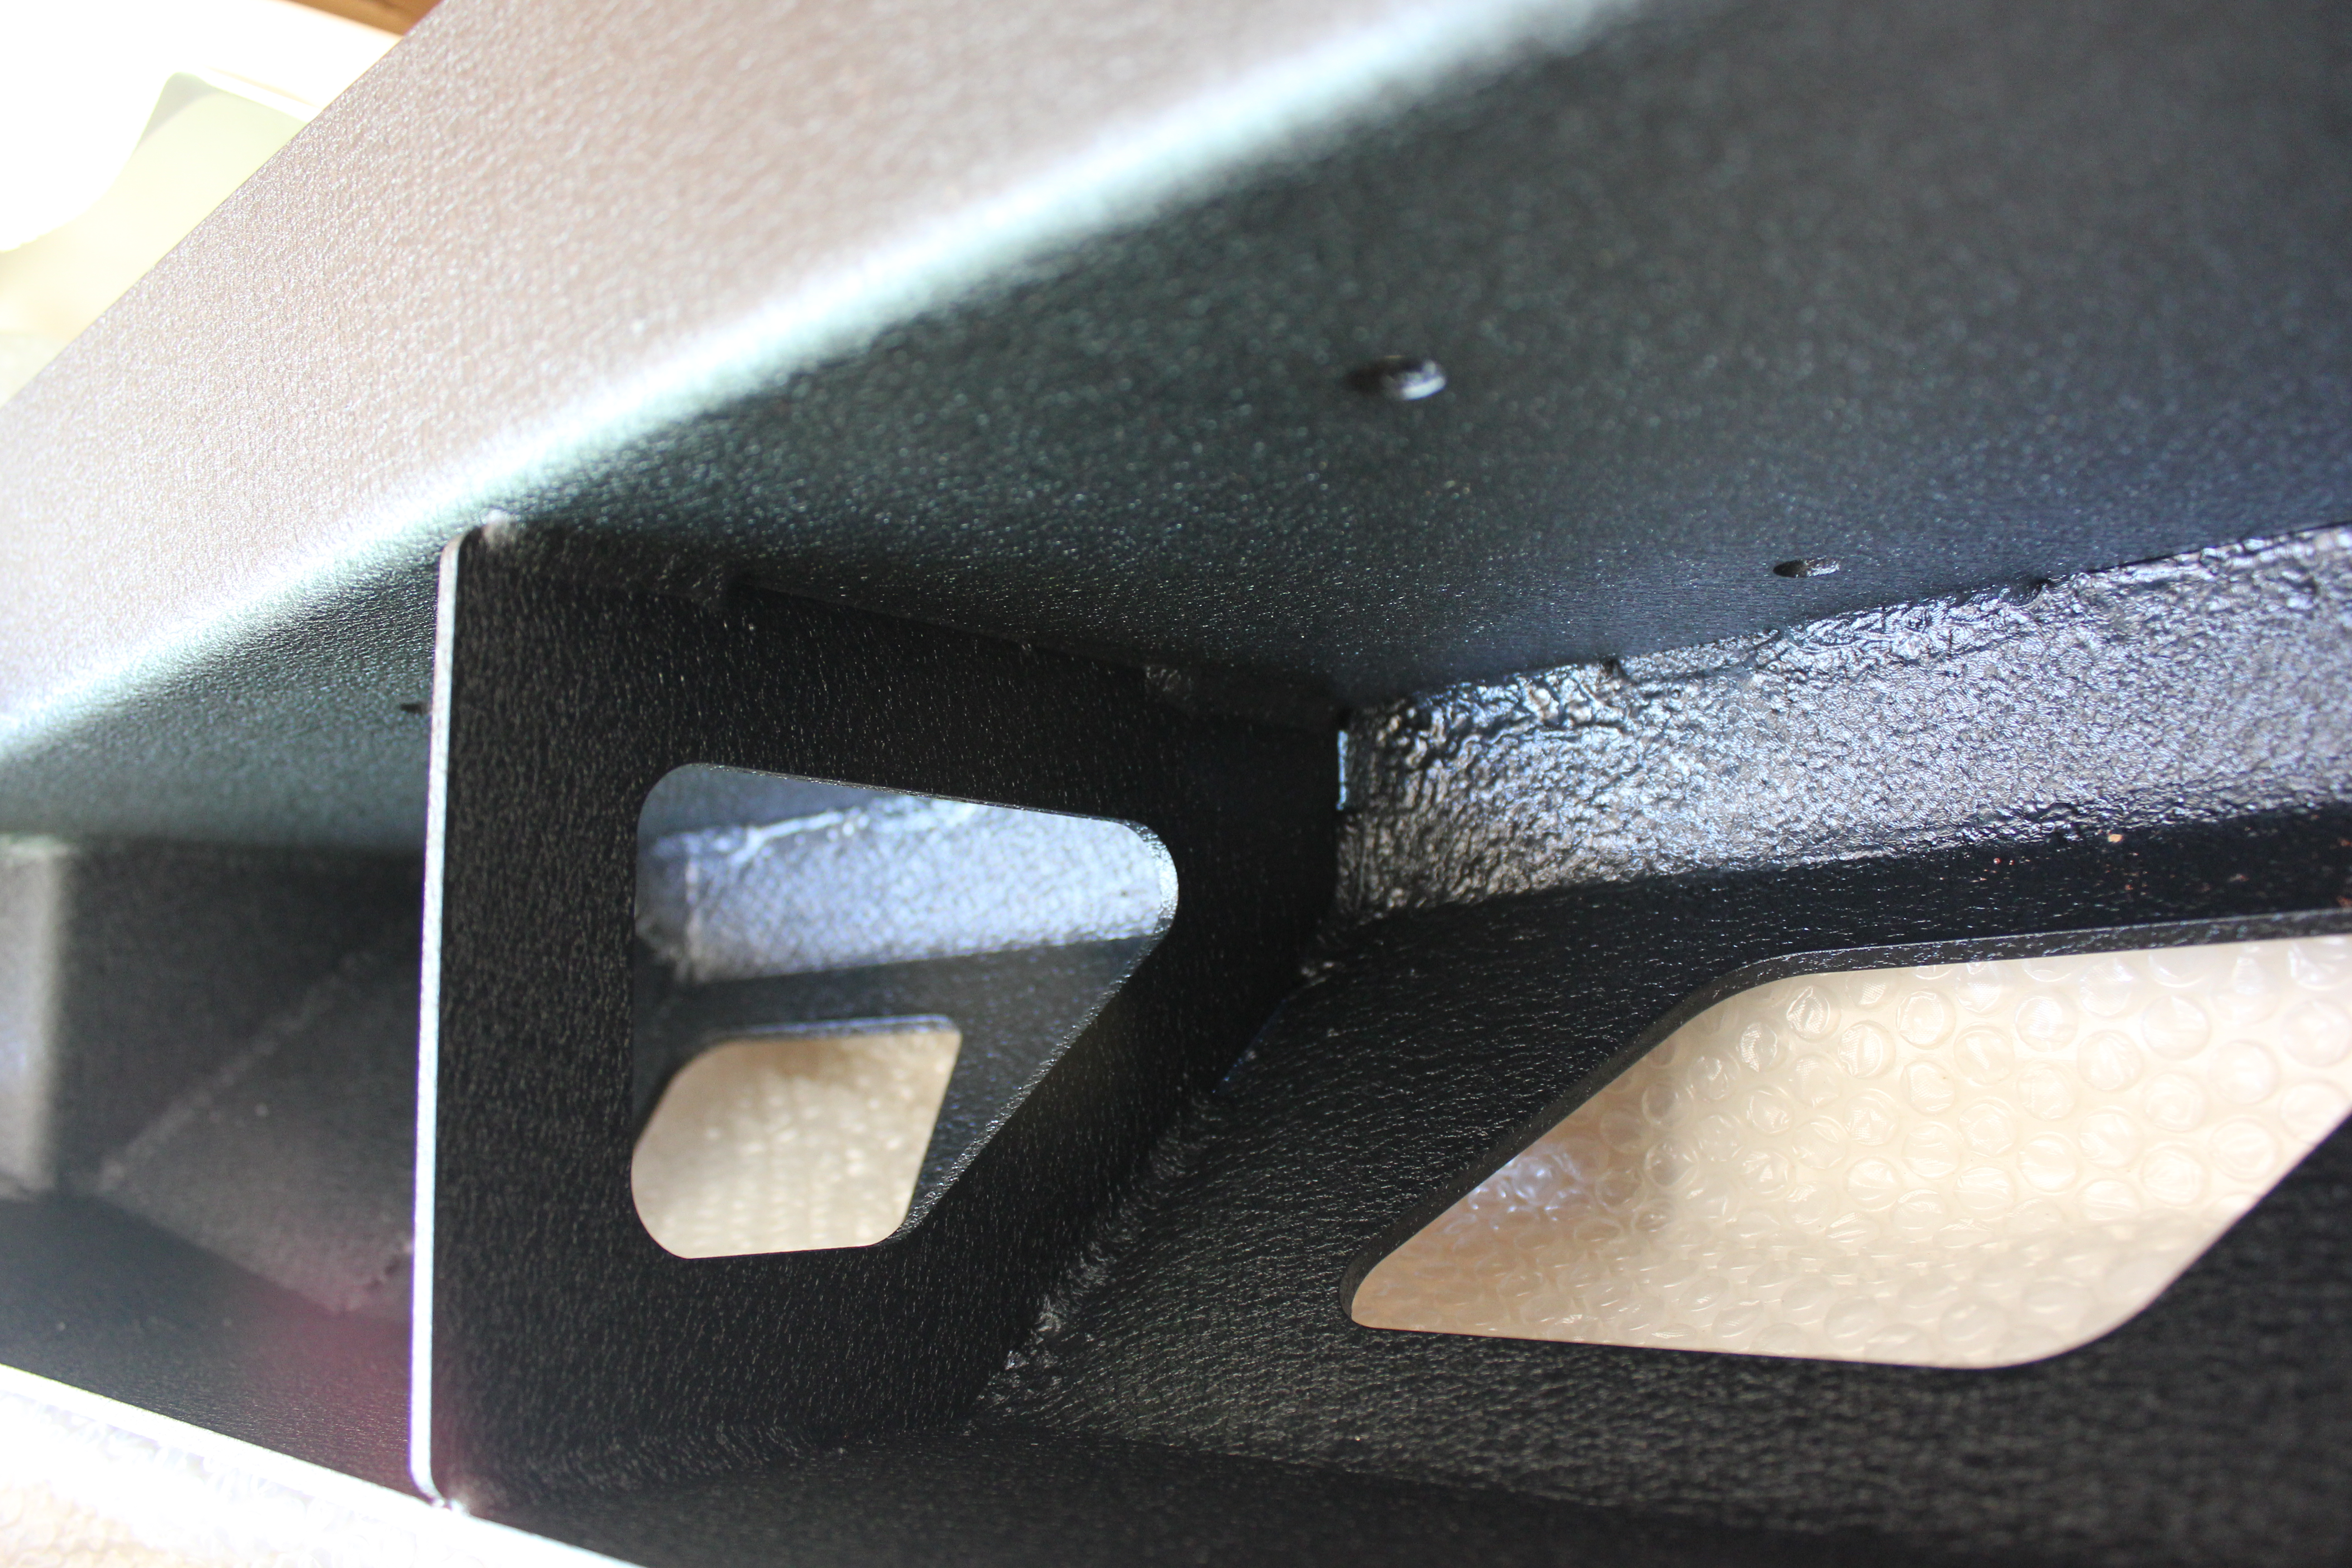
Note that there are basically 4 sections here in the back. There is a center support under the winch plate, and then the two supports that connect to the bumper brackets:
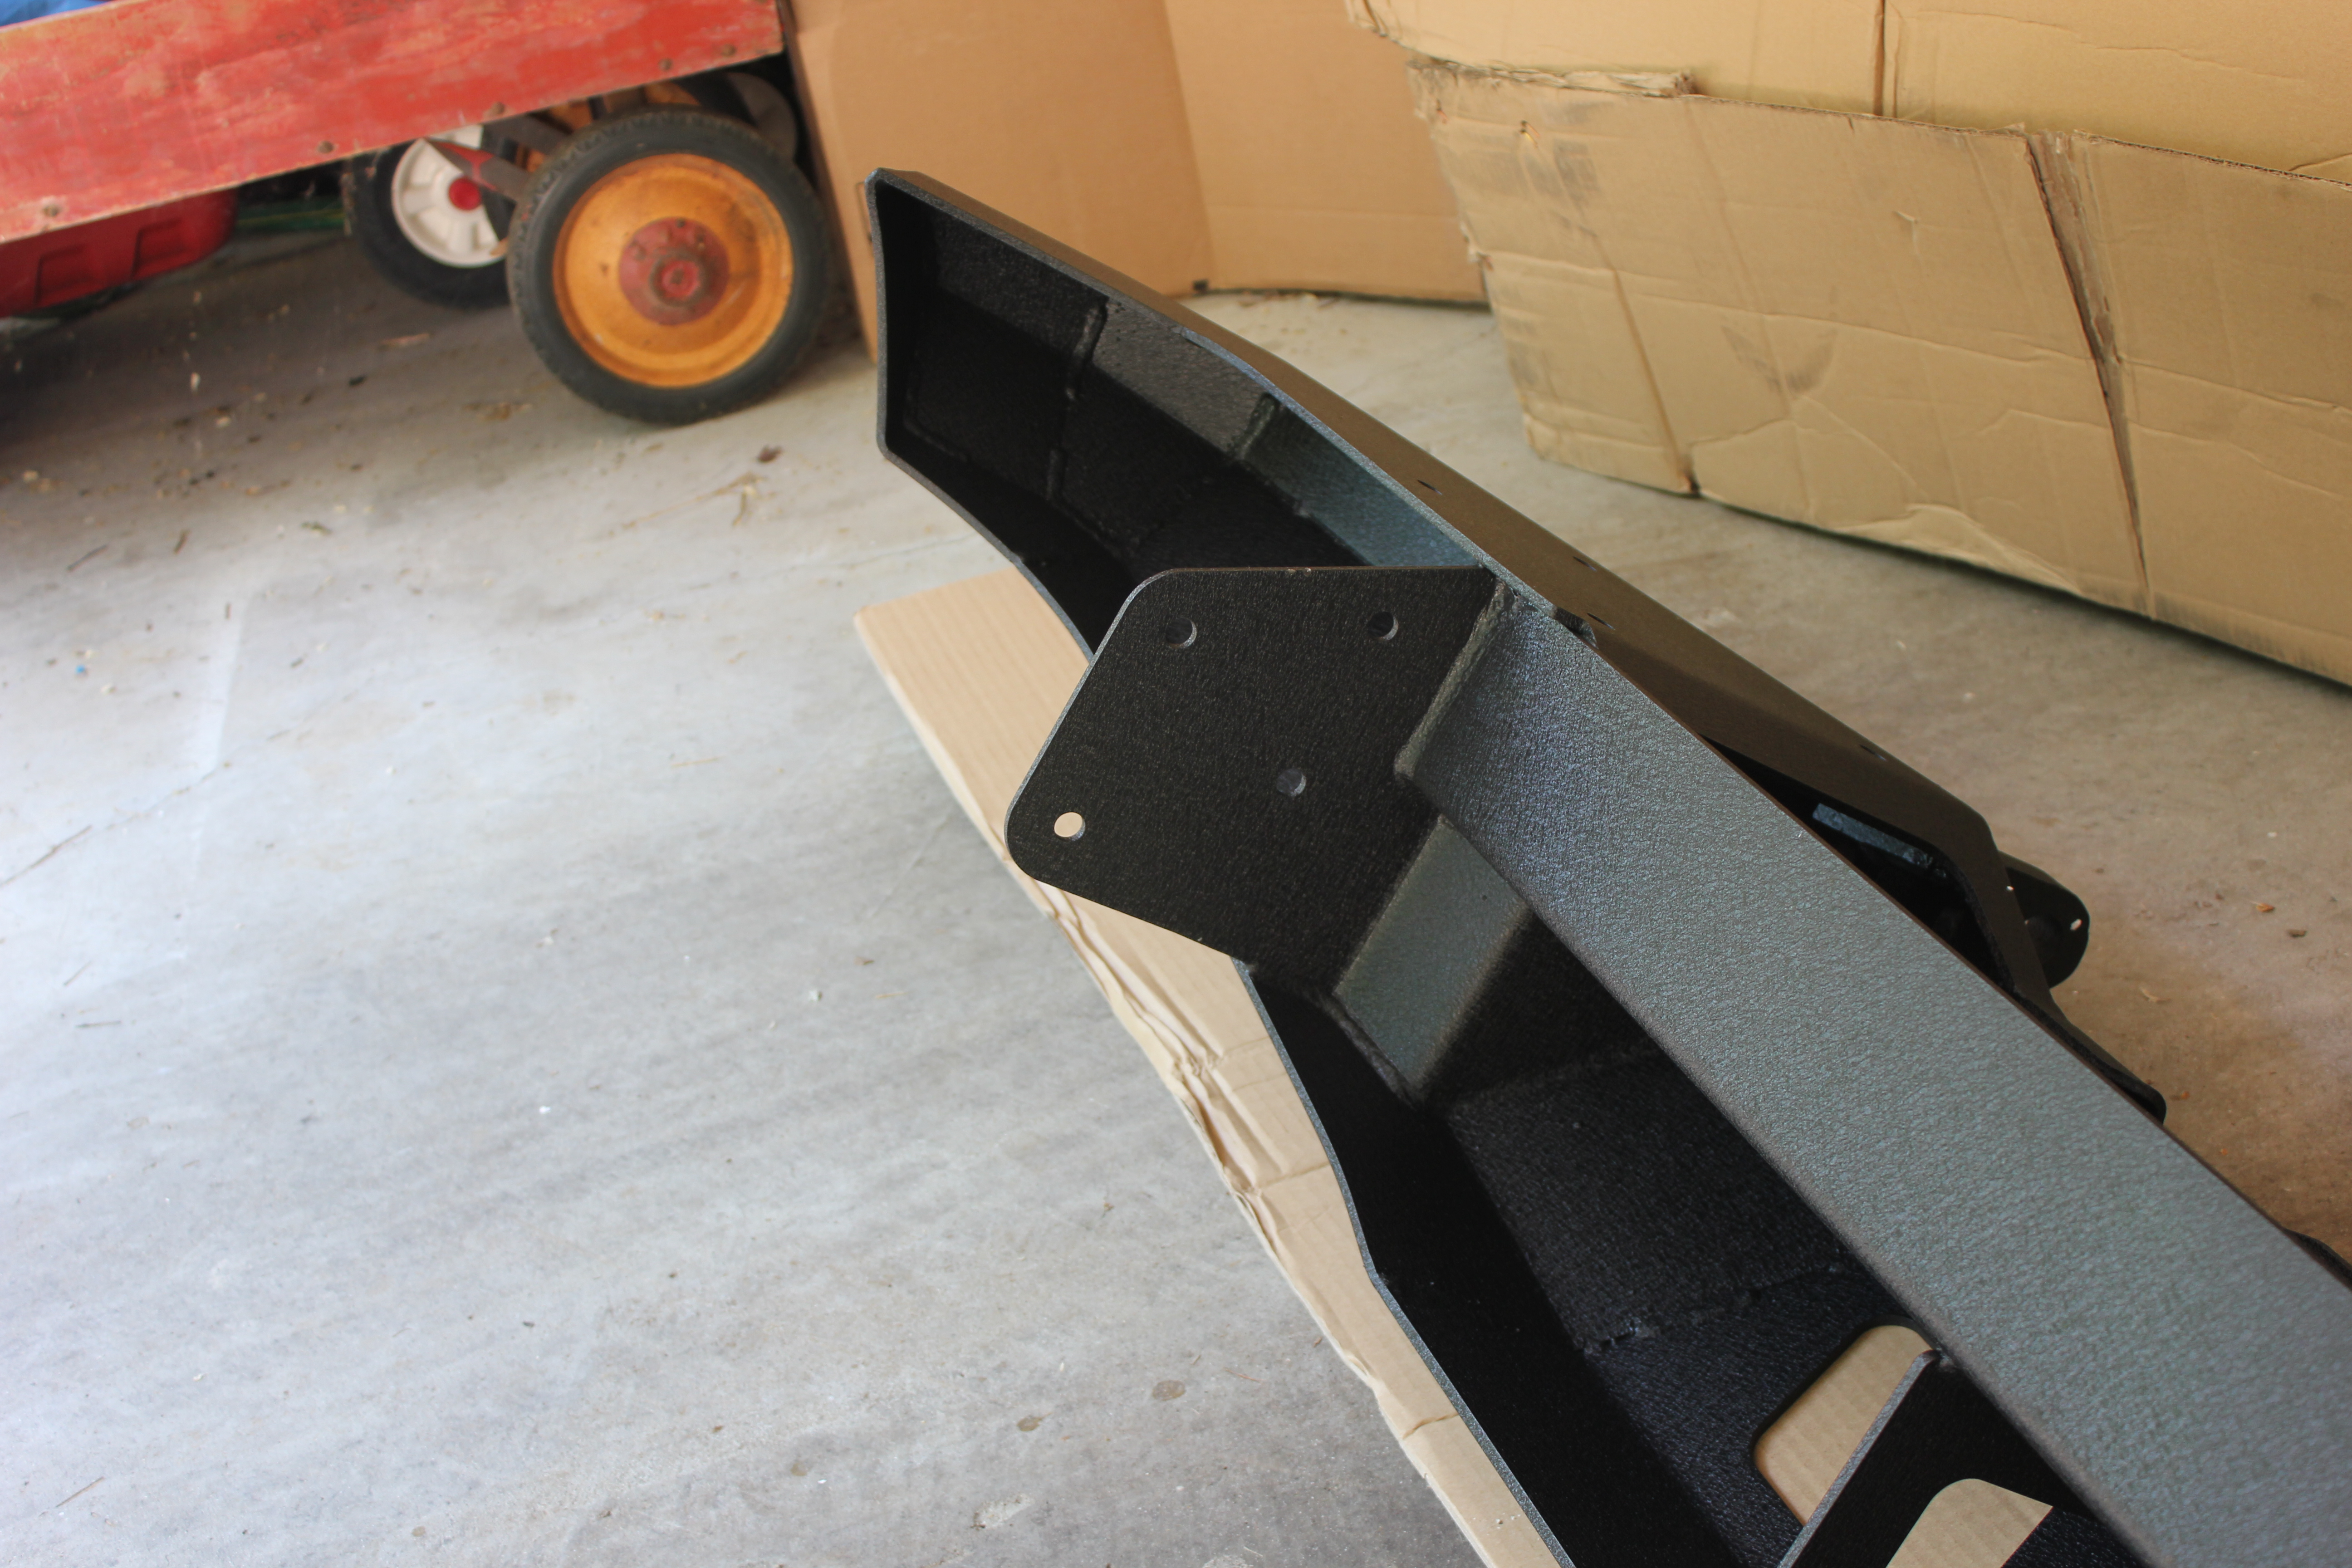
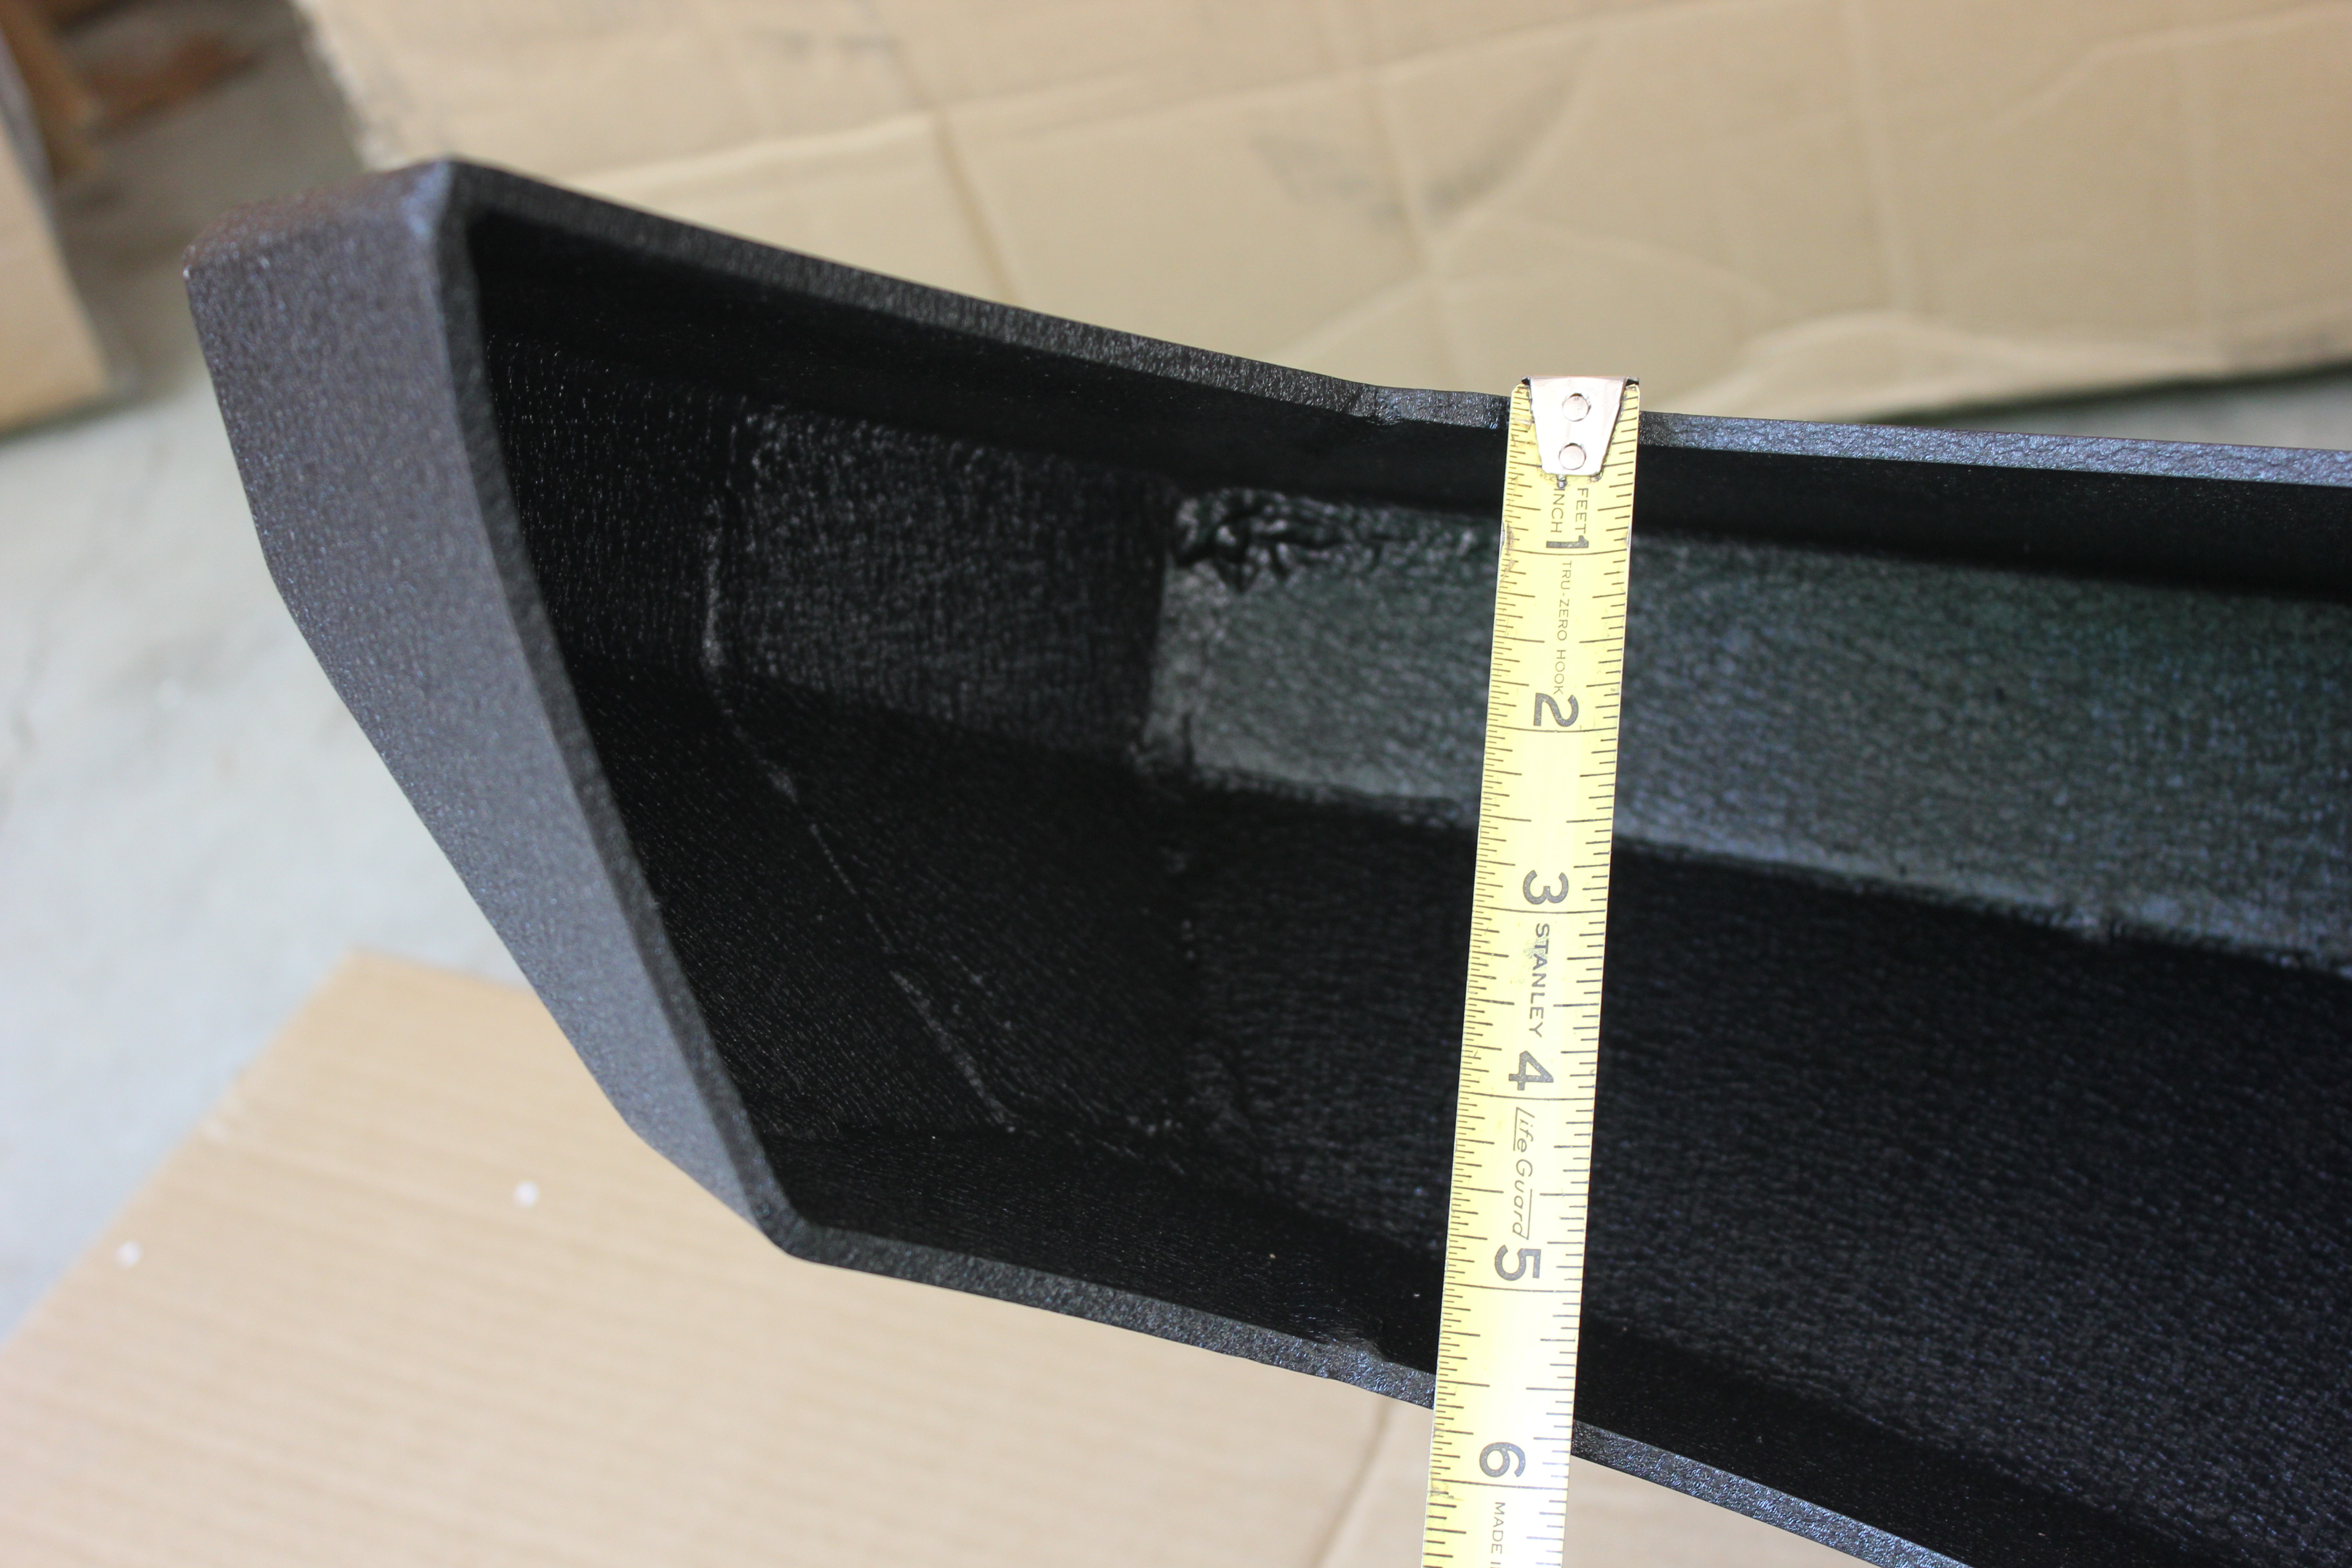
This odd triangular cut is for a Hi-Lift jack. Note how it lines up with the bumper bracket (and, therefore, your unibody rail):
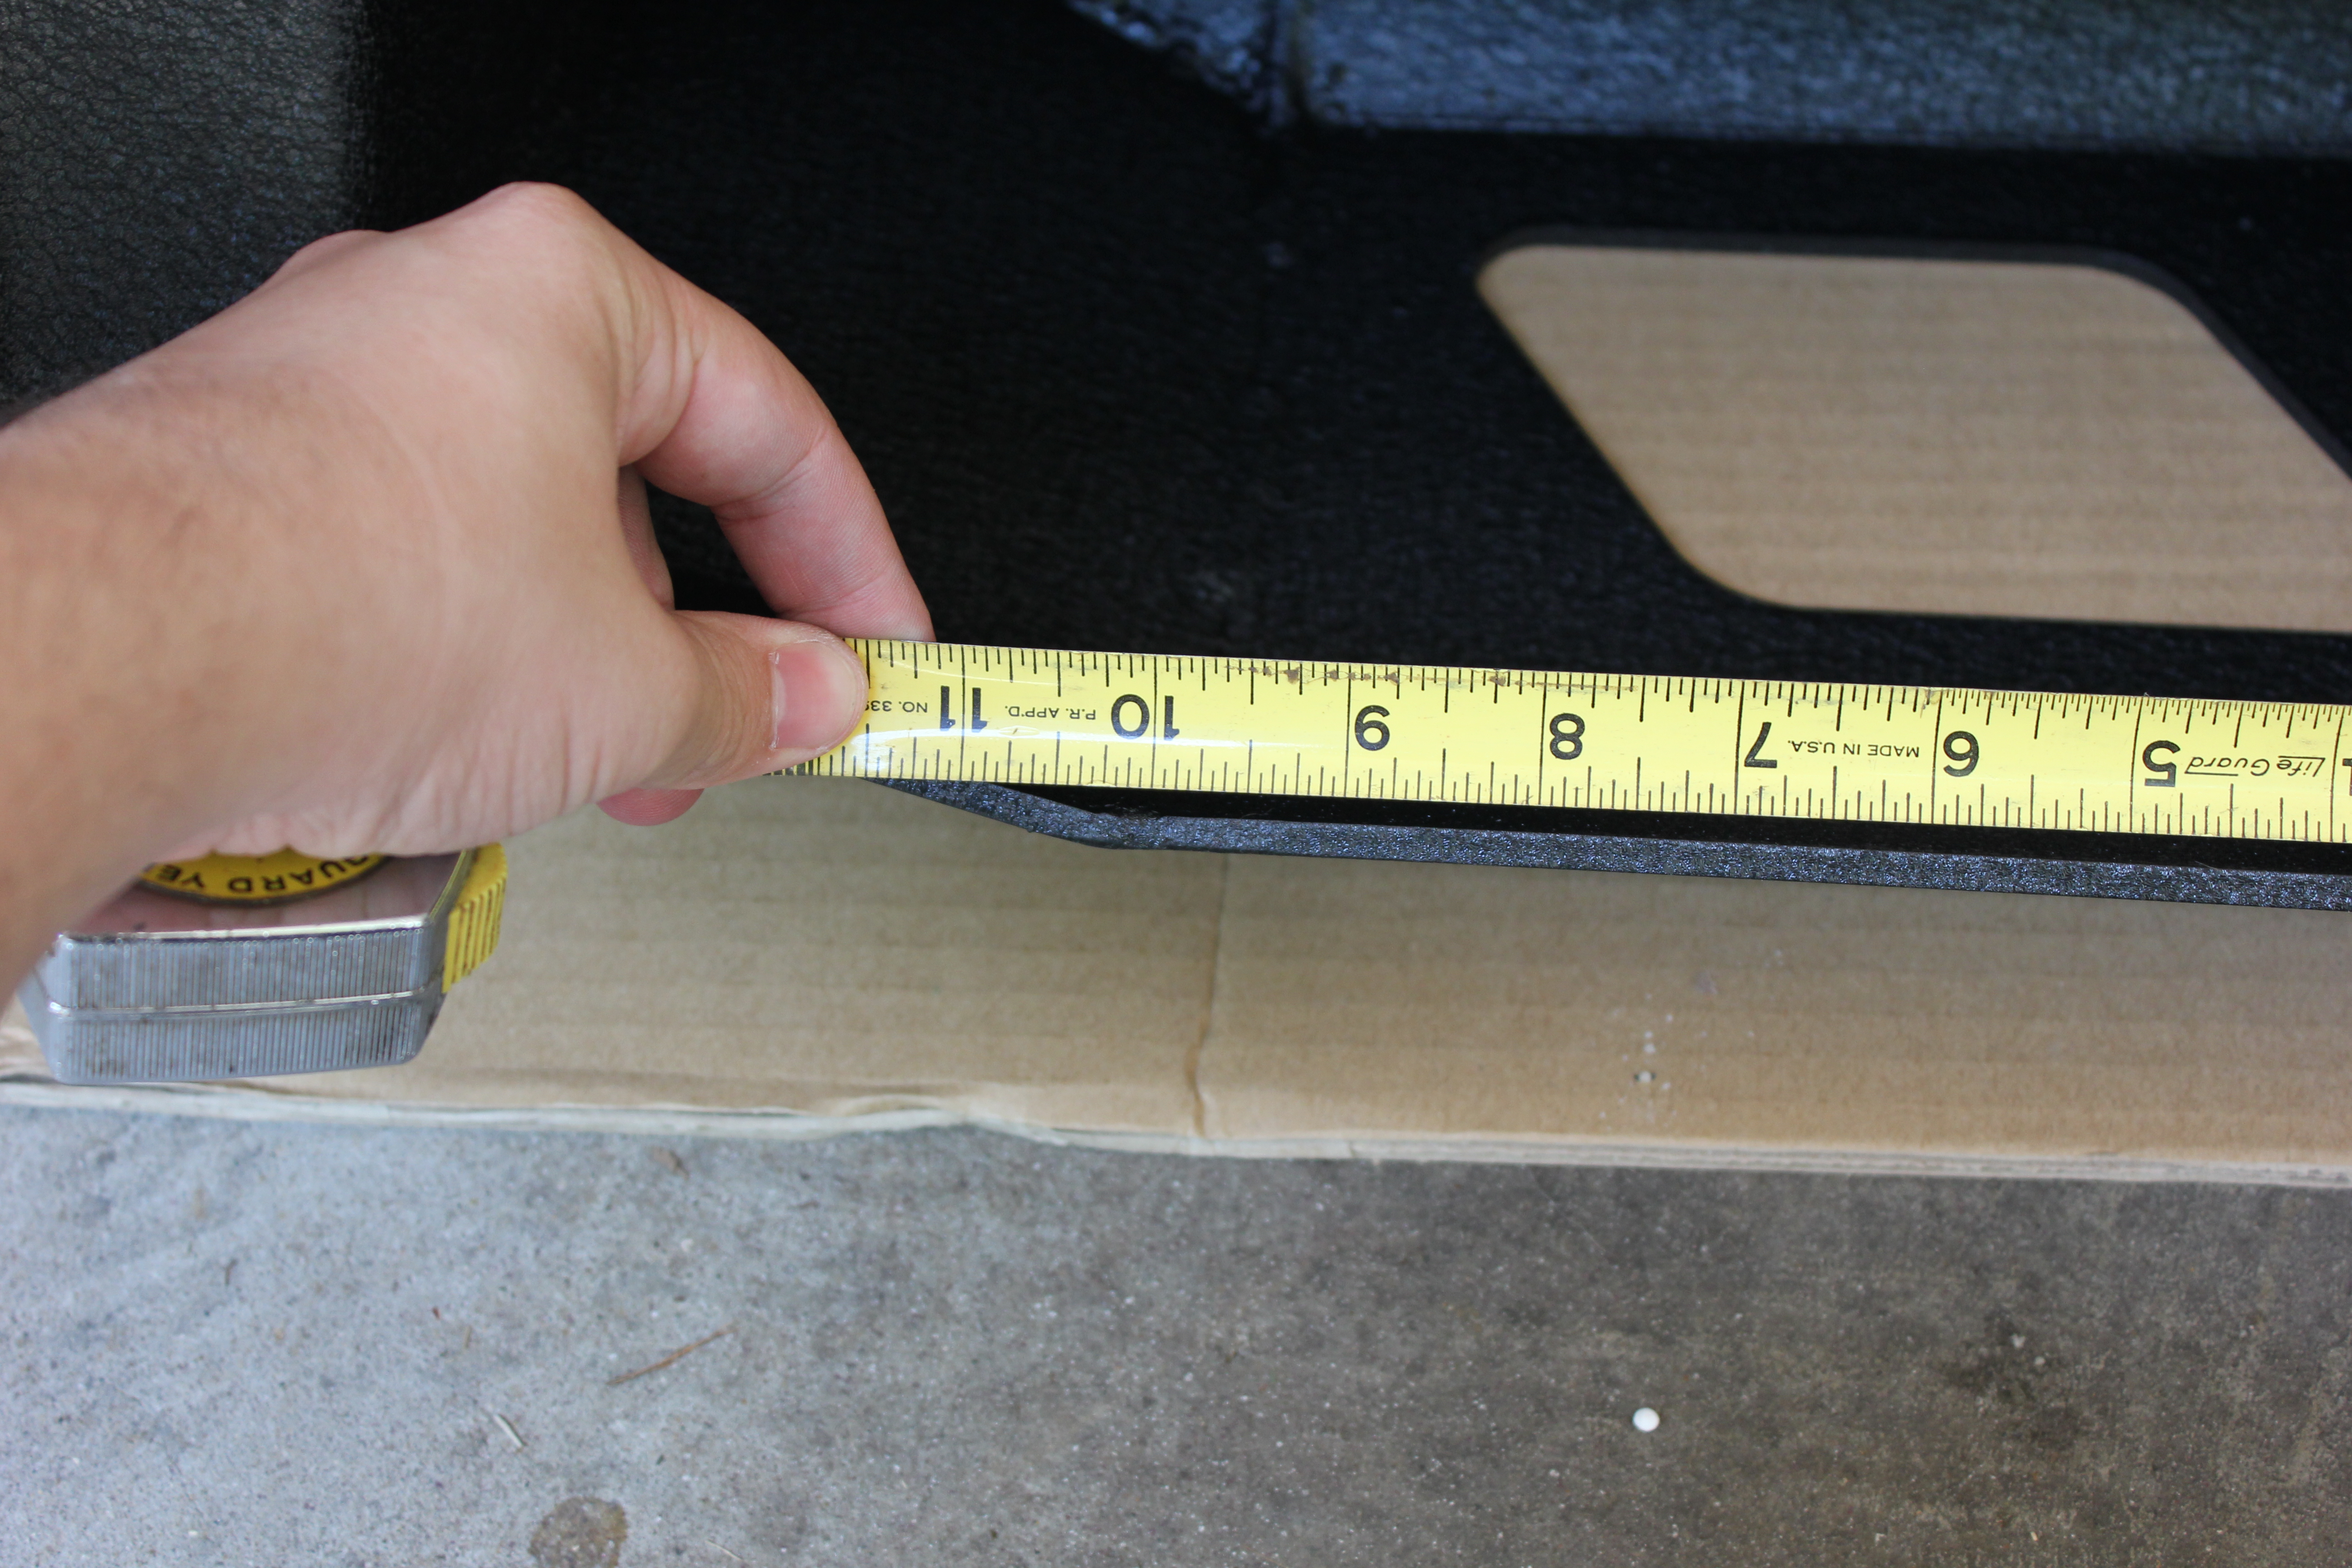
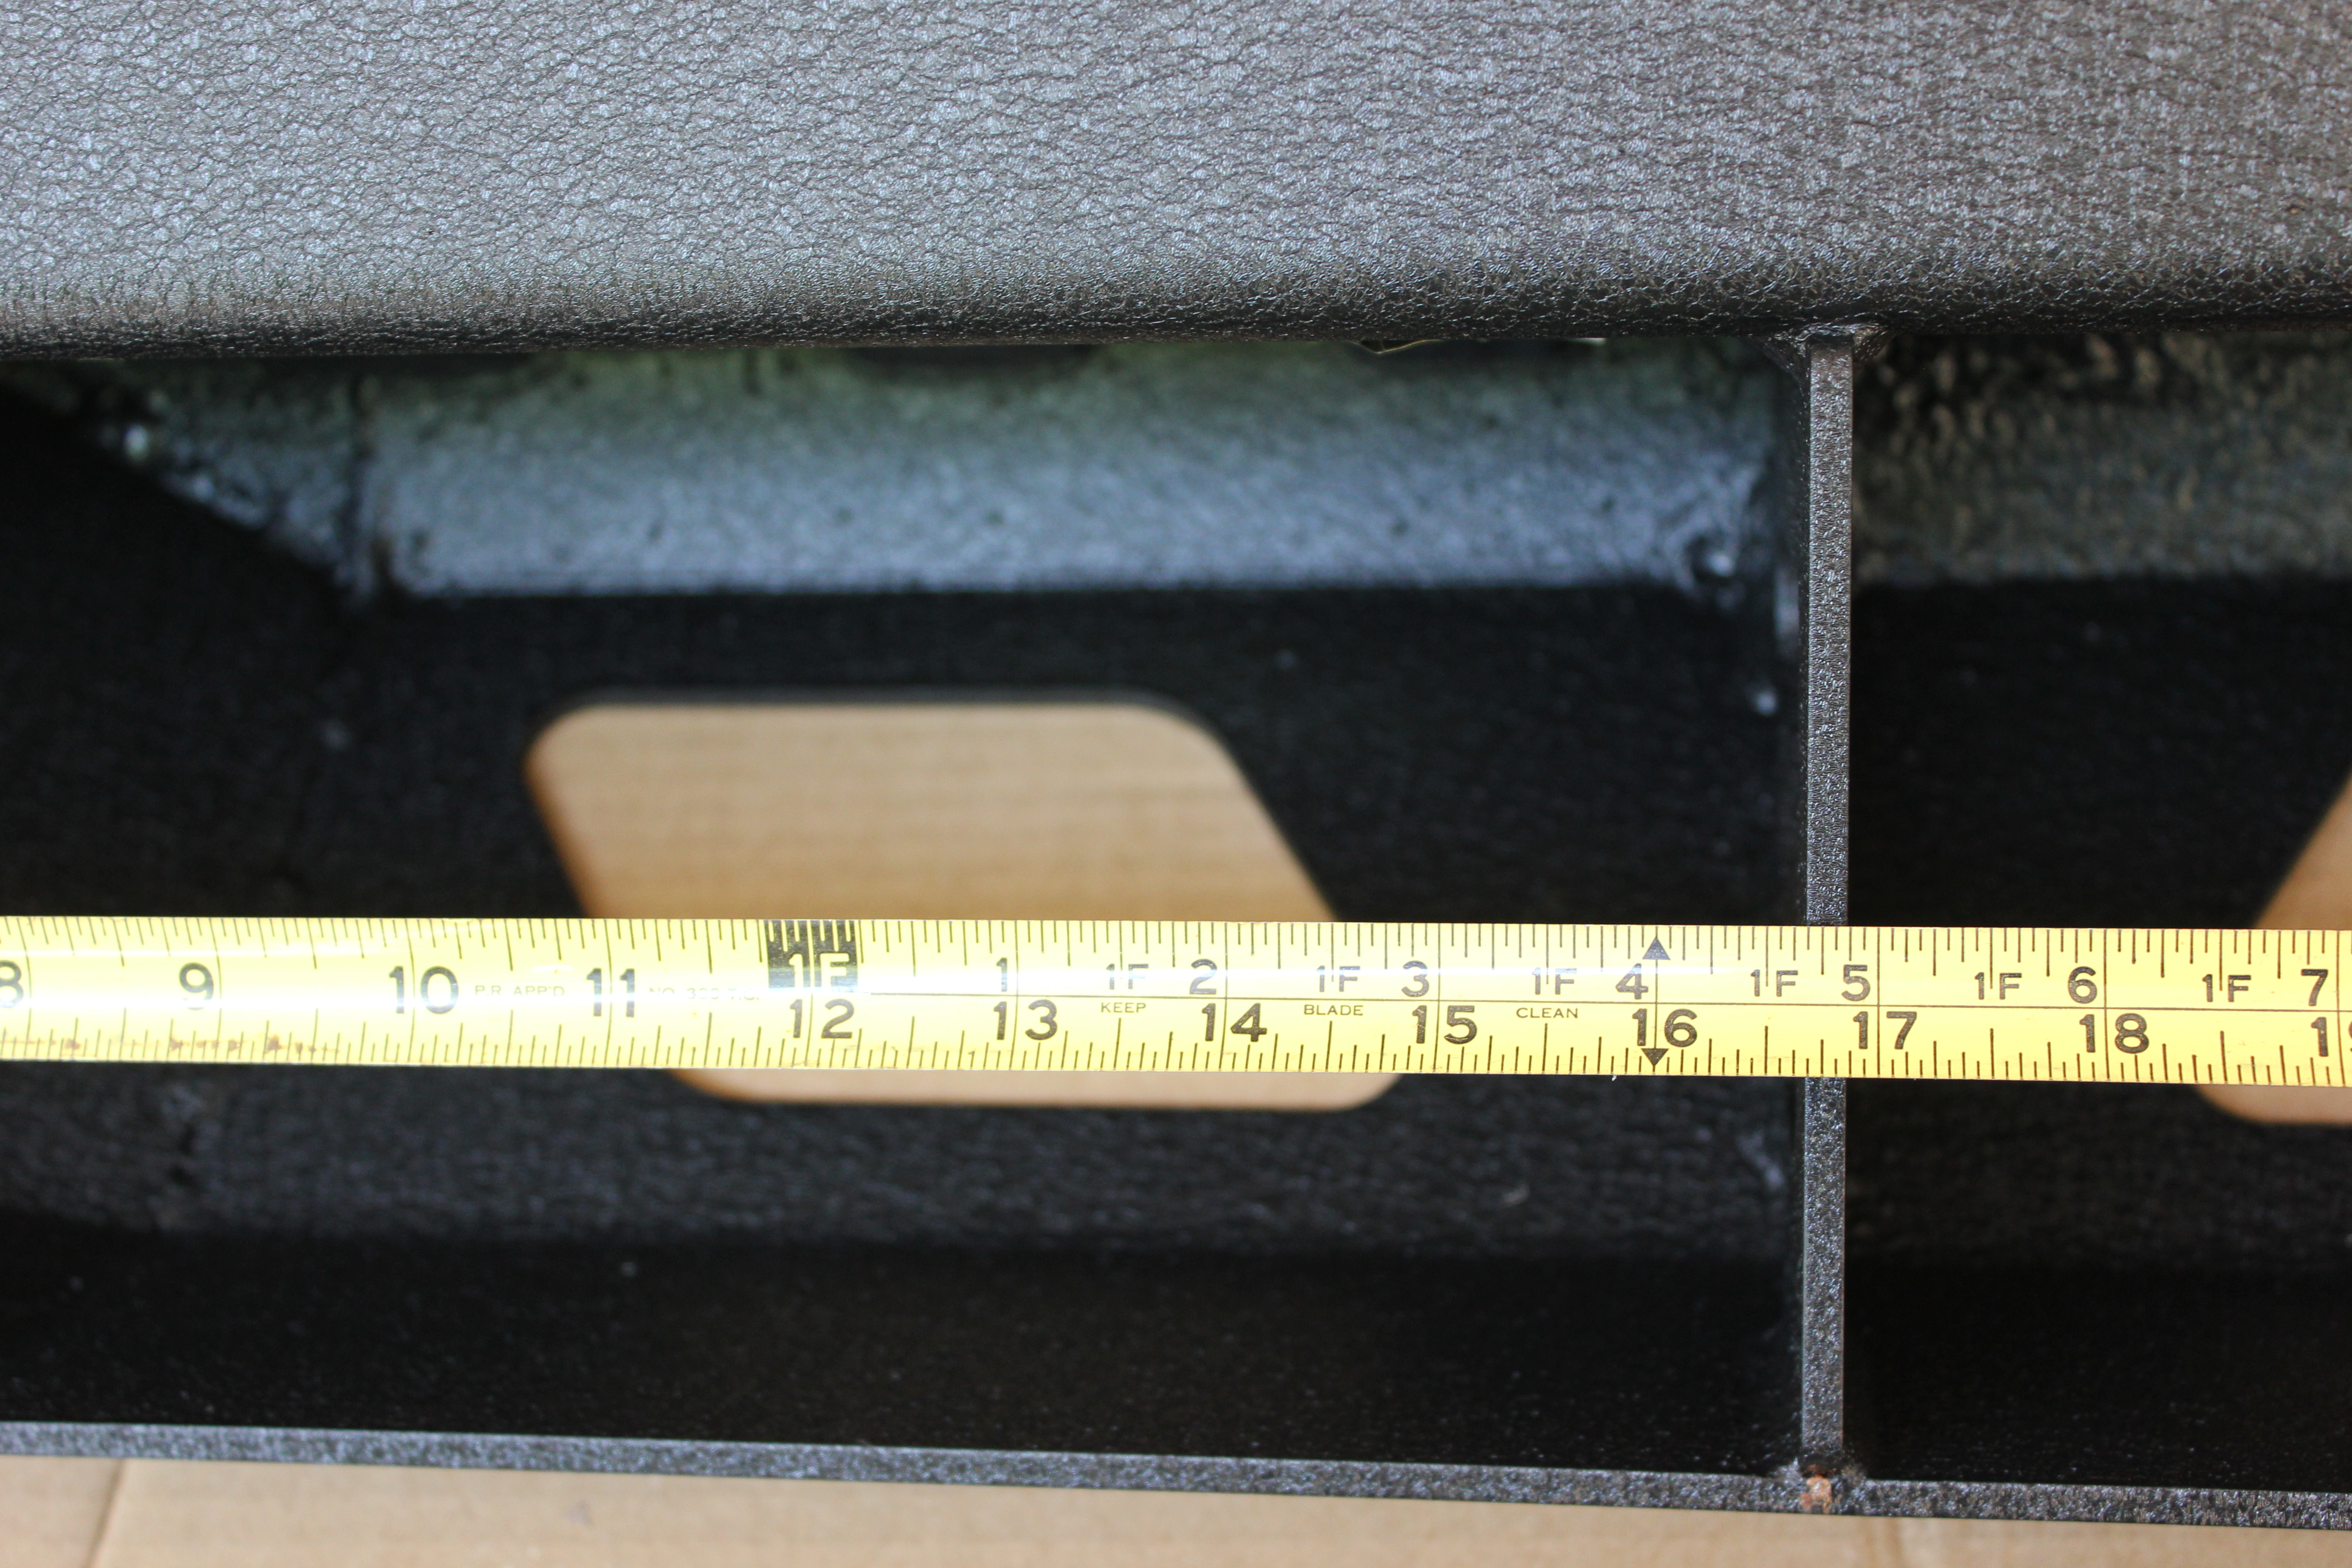
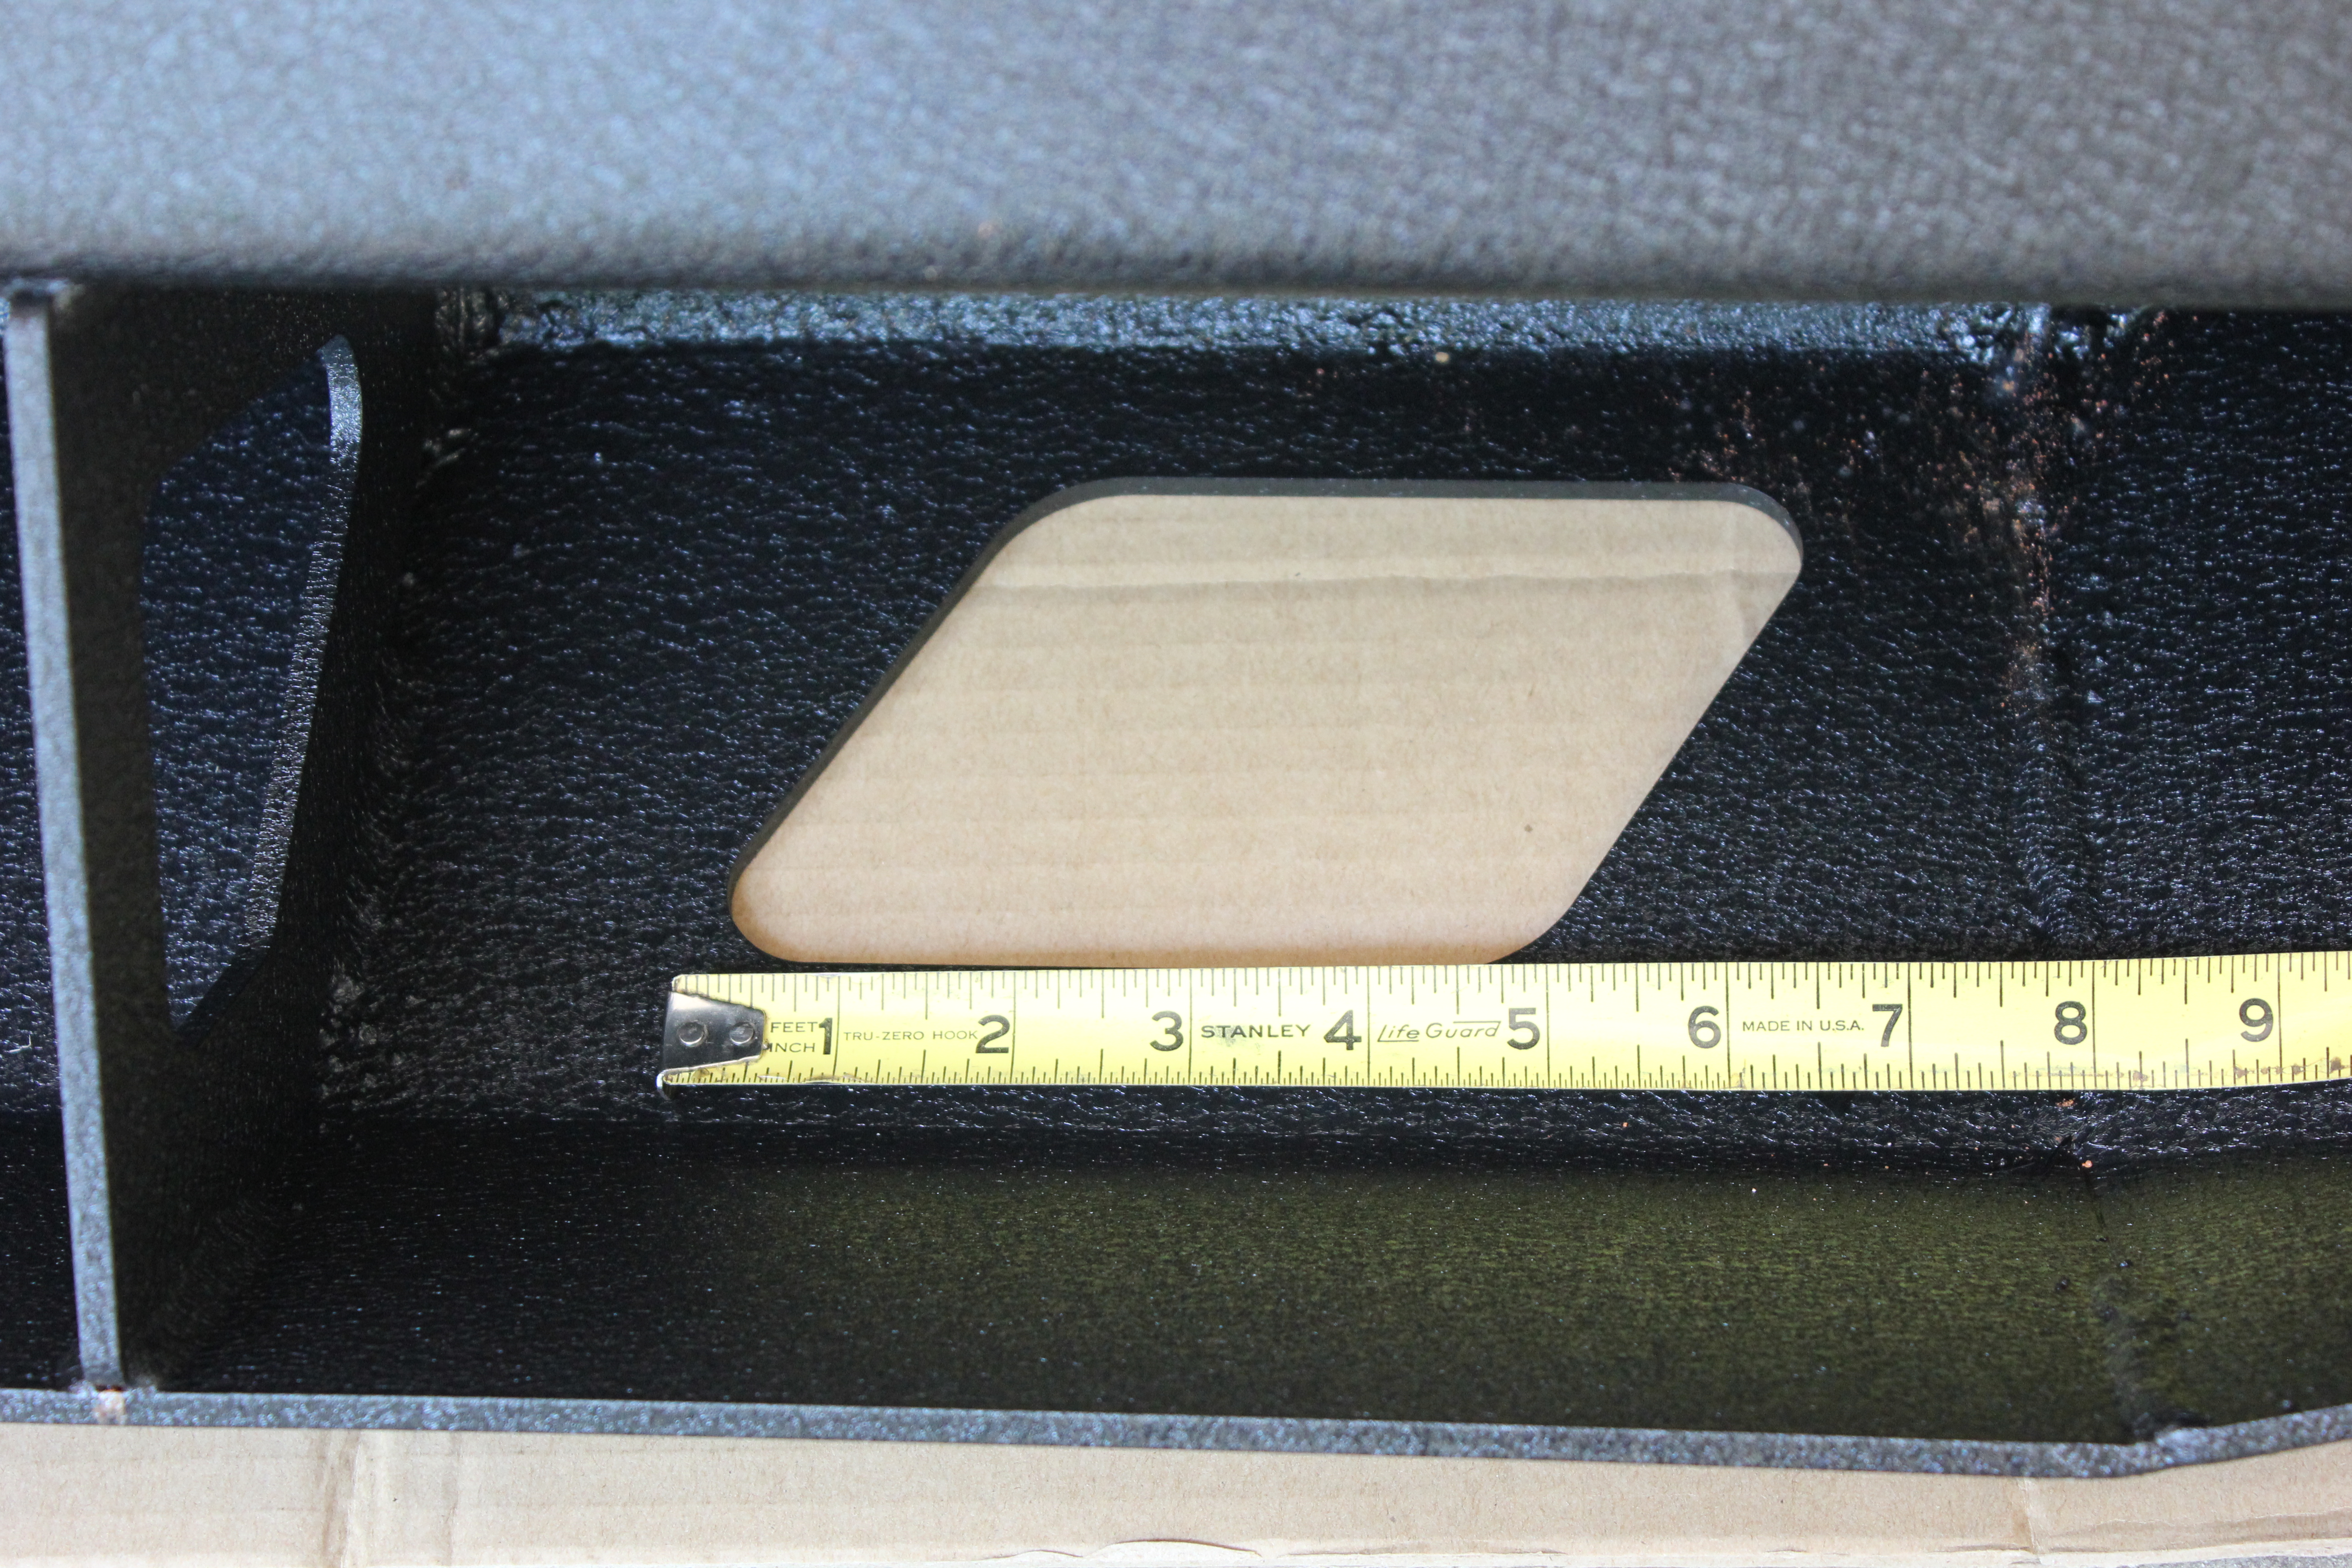
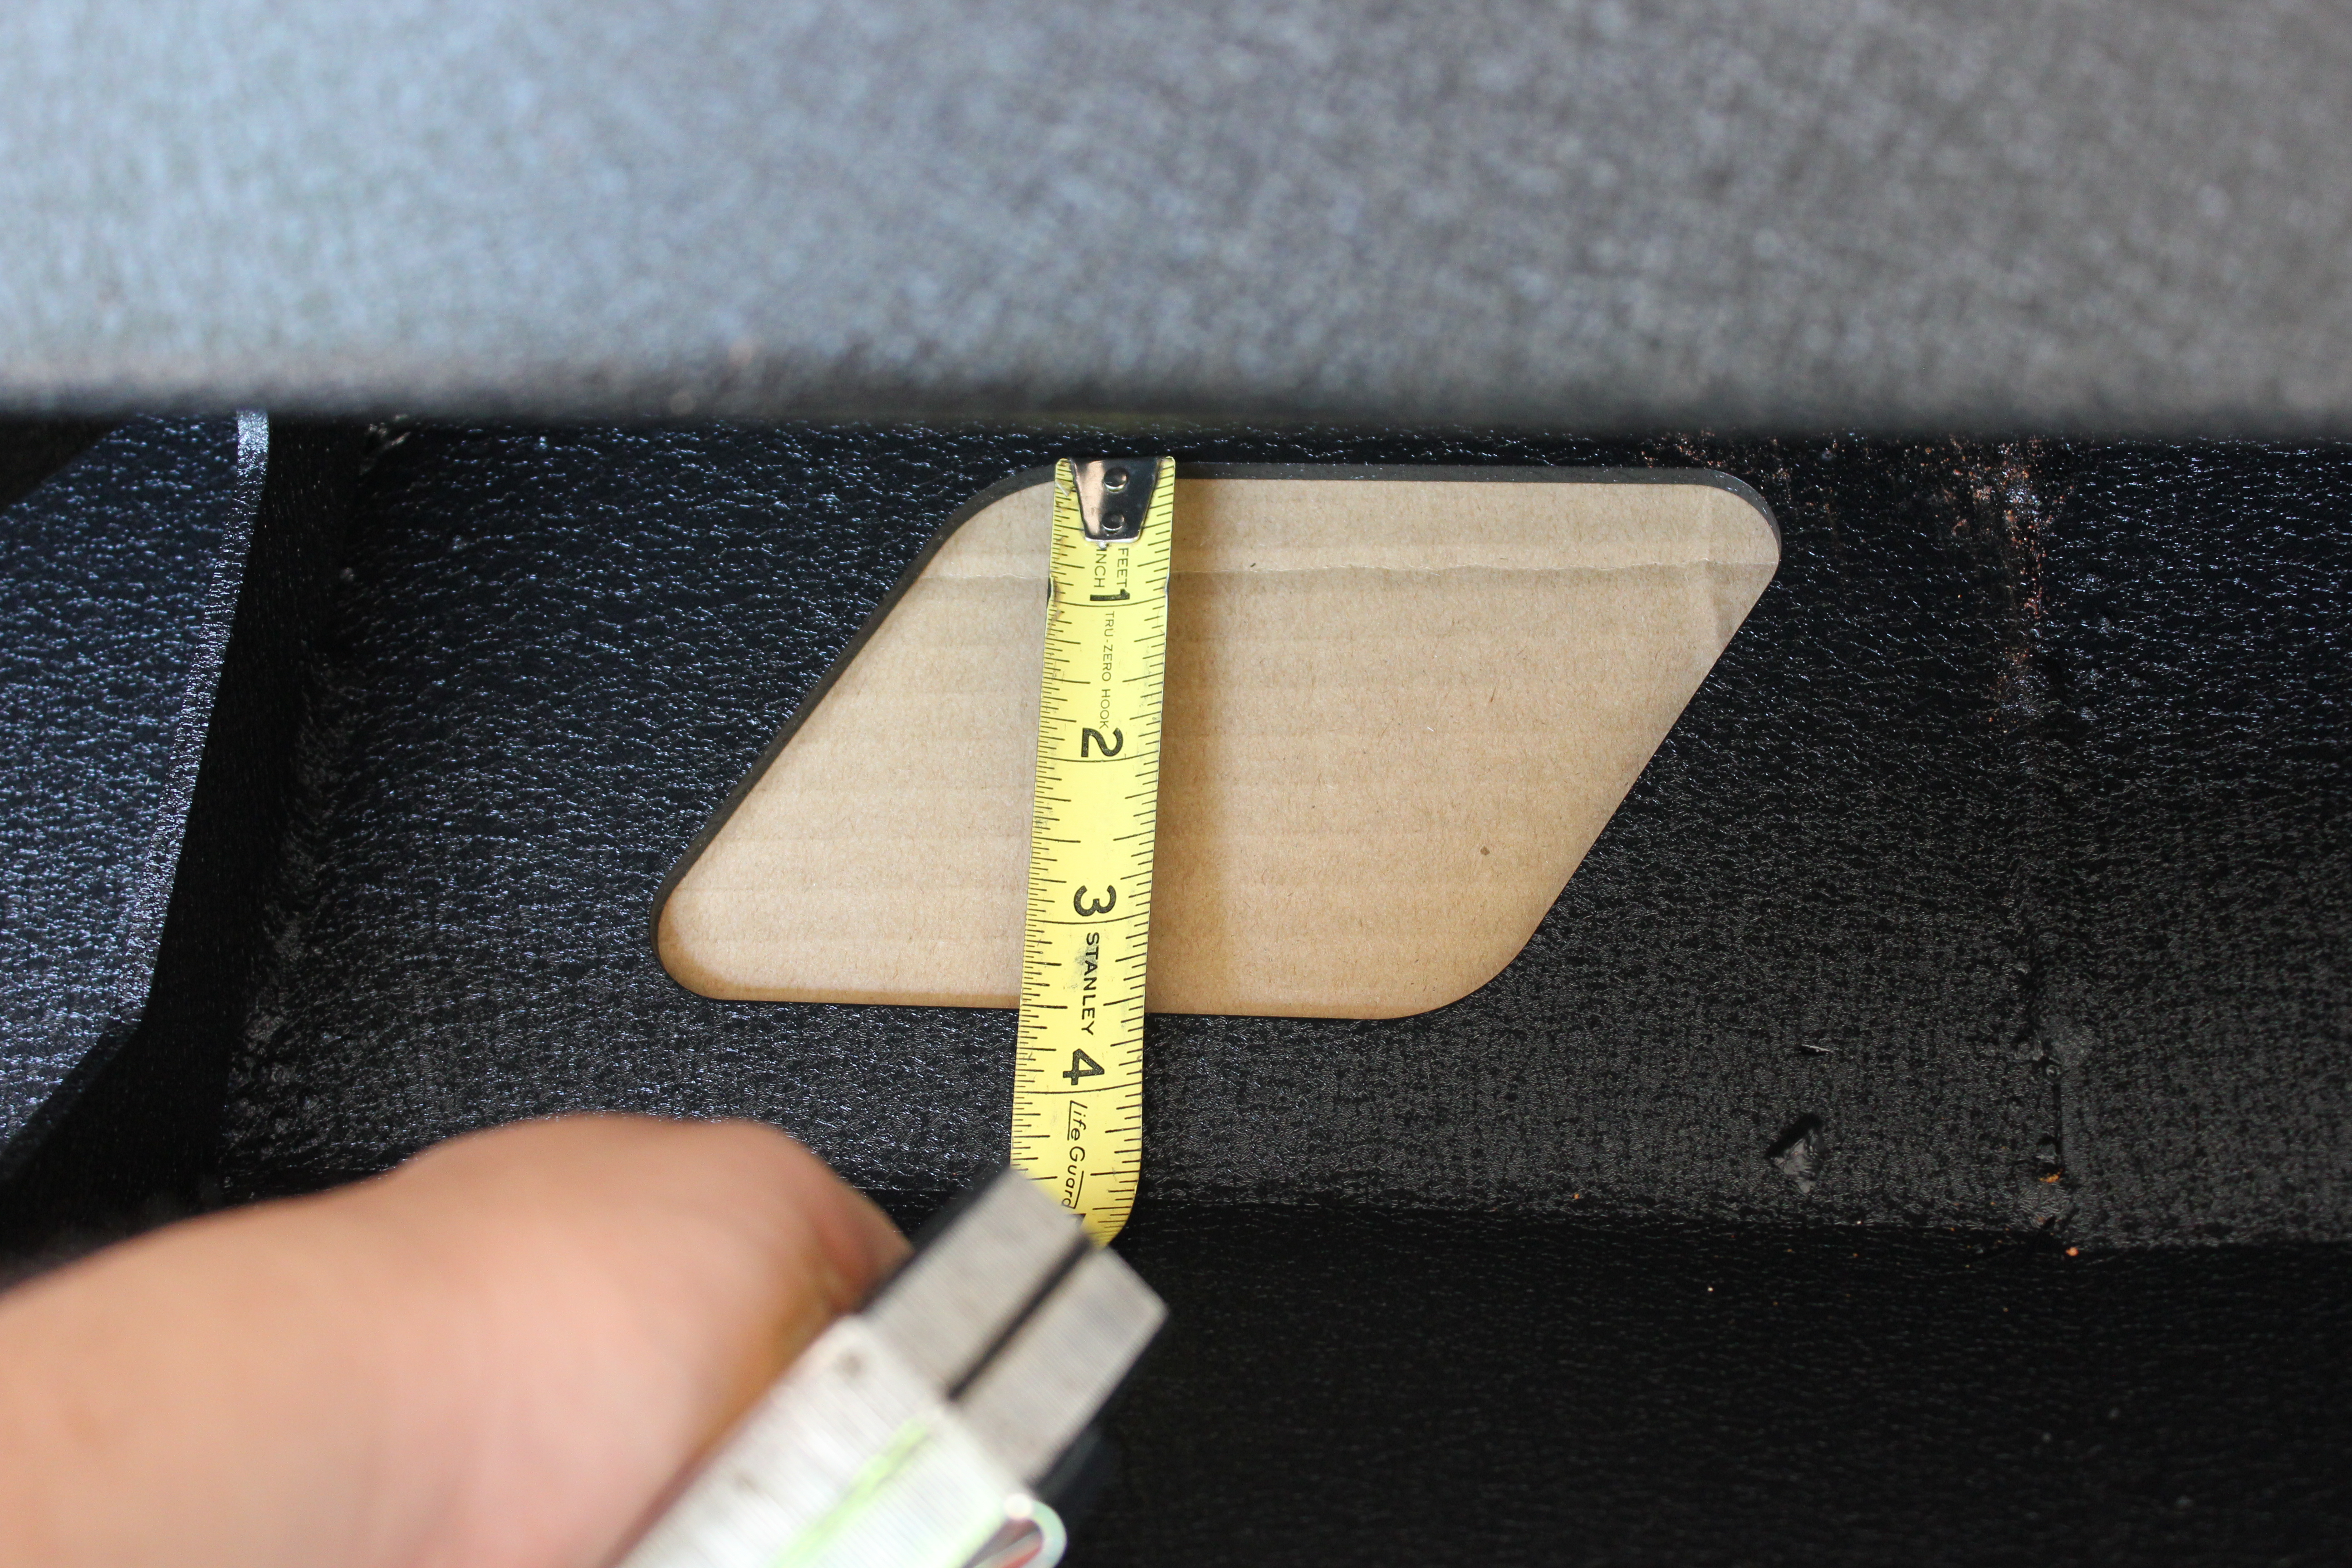
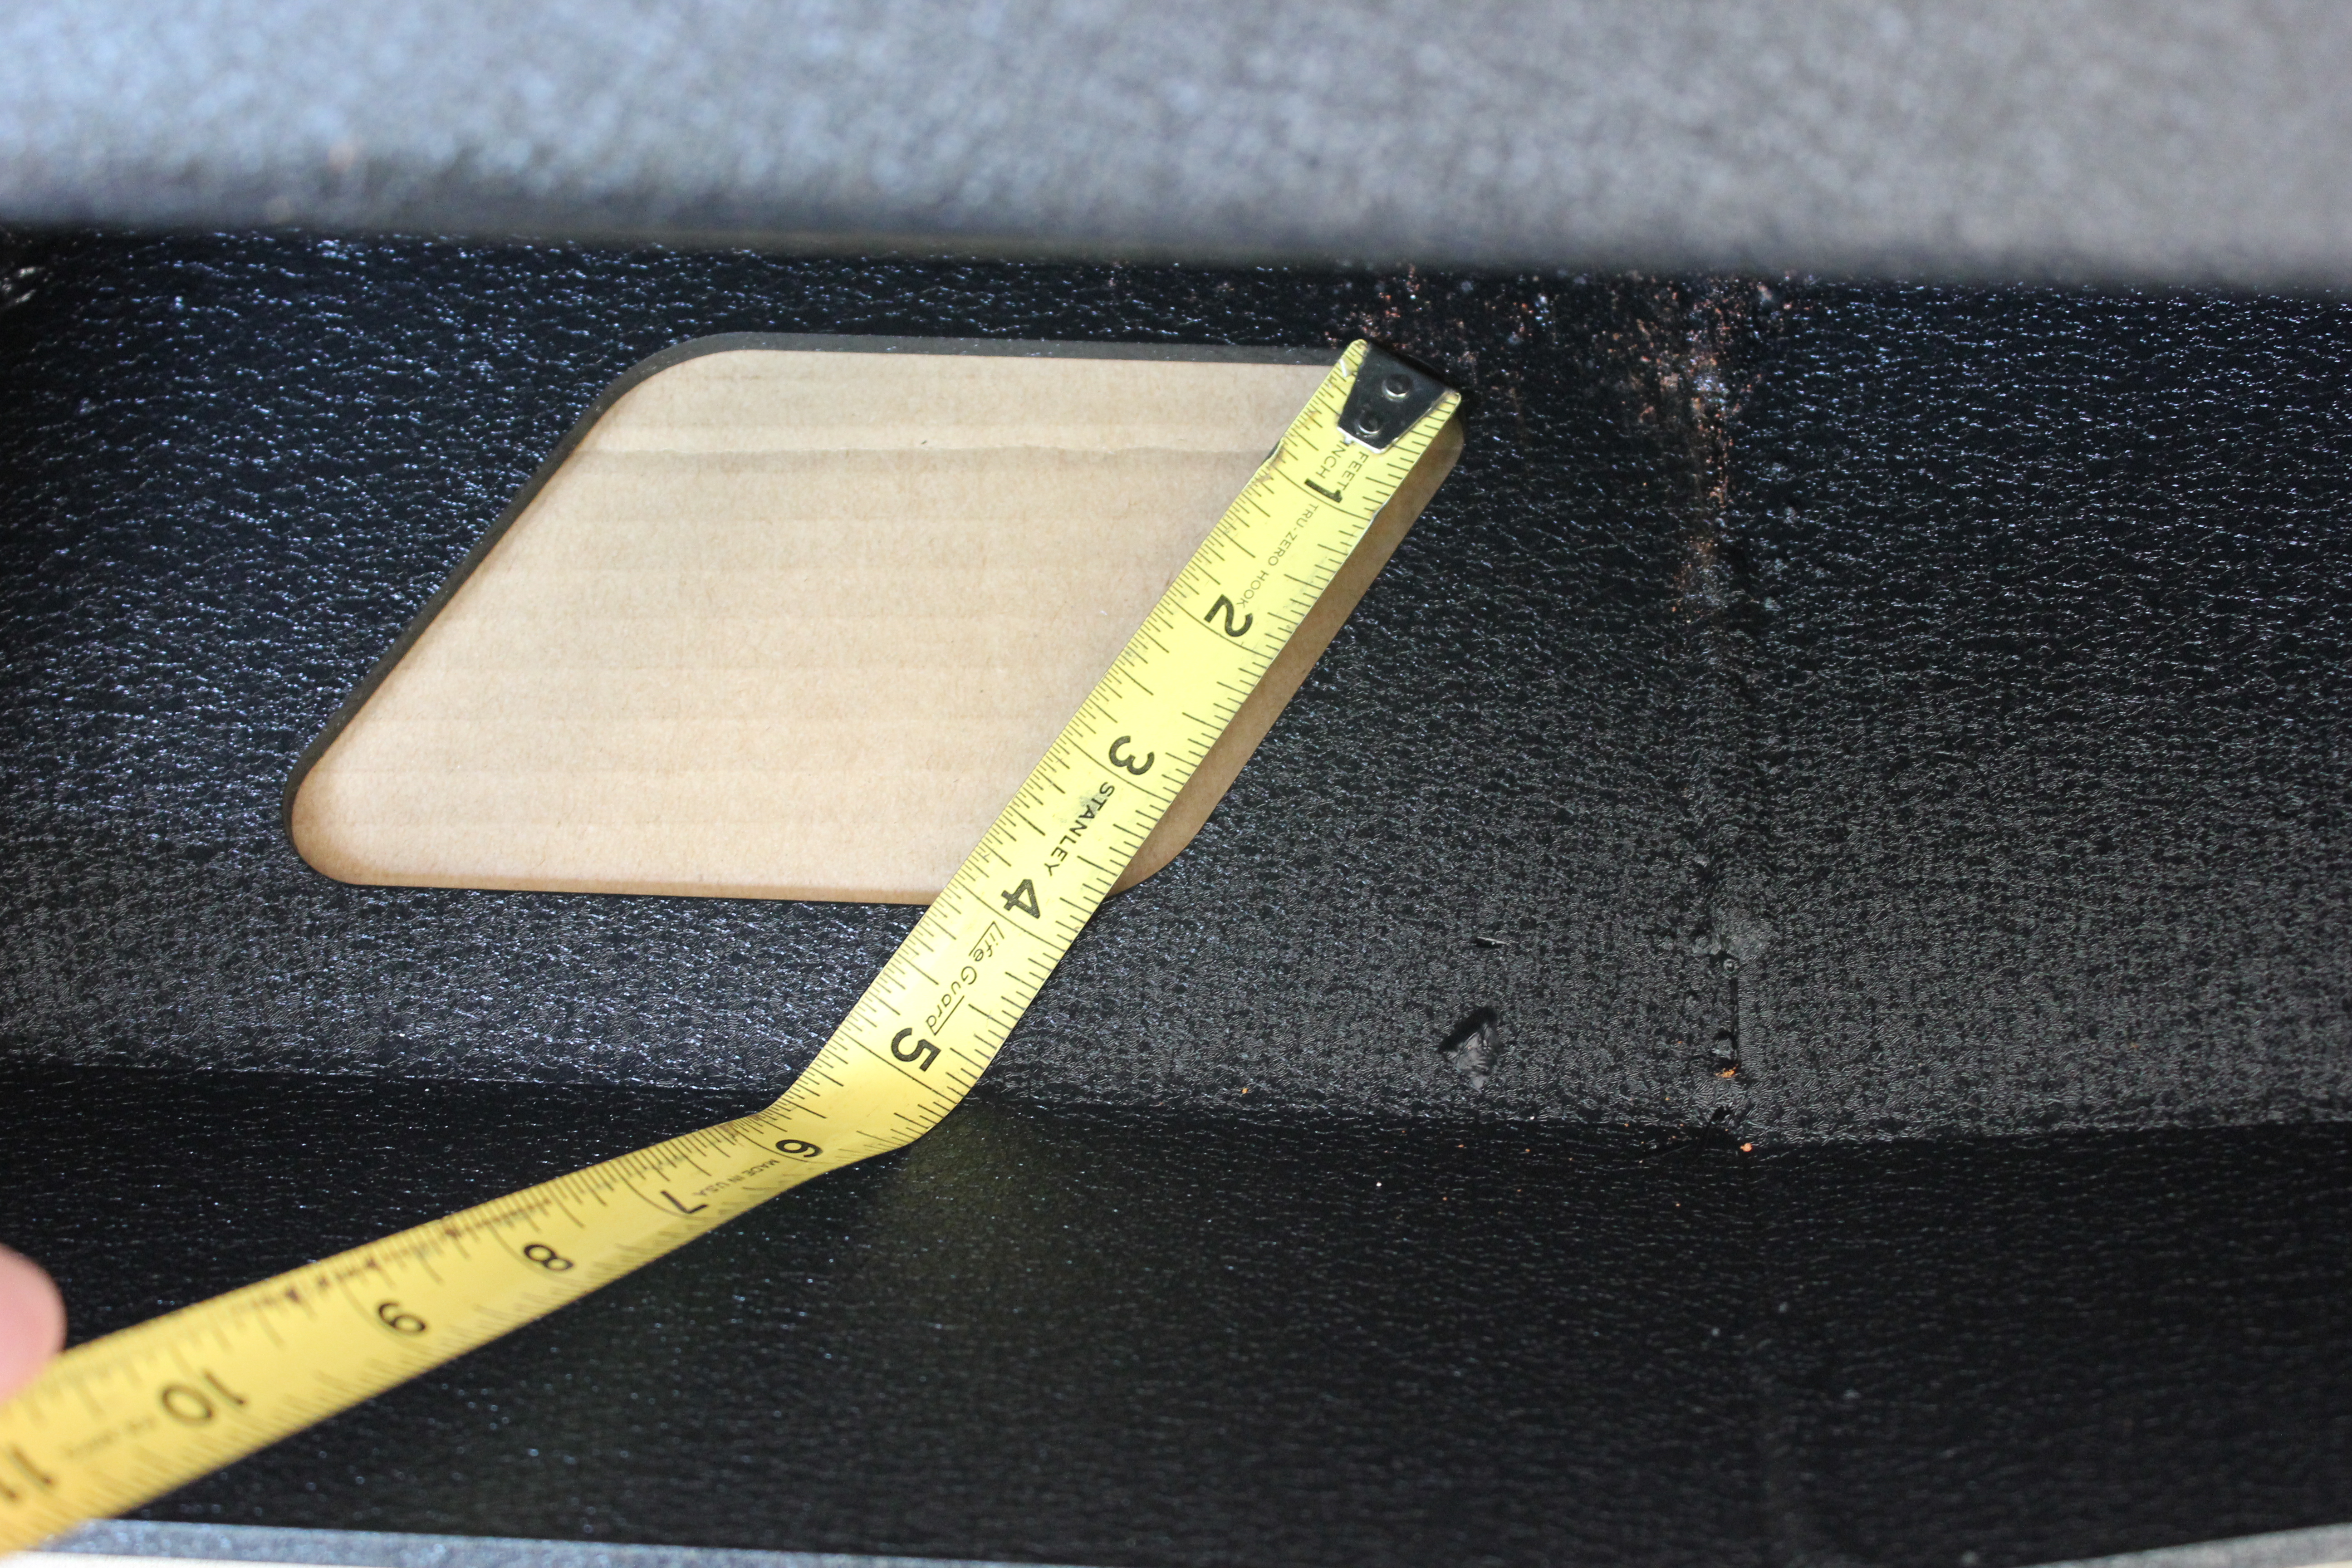
About 10 1/4″ from the center support to where the bumper starts to bend upwards:
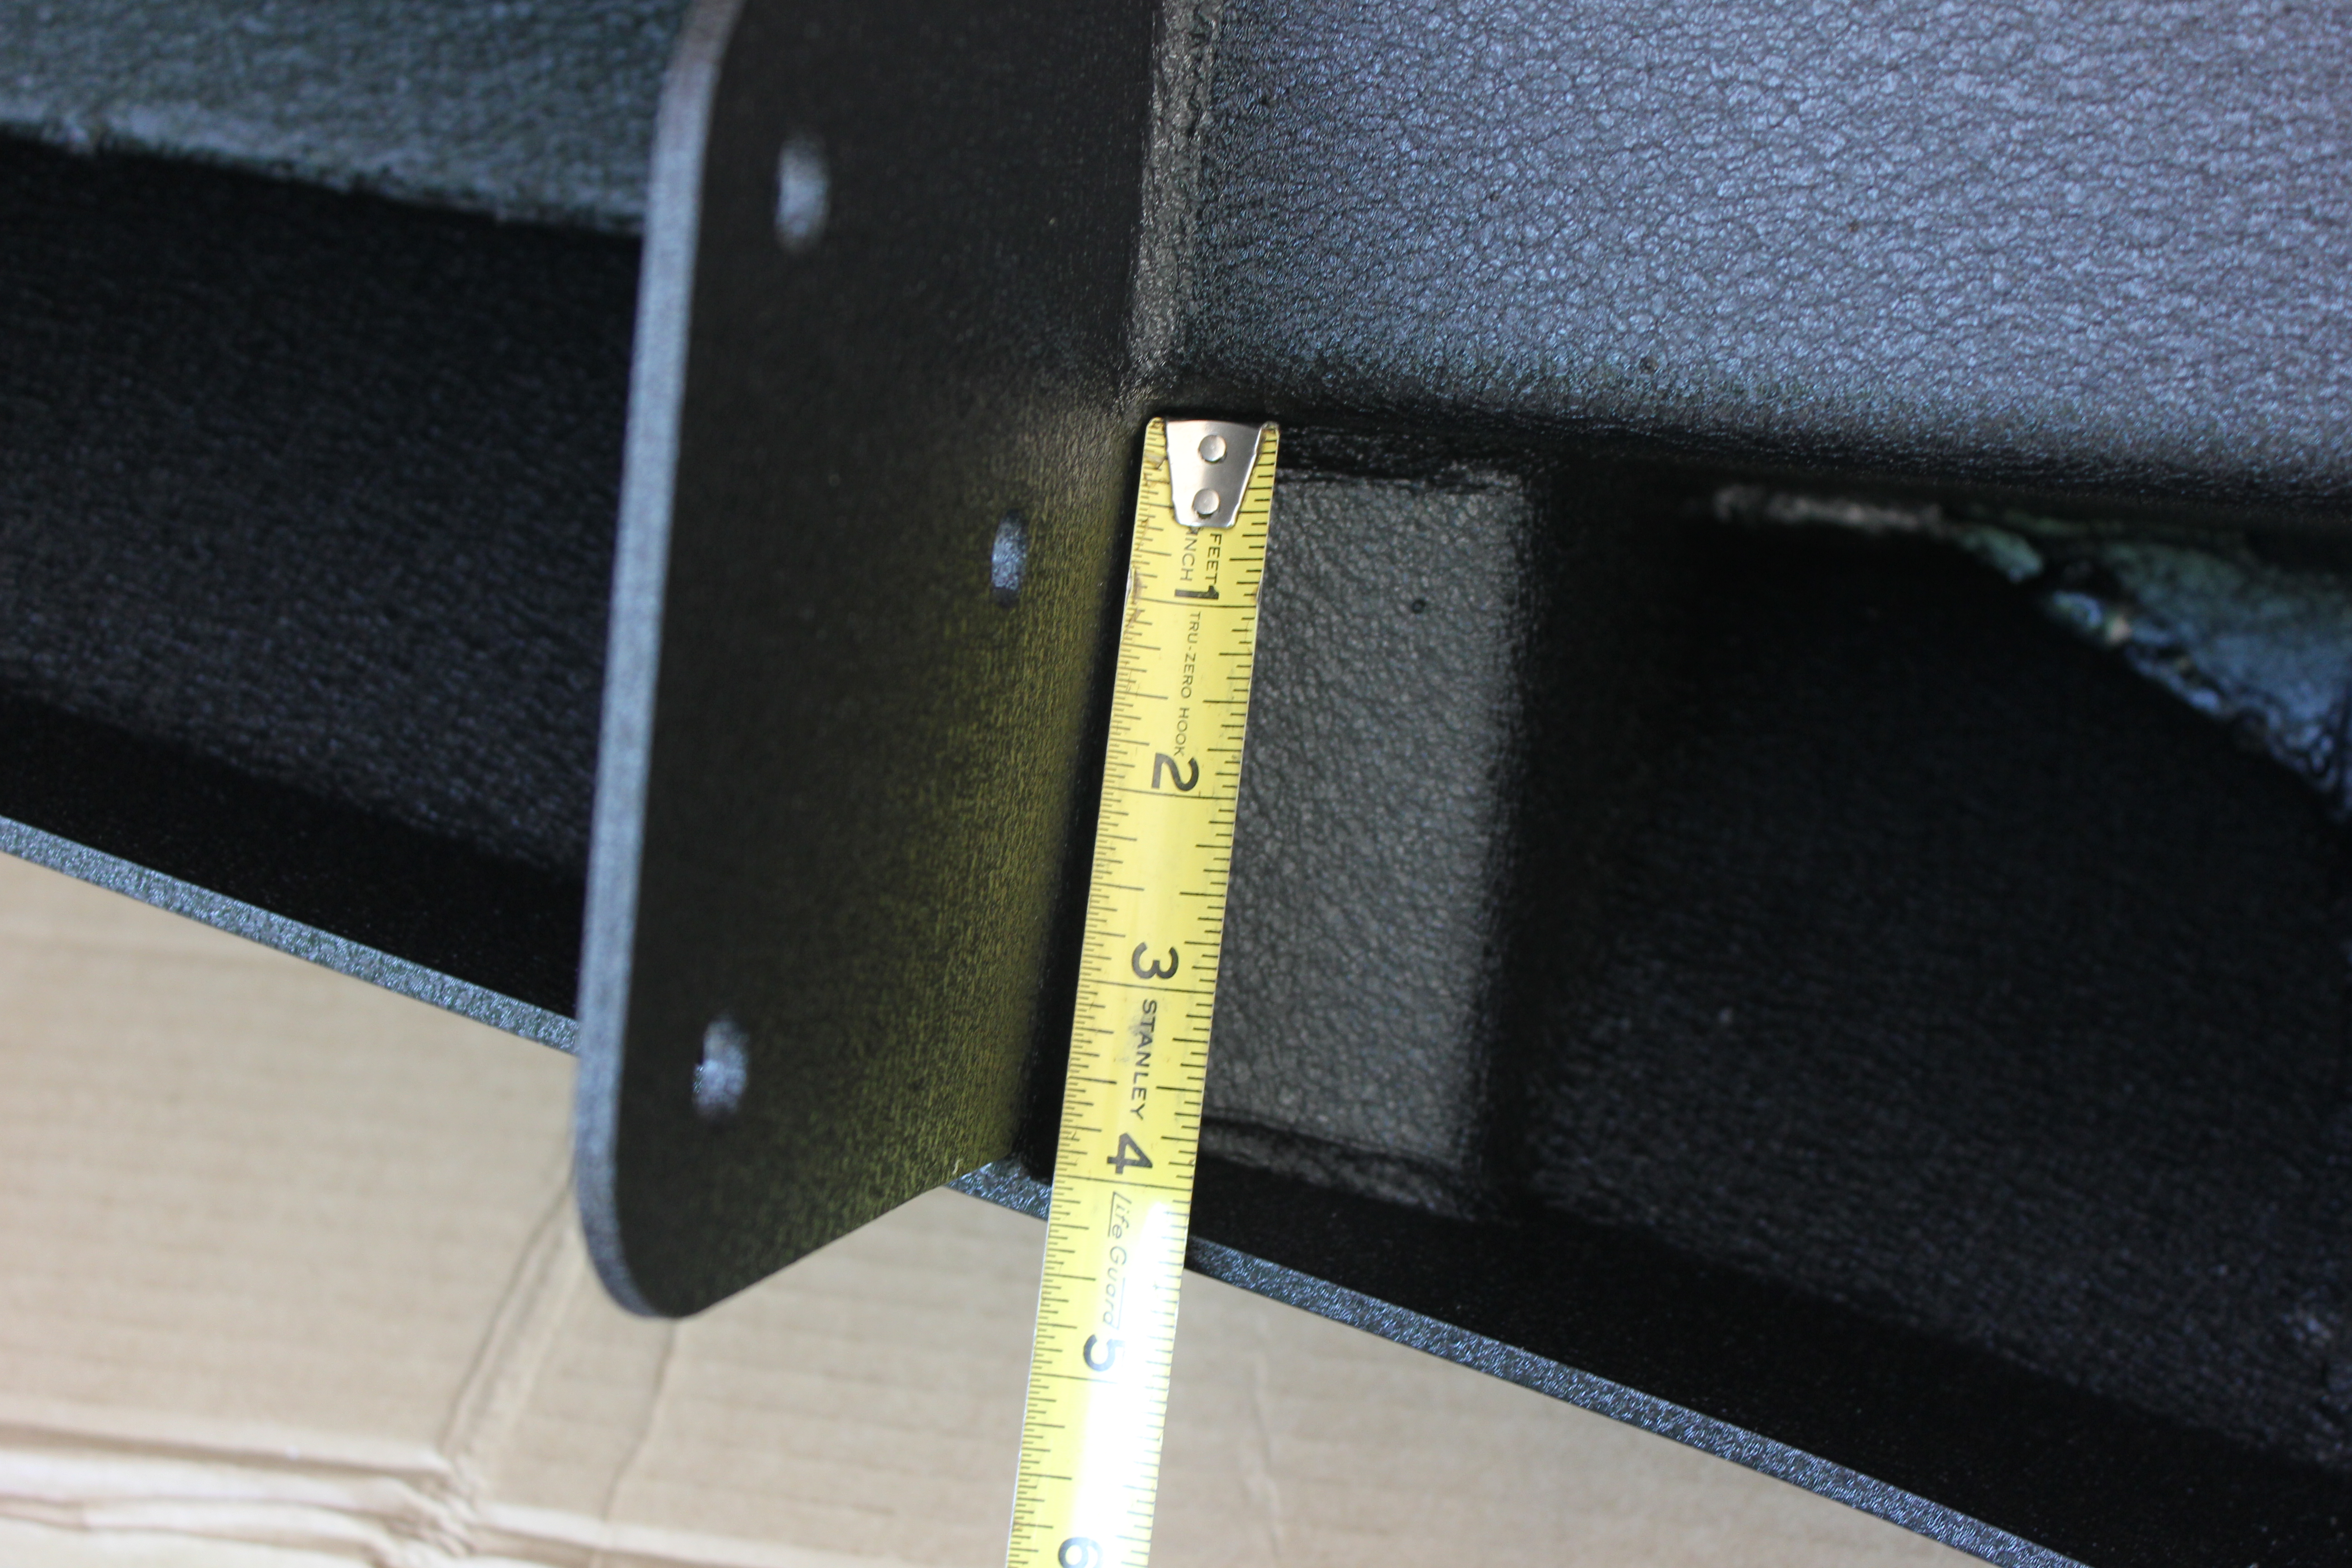
The space between the winch plate and the bottom of the bumper is about 5 1/2″ tall:
And at the bumper bracket it’s 4″
A little over 16 1/2″ between the center support and the bumper bracket:
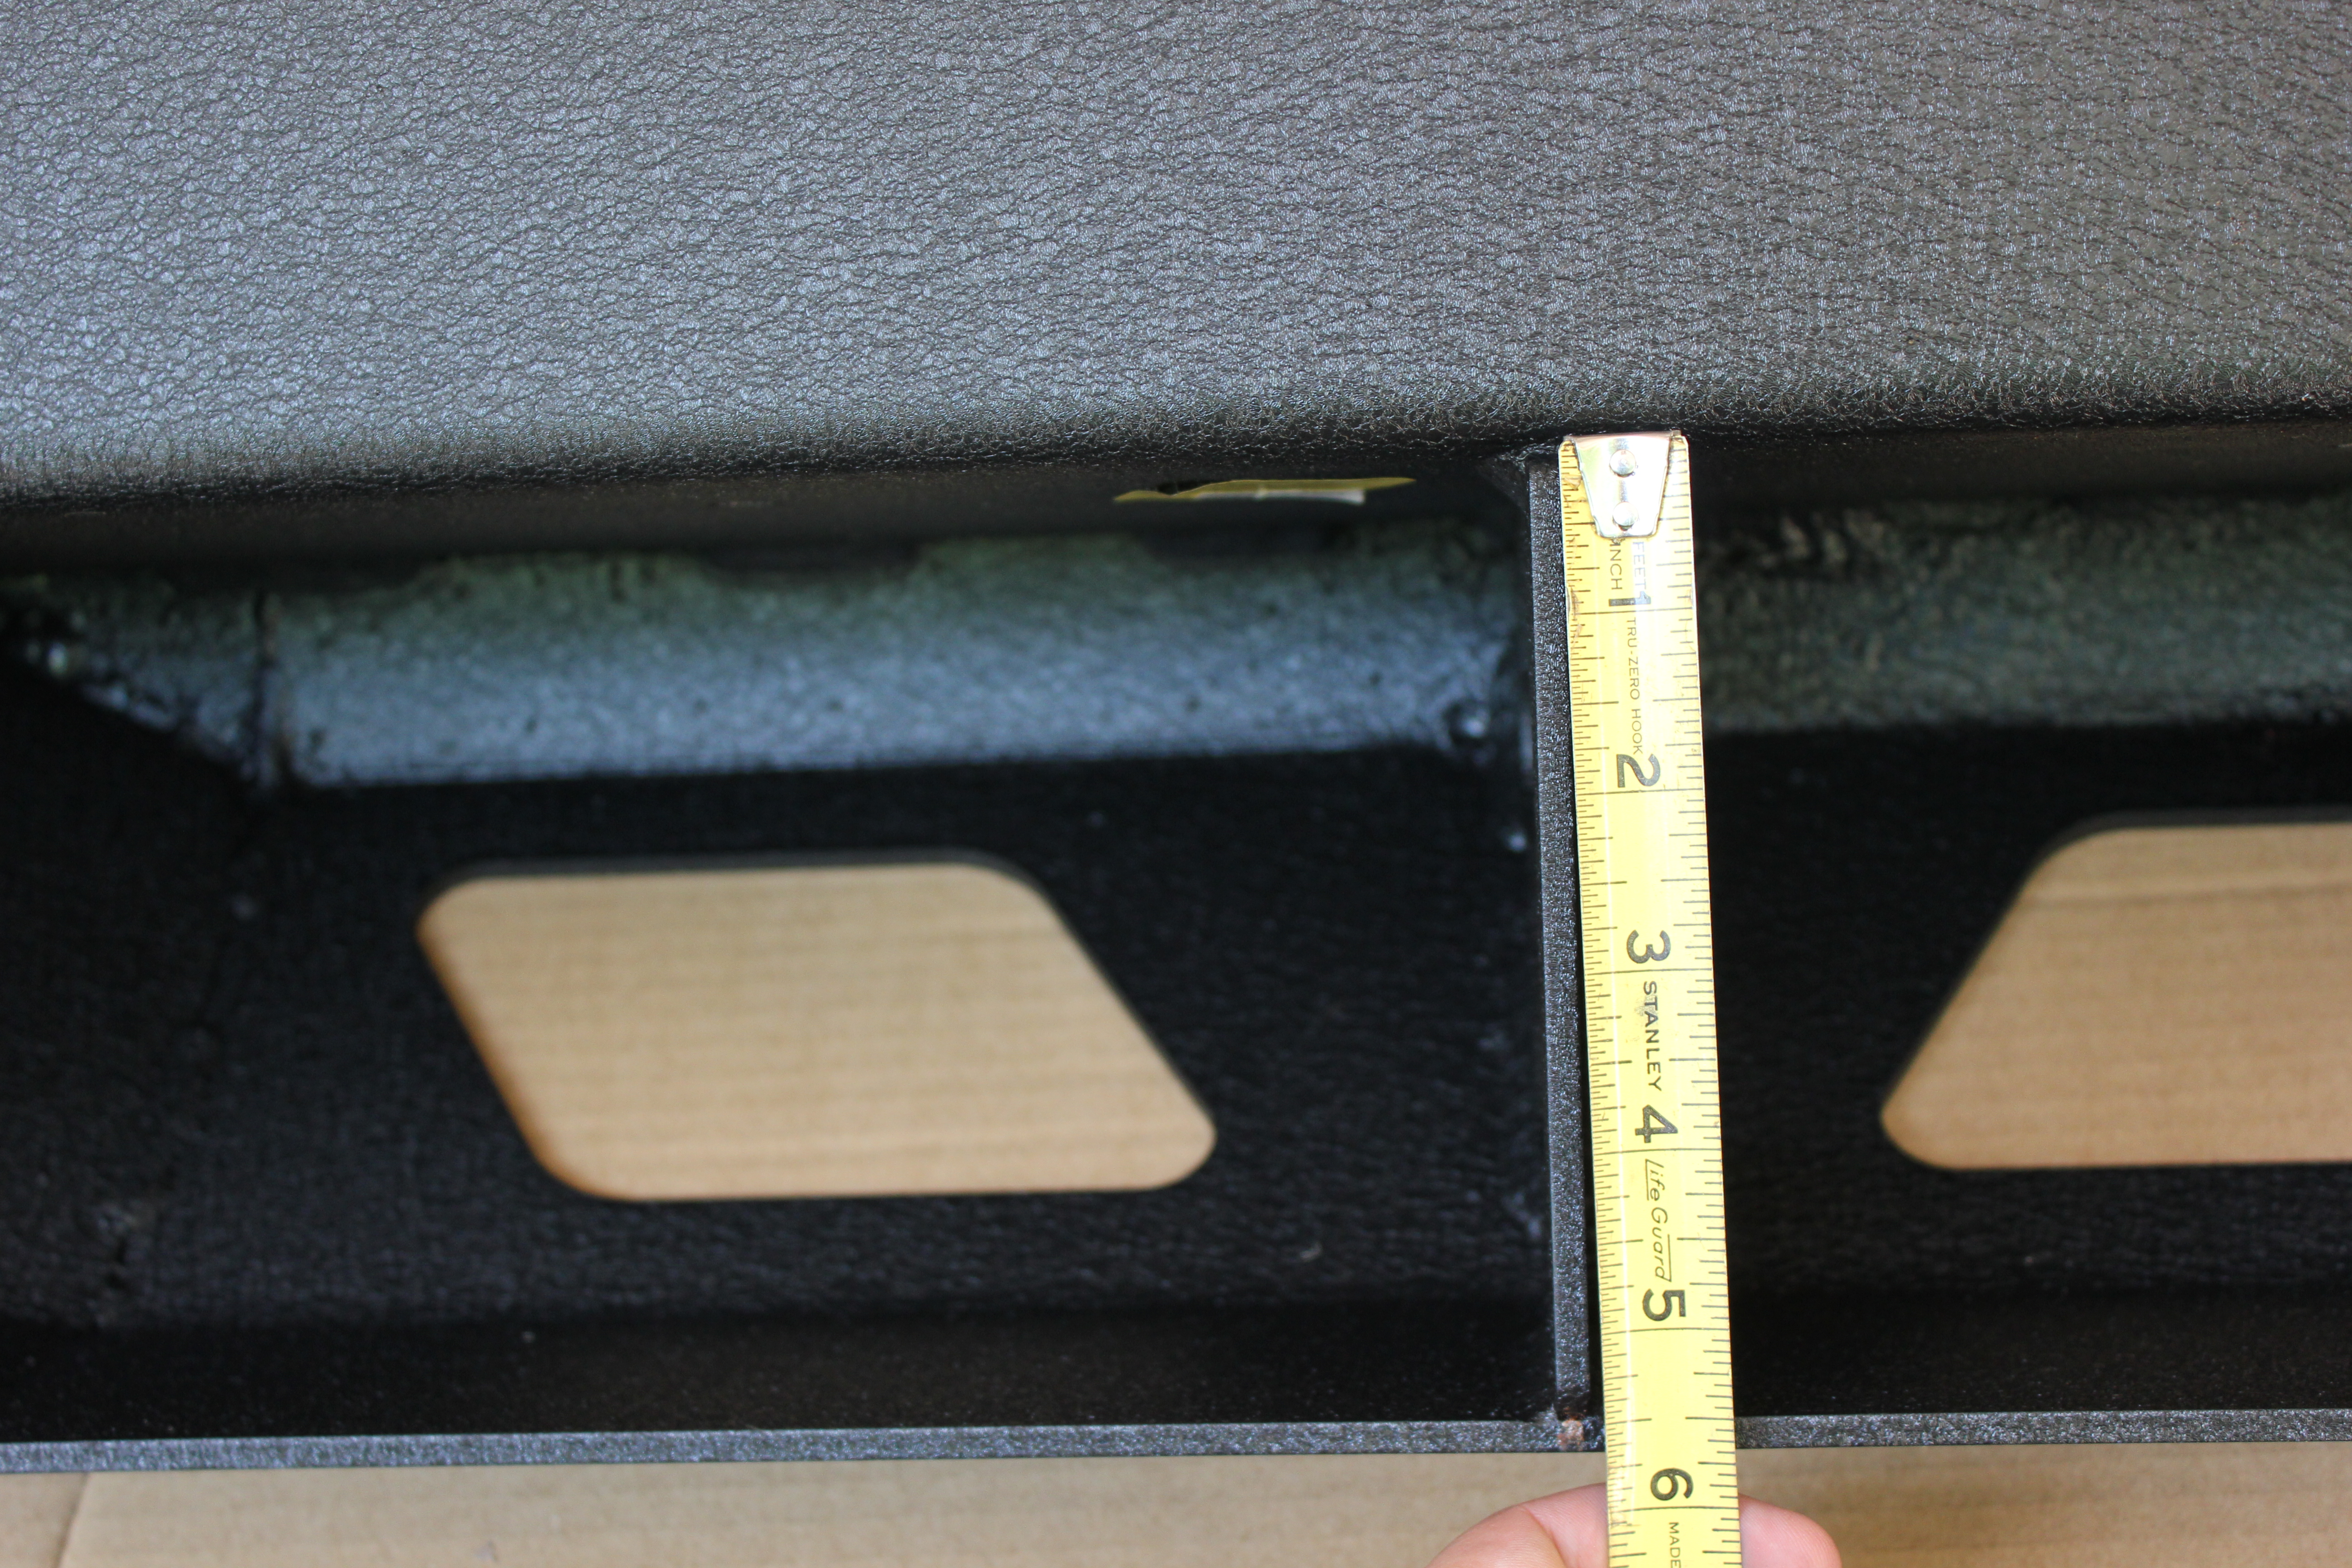
In the outer sections, they start about 7 1/2″ tall:
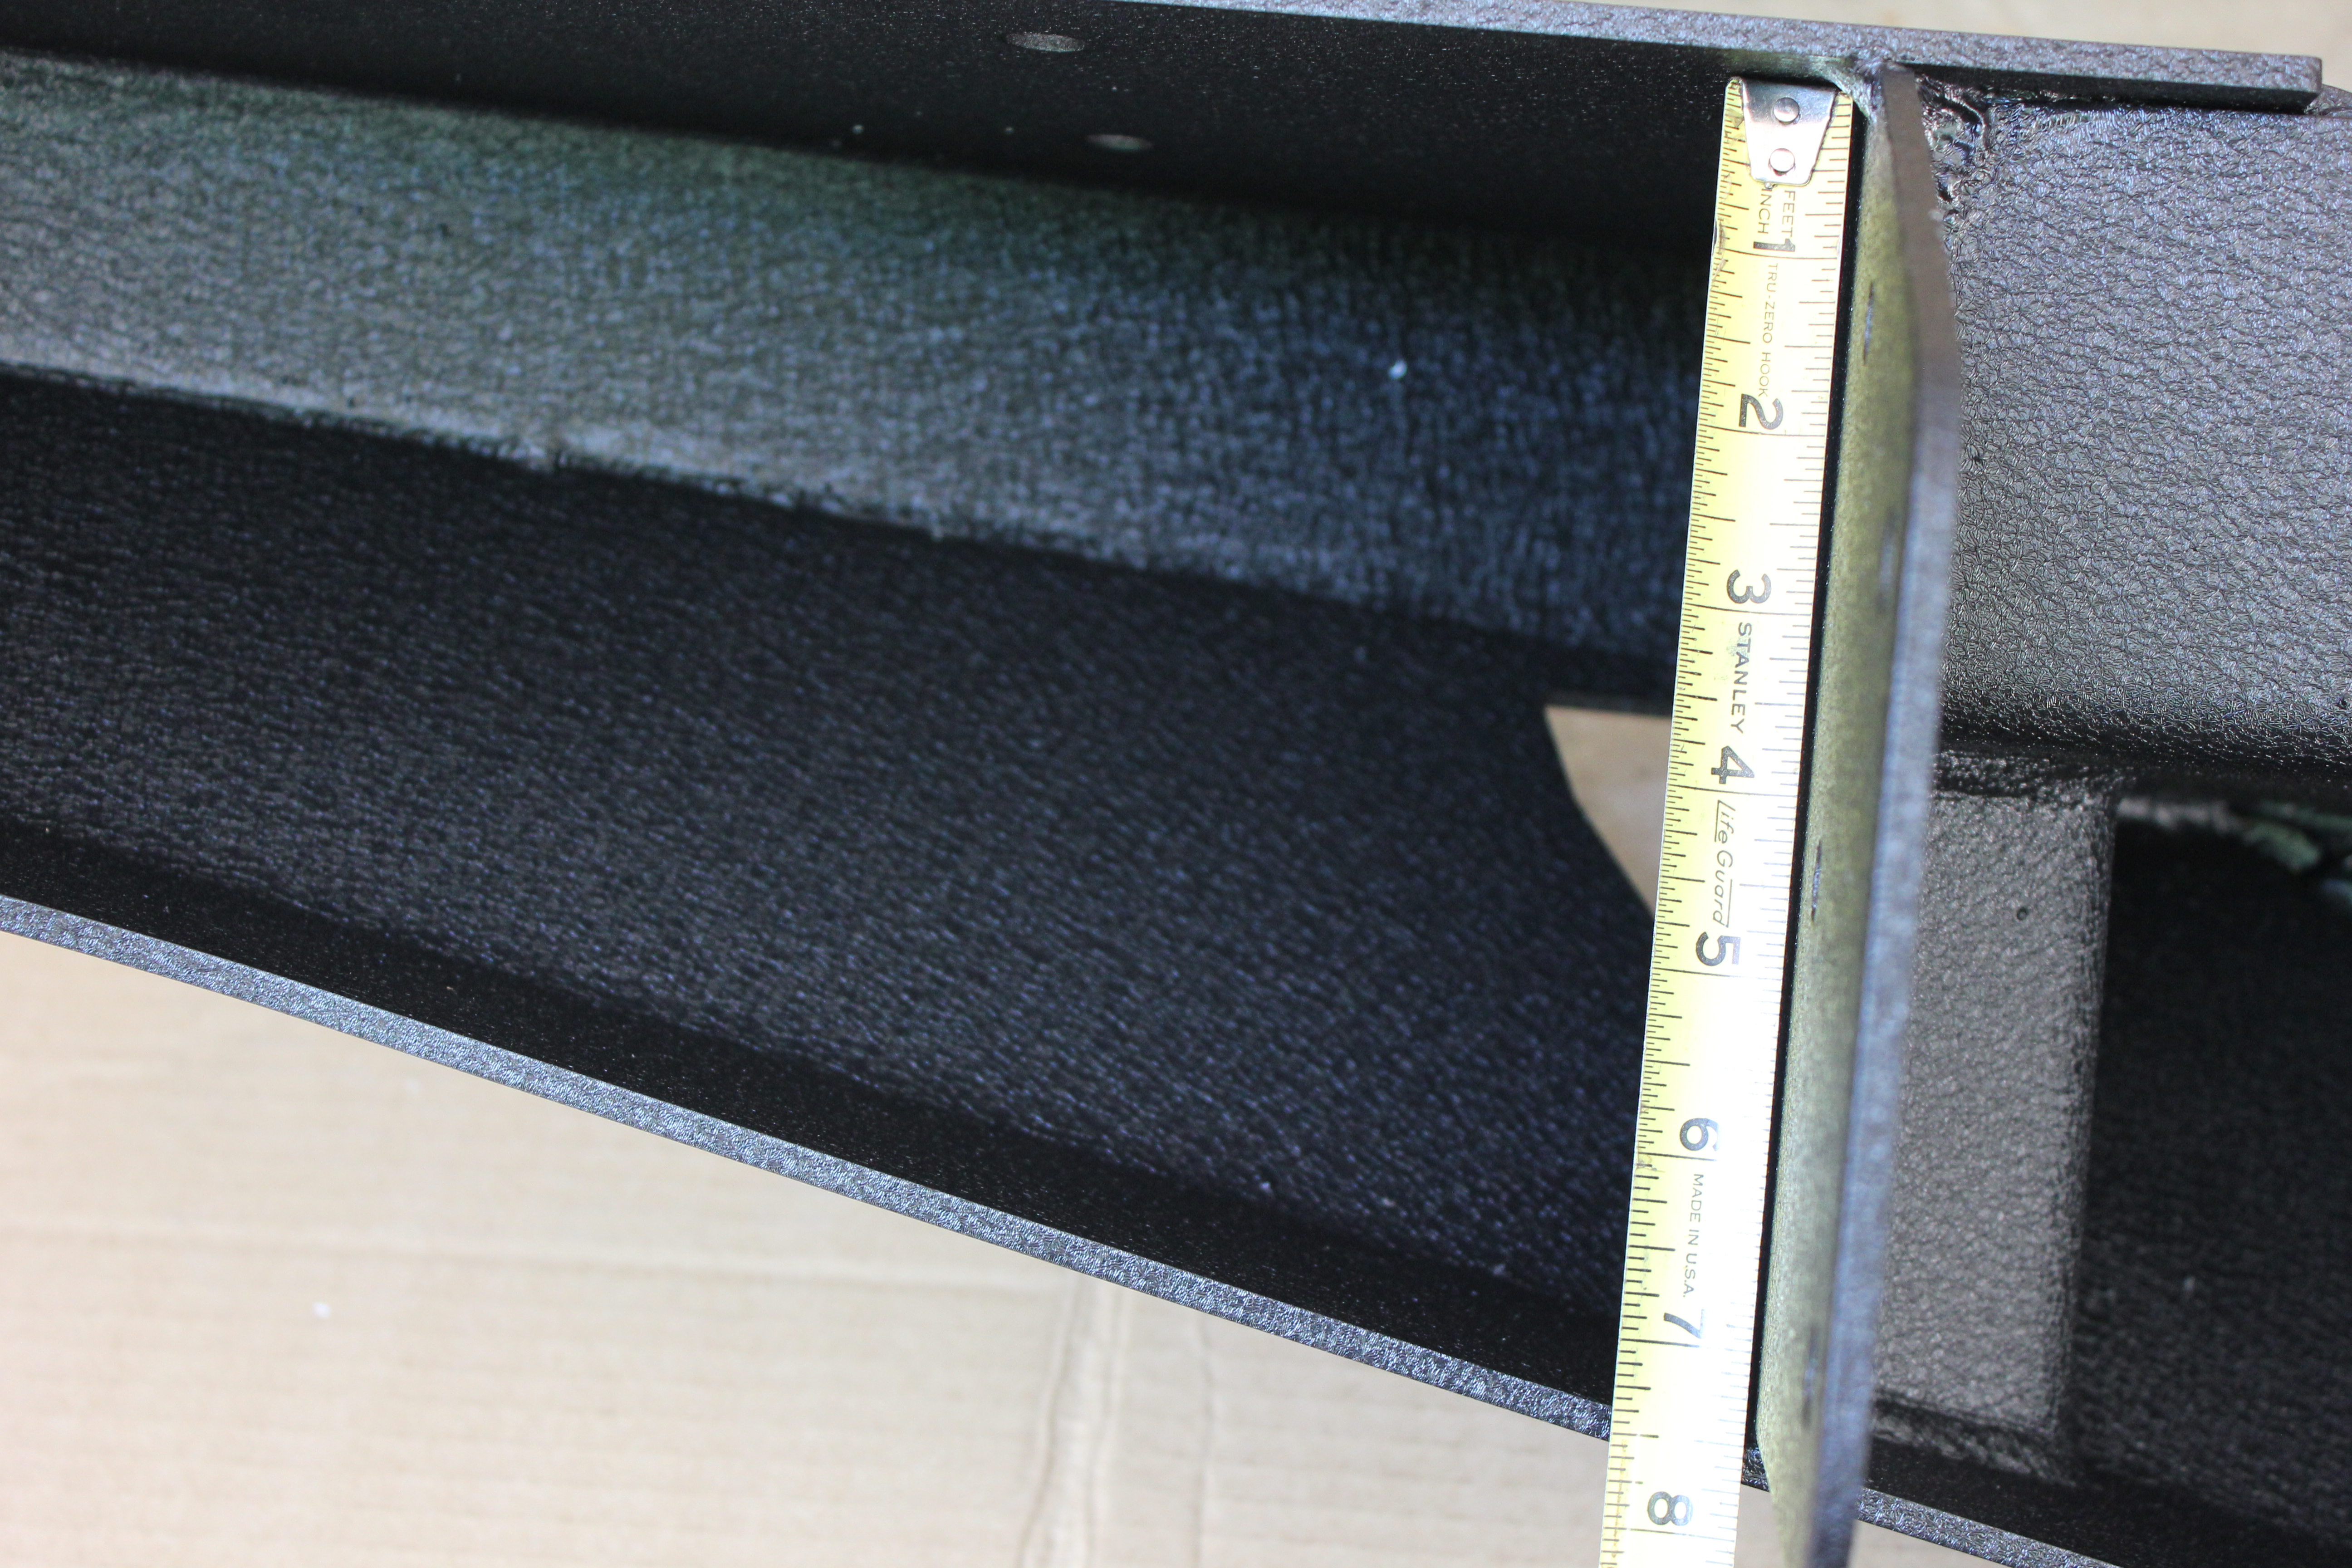
Tapering down to about 5 1/2″.
These sections are about 8 1/2″ deep as well. The four holes you see here are for the optional Smittybilt 76811 XRC Front Bull Bar, which I’m likely going to end up buying for reasons I’ll discuss later.
These diamond shaped holes are for….I don’t exactly know, but I will likely be very glad they are there when I go to mount the winch later.
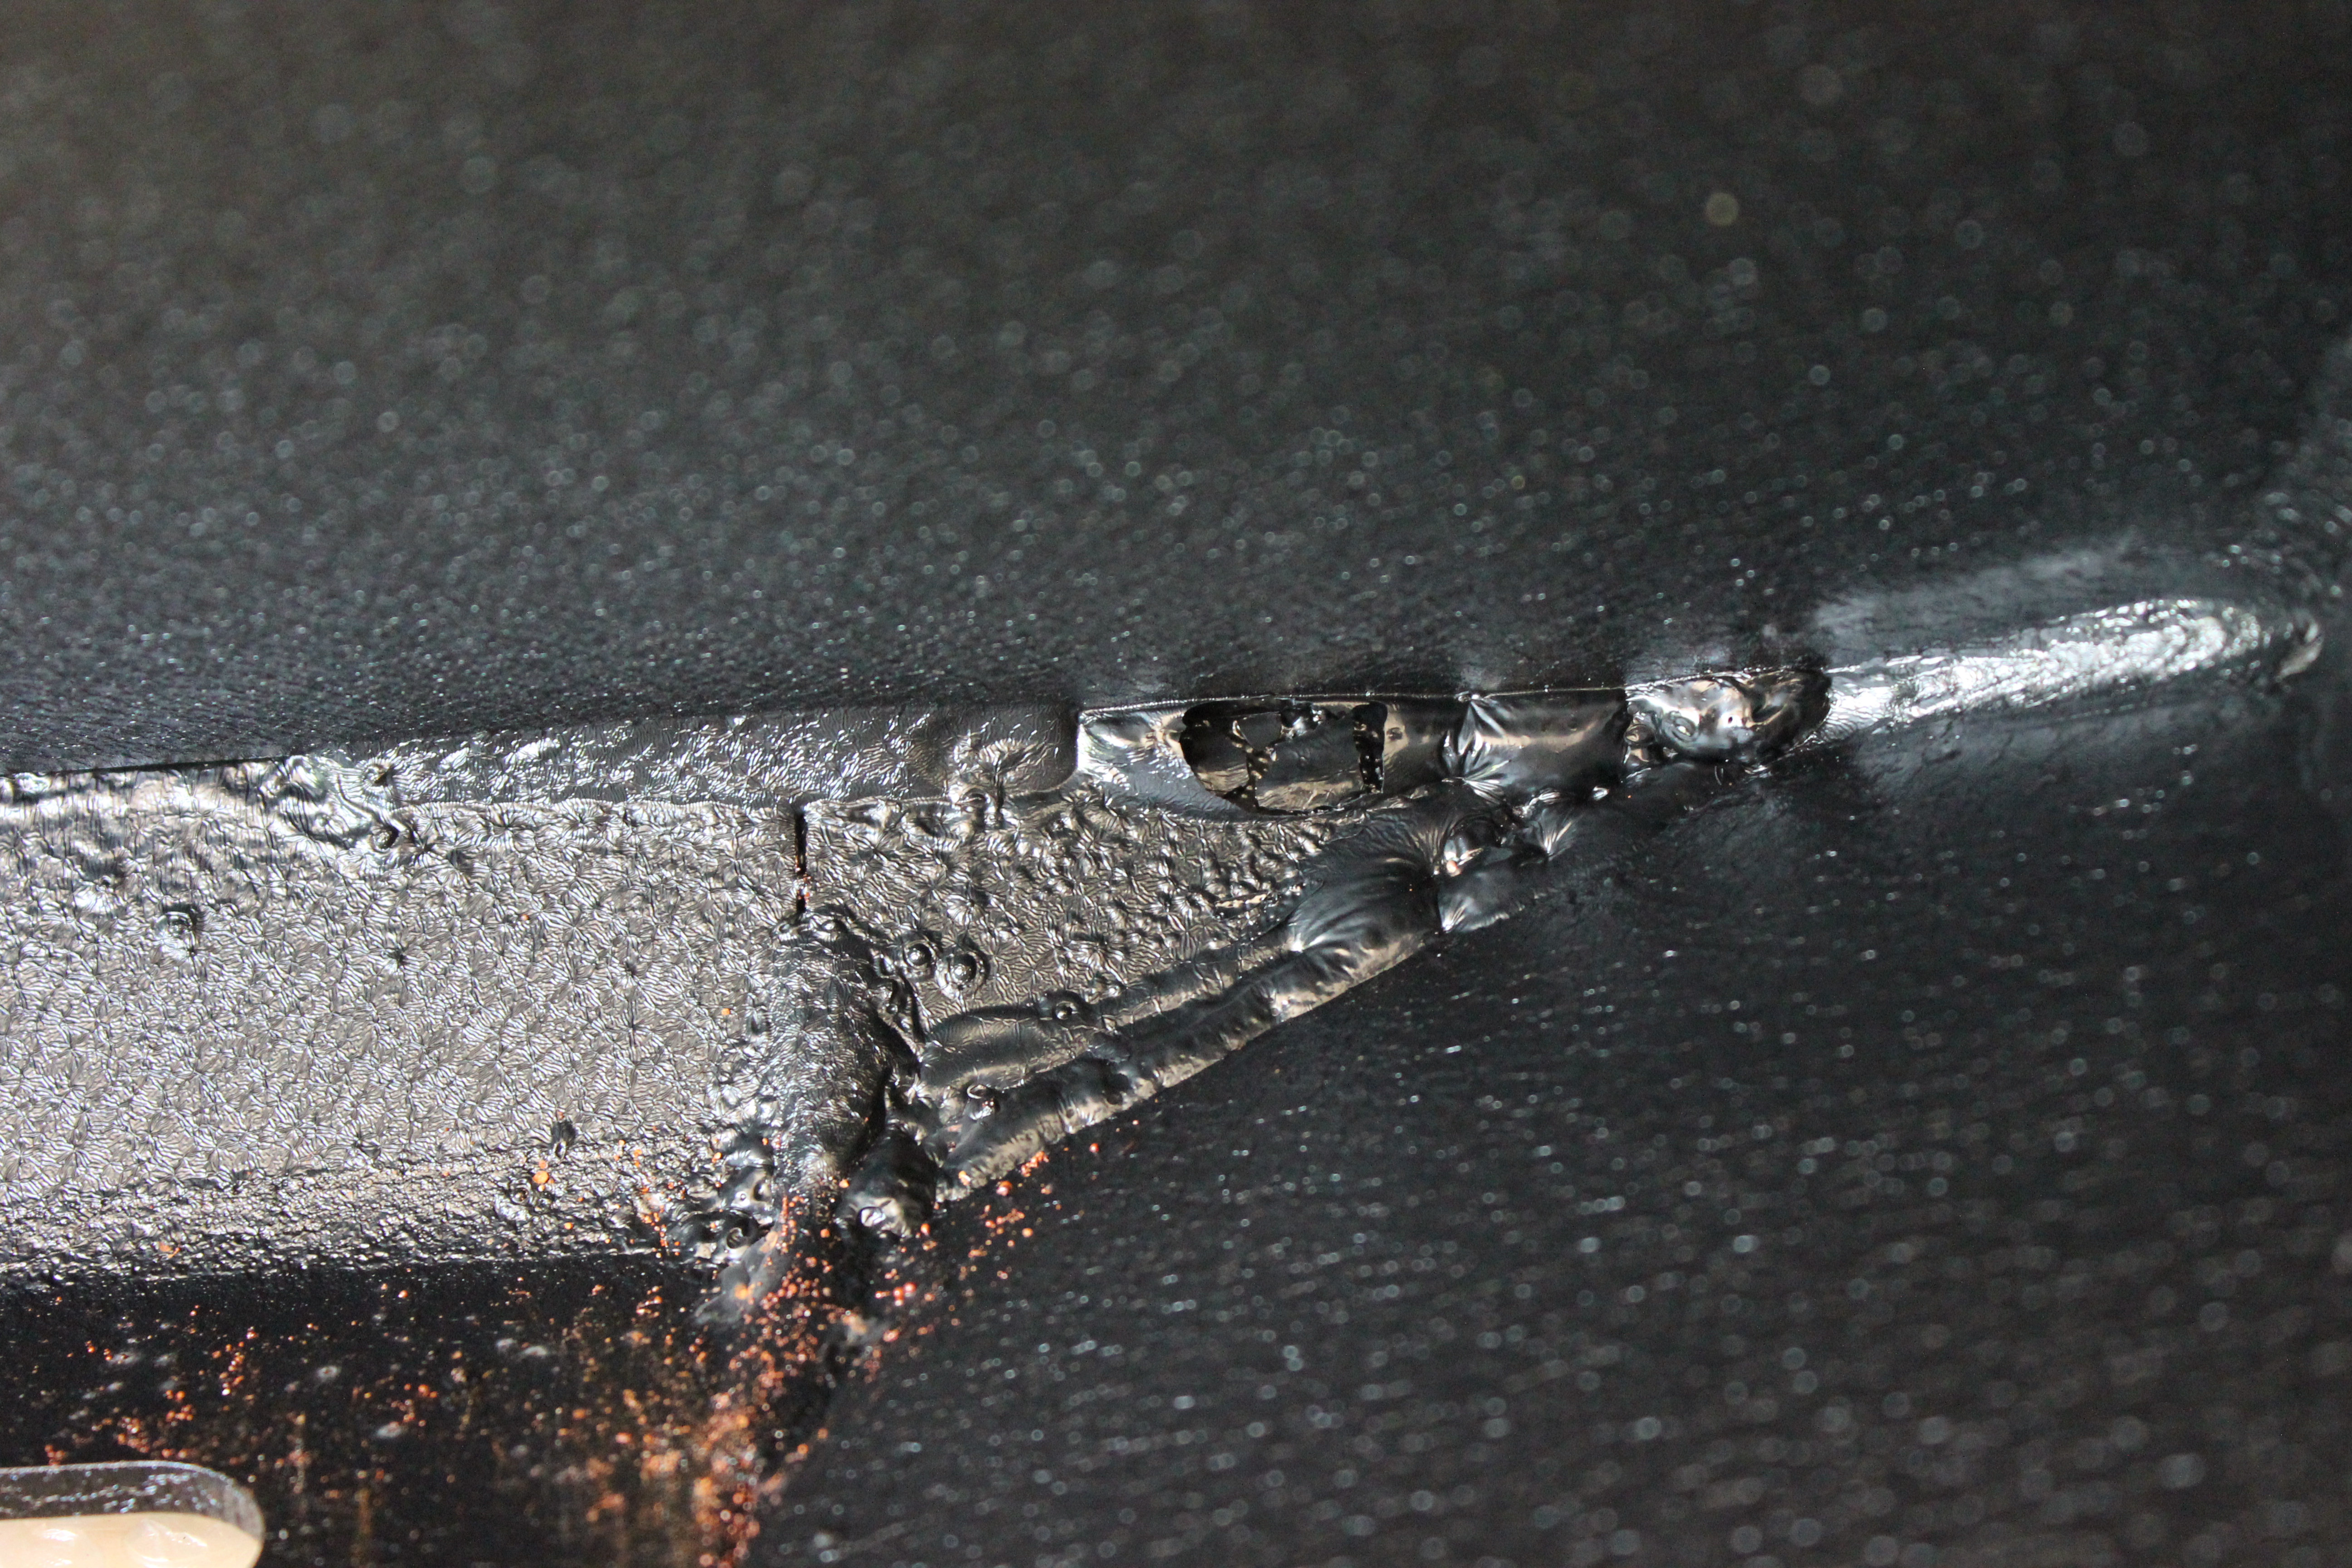
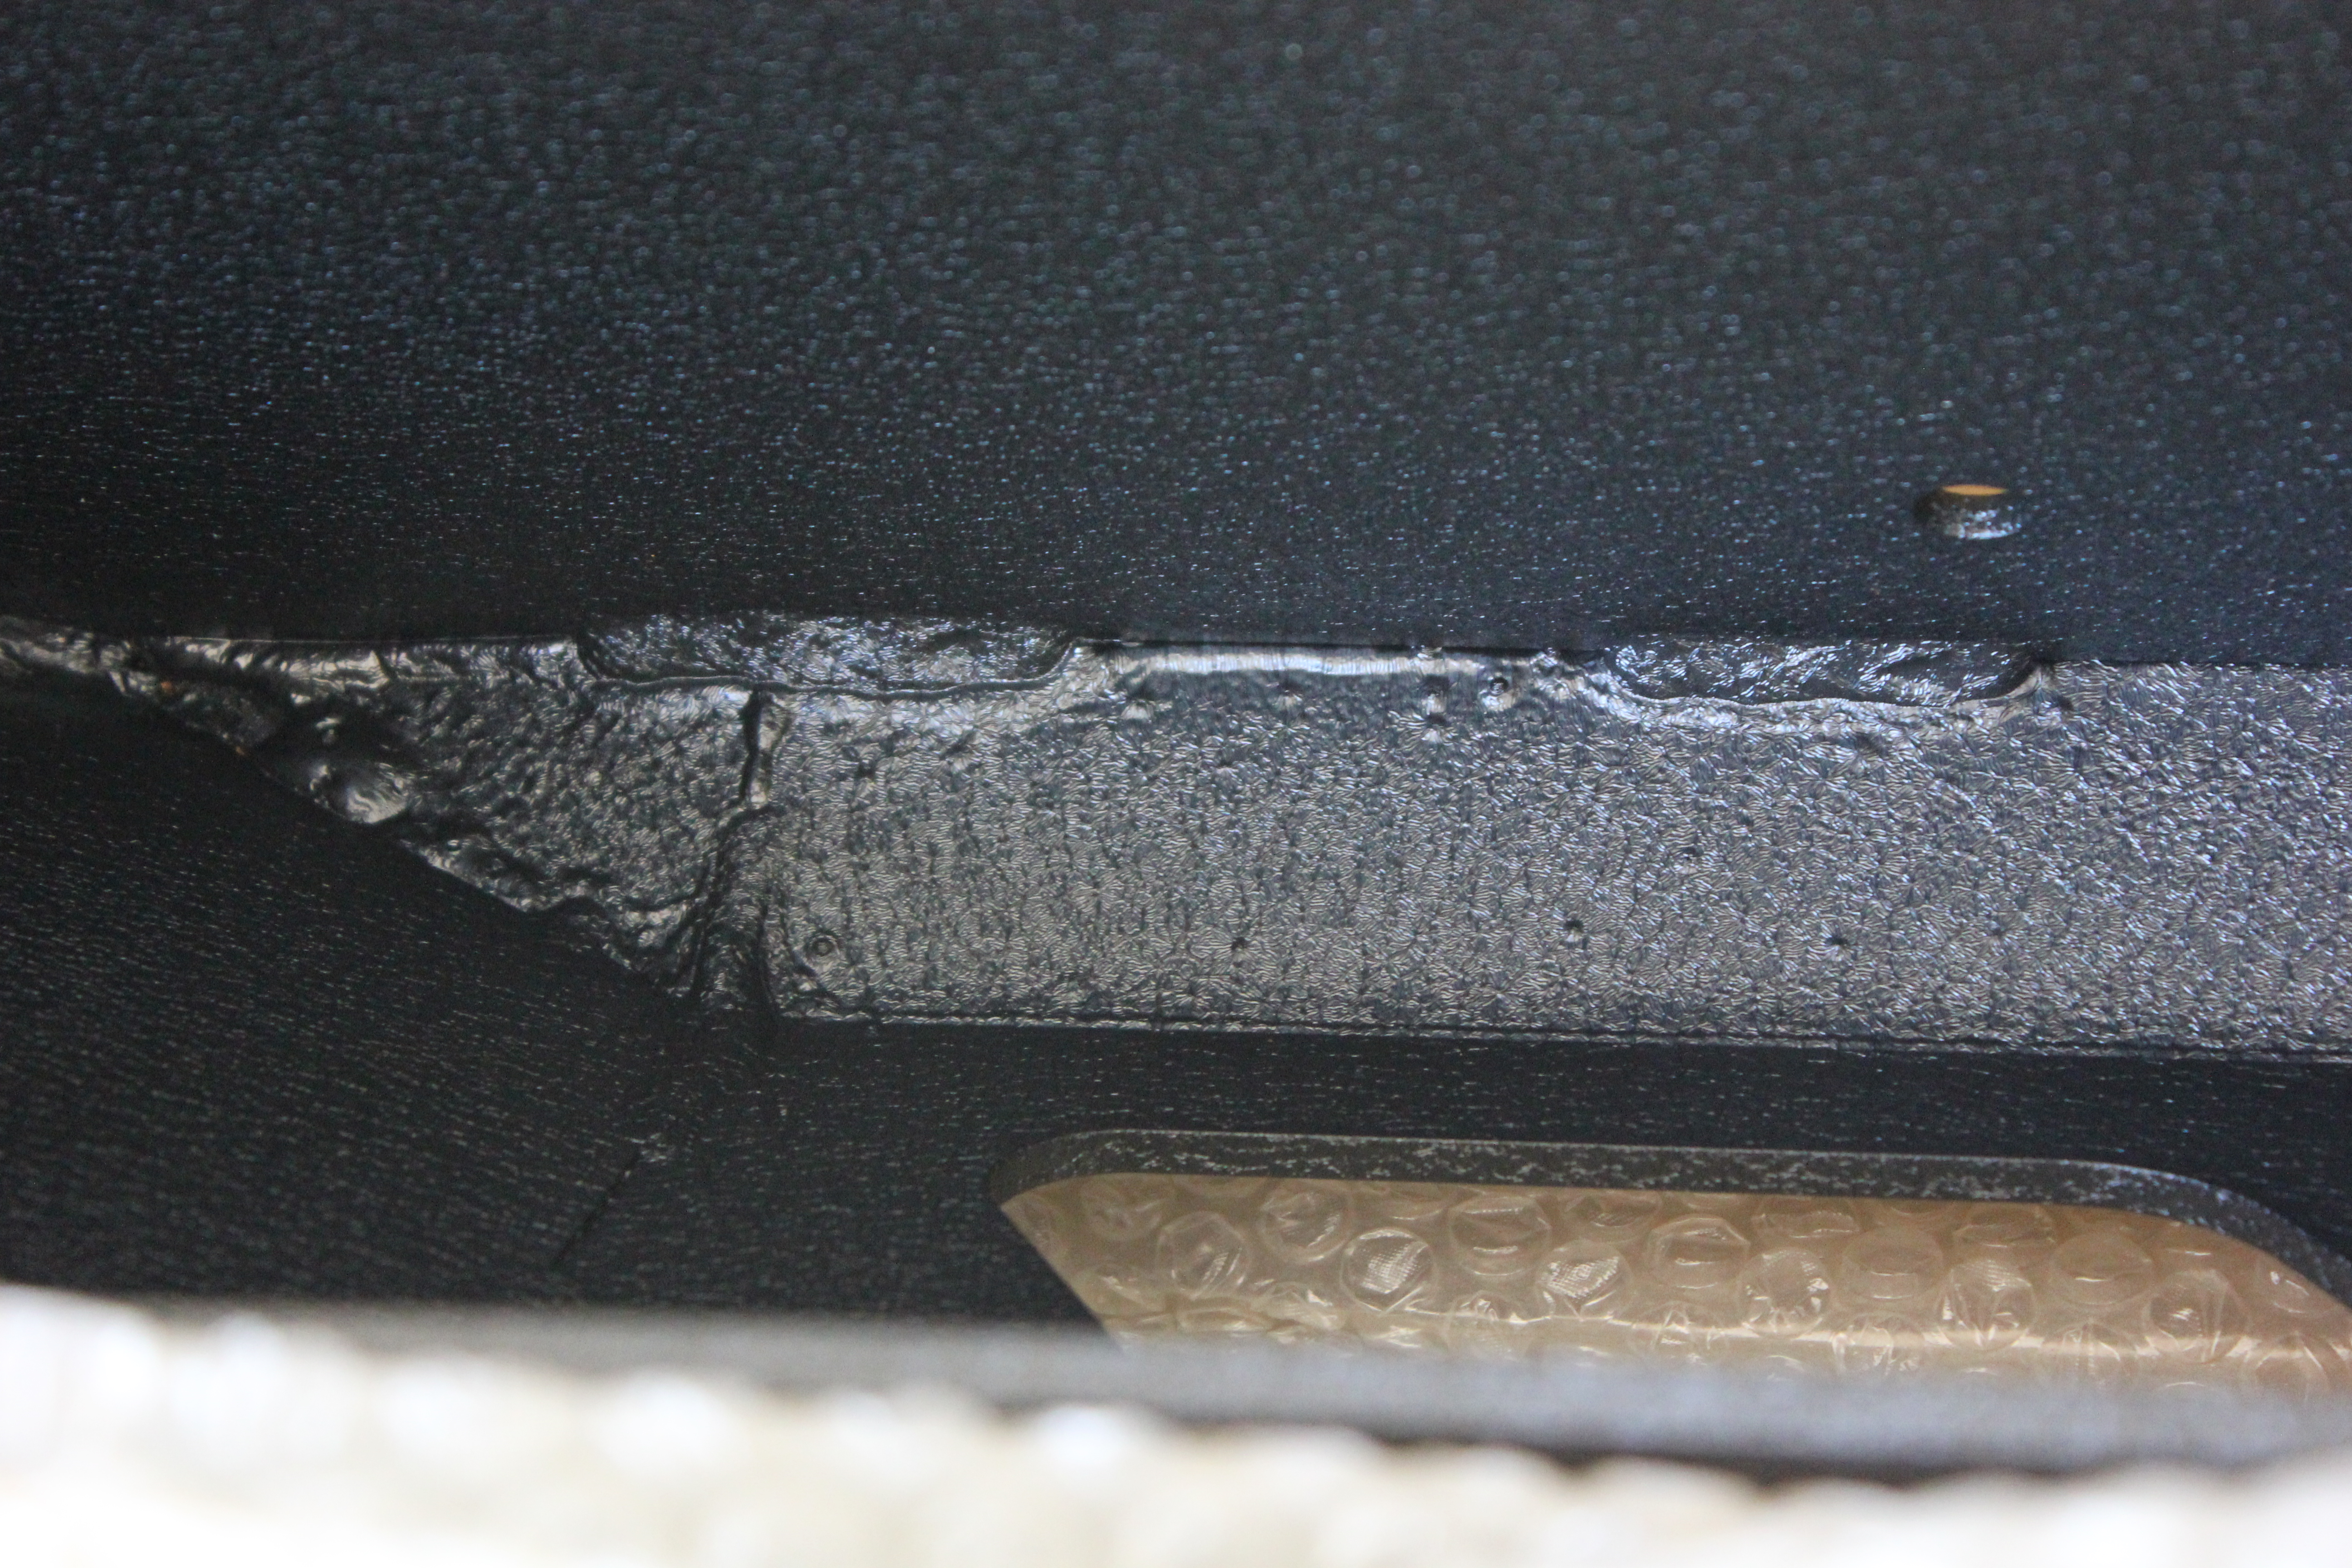
A quick word on the welds
One of the big gripes I read about these were that they had crappy welds. You may have noticed already, but that seems to be a valid complaint for the welds you can’t see. The external ones are fine.
Here we go:
Removing the Bumper End Caps
A lot of instructions out there just simply say “remove the end caps” like you just know how to do that. The XJ Field Service Manual shows you how to do it, but here are the basics.
If you have a skid plate, you’ll want to remove it first. There are three bolts on the passenger side, one on the driver side, and up to three in the front, depending on how thorough the guy installing yours was.
I removed my tow hooks and fog lights before I took off the end caps, but I’m not certain that was necessary. There are 4 bolts that hold on each end cap: One near the fog light (10mm), one near the tow hook (10mm), and two in the wheel well (1/4″):
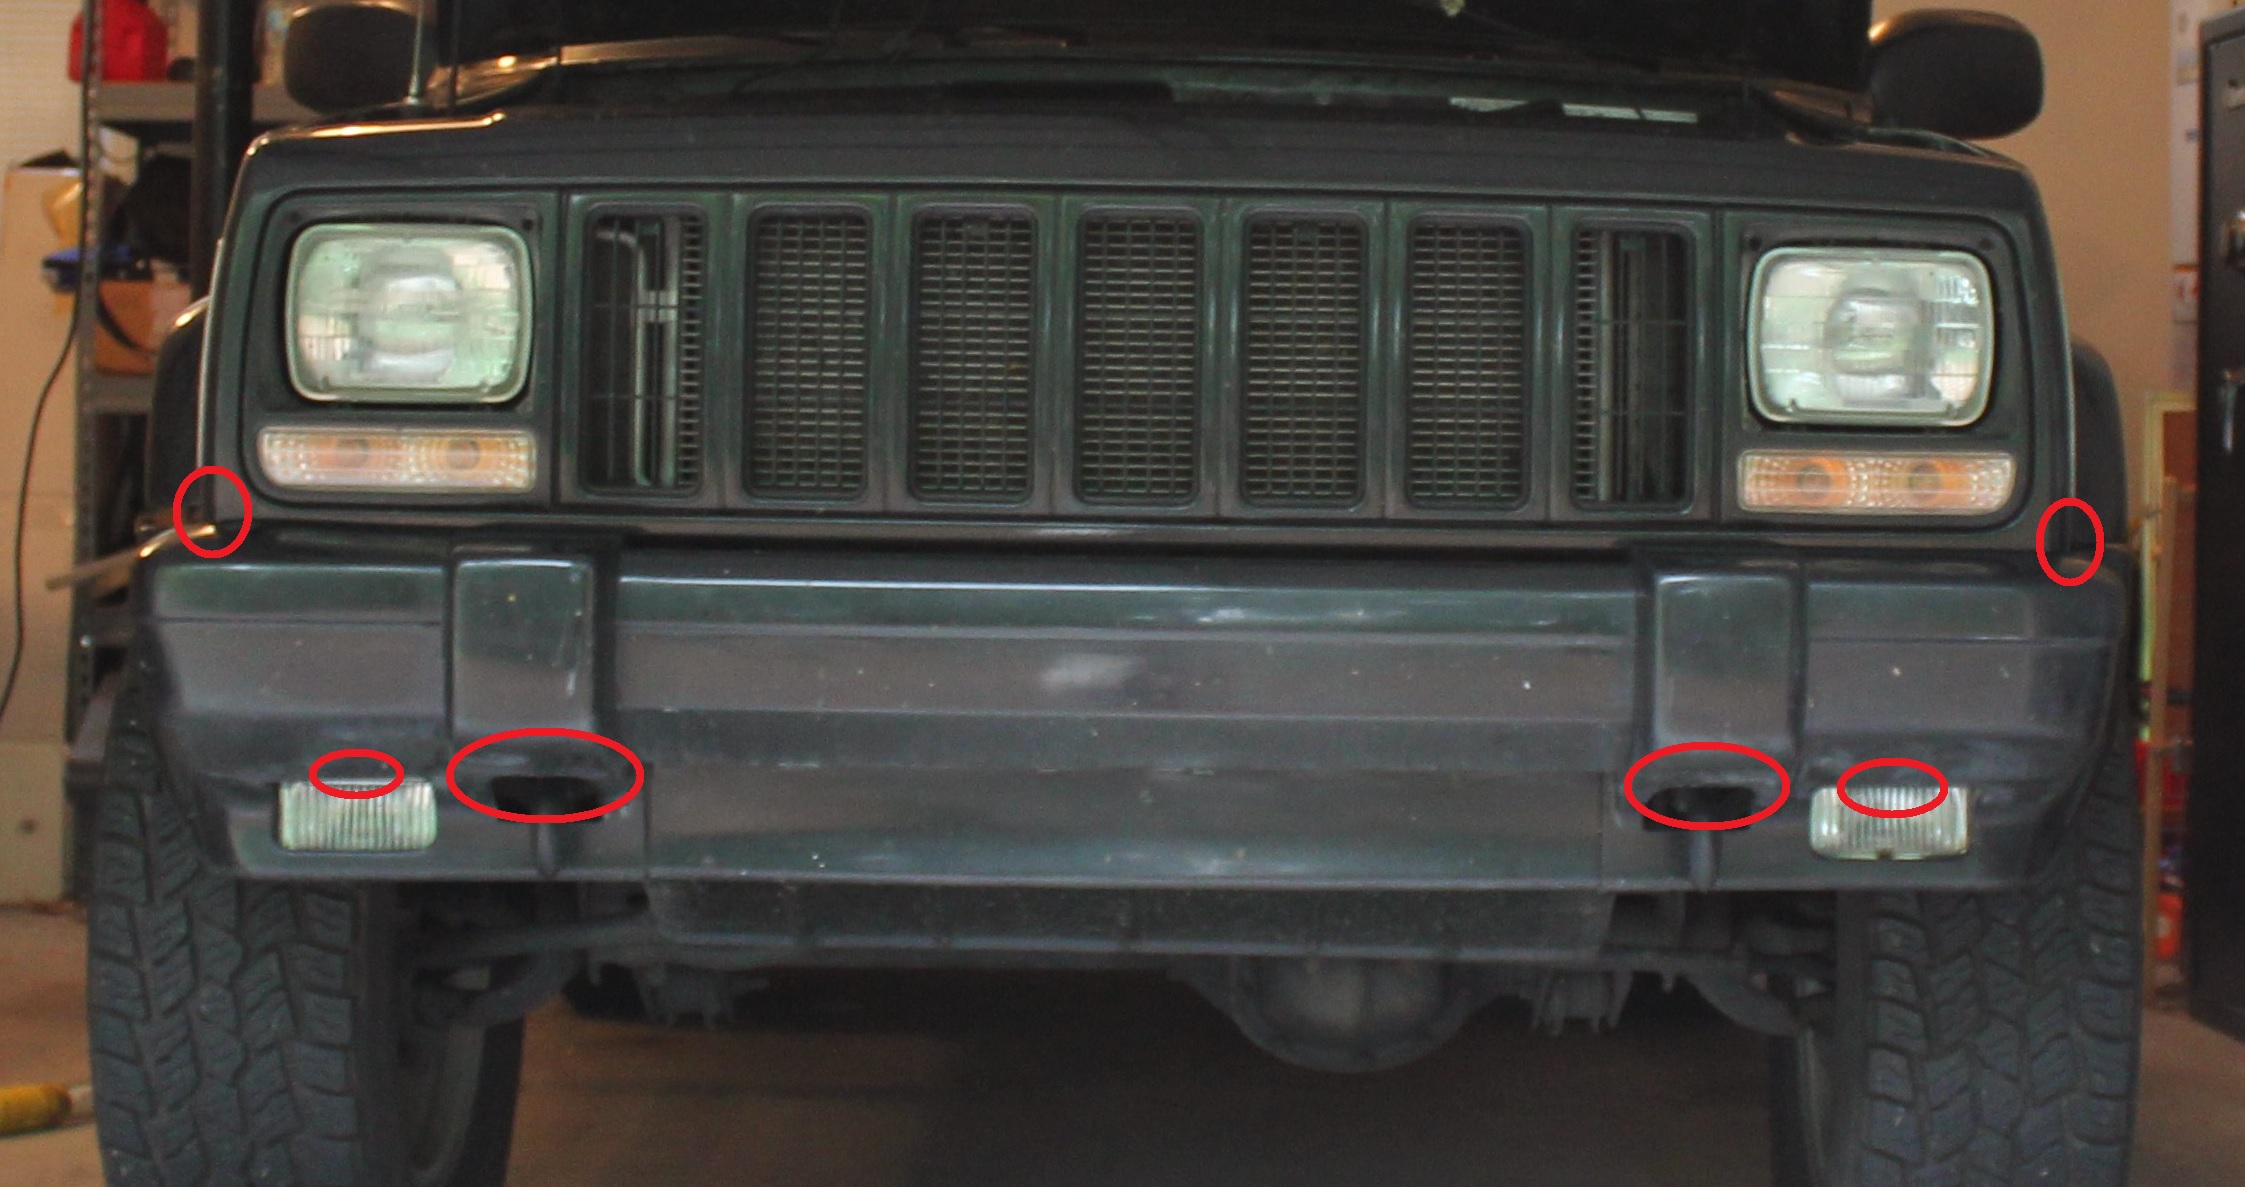
Here’s one near the tow hook:
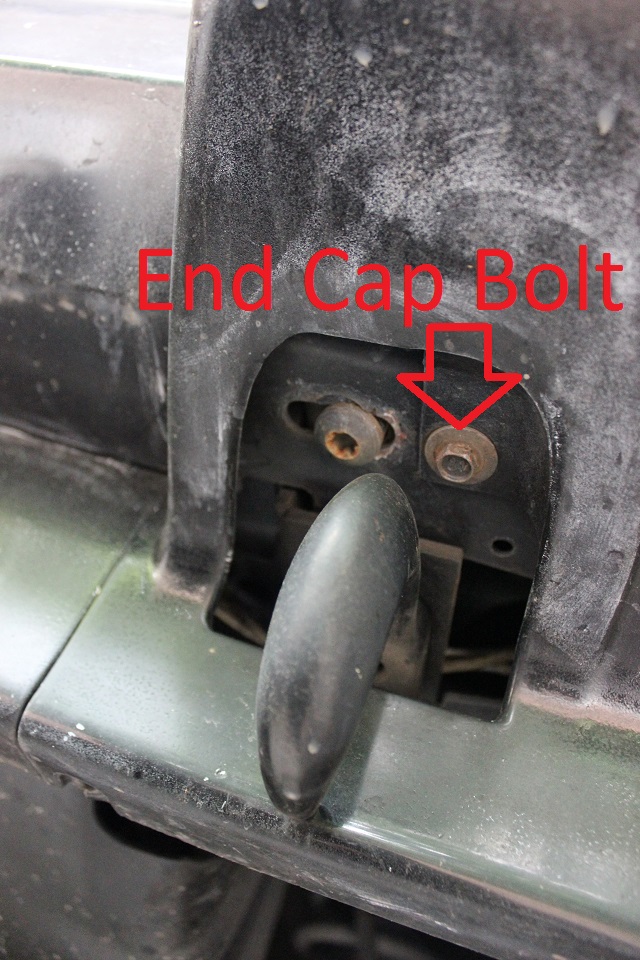
The torx bolt is holding the bumper to the bumper bracket. It might be hard to see from this angle, but the location of the tow hook made it difficult to get to the bolt with a socket. A wrench probably would have worked just fine. Lucky for me, when I bought this Cherokee the tow hooks were installed like this:
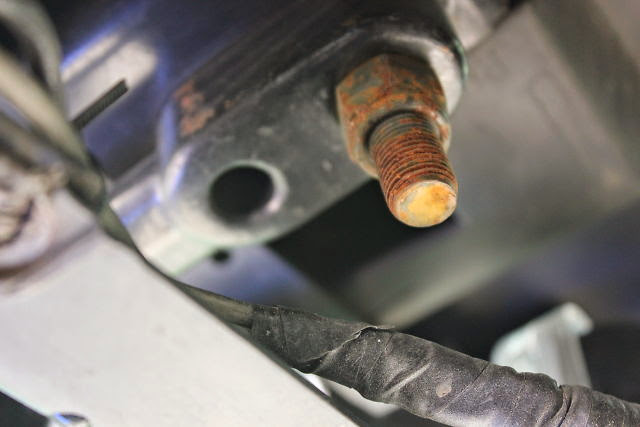
Hint: There’s two holes for a reason…there’s supposed to be a second bolt there. They’re not studs, so you’ll need to put a box wrench or a socket on the top side as well. And, as you can see from the picture, you’ll need a deep socket. Impact wrench FTW.
After you take off the tow hook it’s easy peasy.
And here’s the one near the fog light:
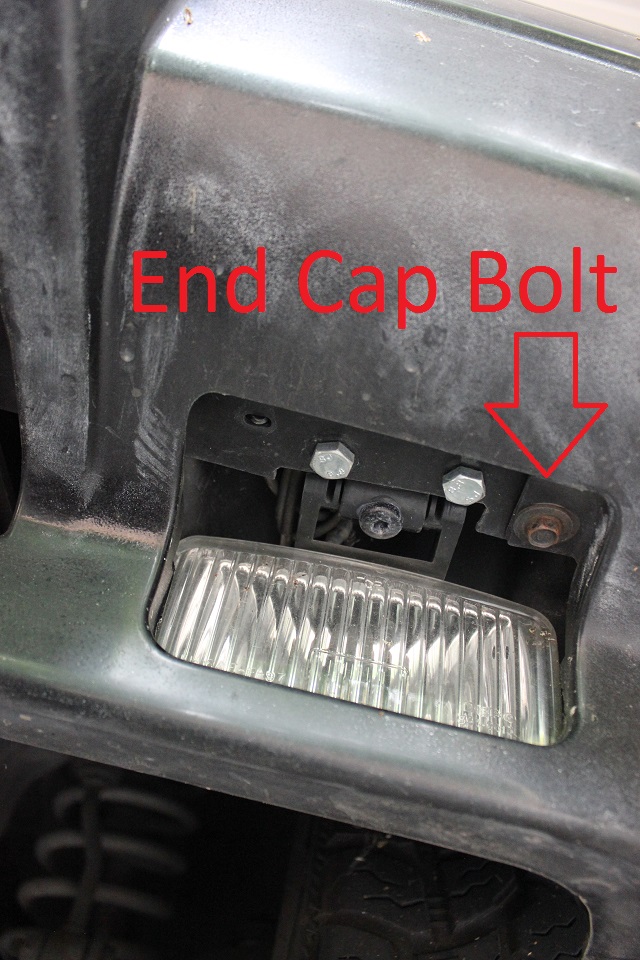
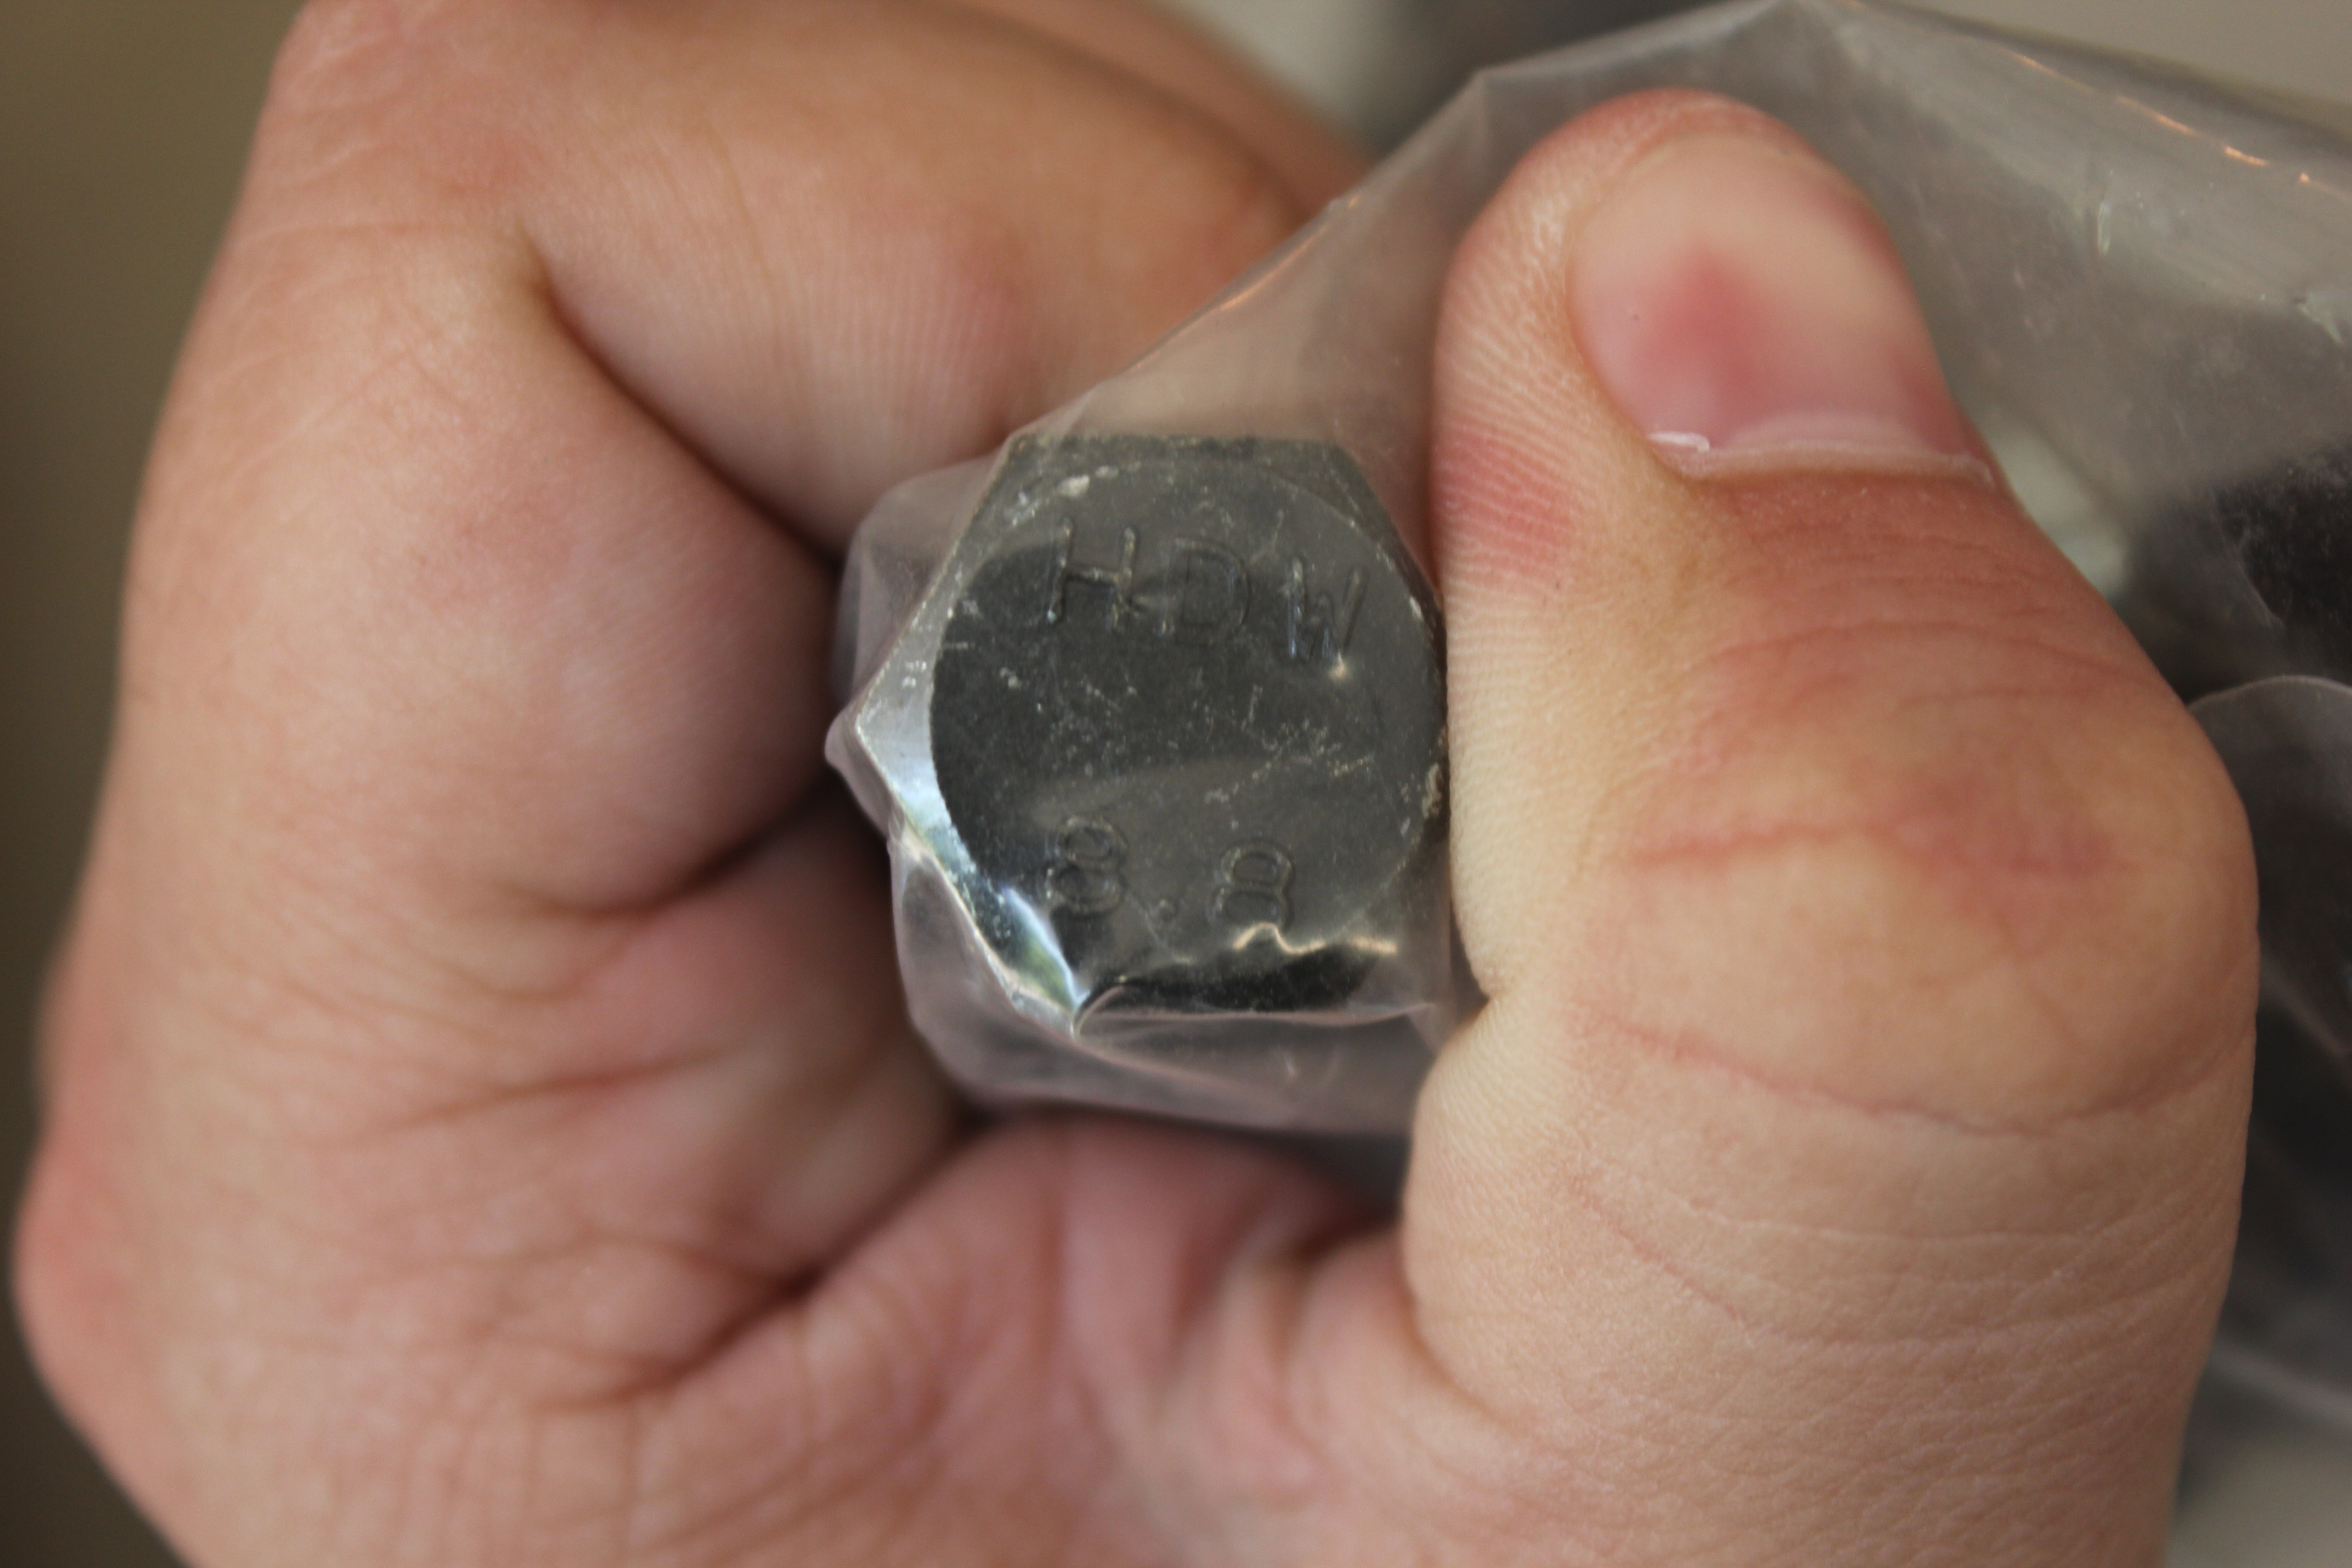
For both the one near the tow hook and this one, there’s a nut on top that you’ll have to grab with a box wrench. In the above picture, the two silver bolts are for the fog light bracket, and they attach to the bumper. You can remove them or not. I did. Fun Fact: Whoever installed these used Grade 8.8 for the fog light brackets, and ungraded zinc for the tow hook brackets and the skid plate. Priorities.
Unfortunately, I didn’t get any pictures of the last two 1/4″ bolts. You’ll need to remove the splash guard to get to them by popping out a couple of plastic rivets with a tool like this. If you’re careful, you can reuse them. To give you an idea of where to look for them, the two 1/4″ bolts fasten the bumper end cap to the fender.
Once all 4 bolts holding on the bumper end cap are removed, you can pop it off by pulling it towards the front of the Jeep and lifting up.
Removing the bumper
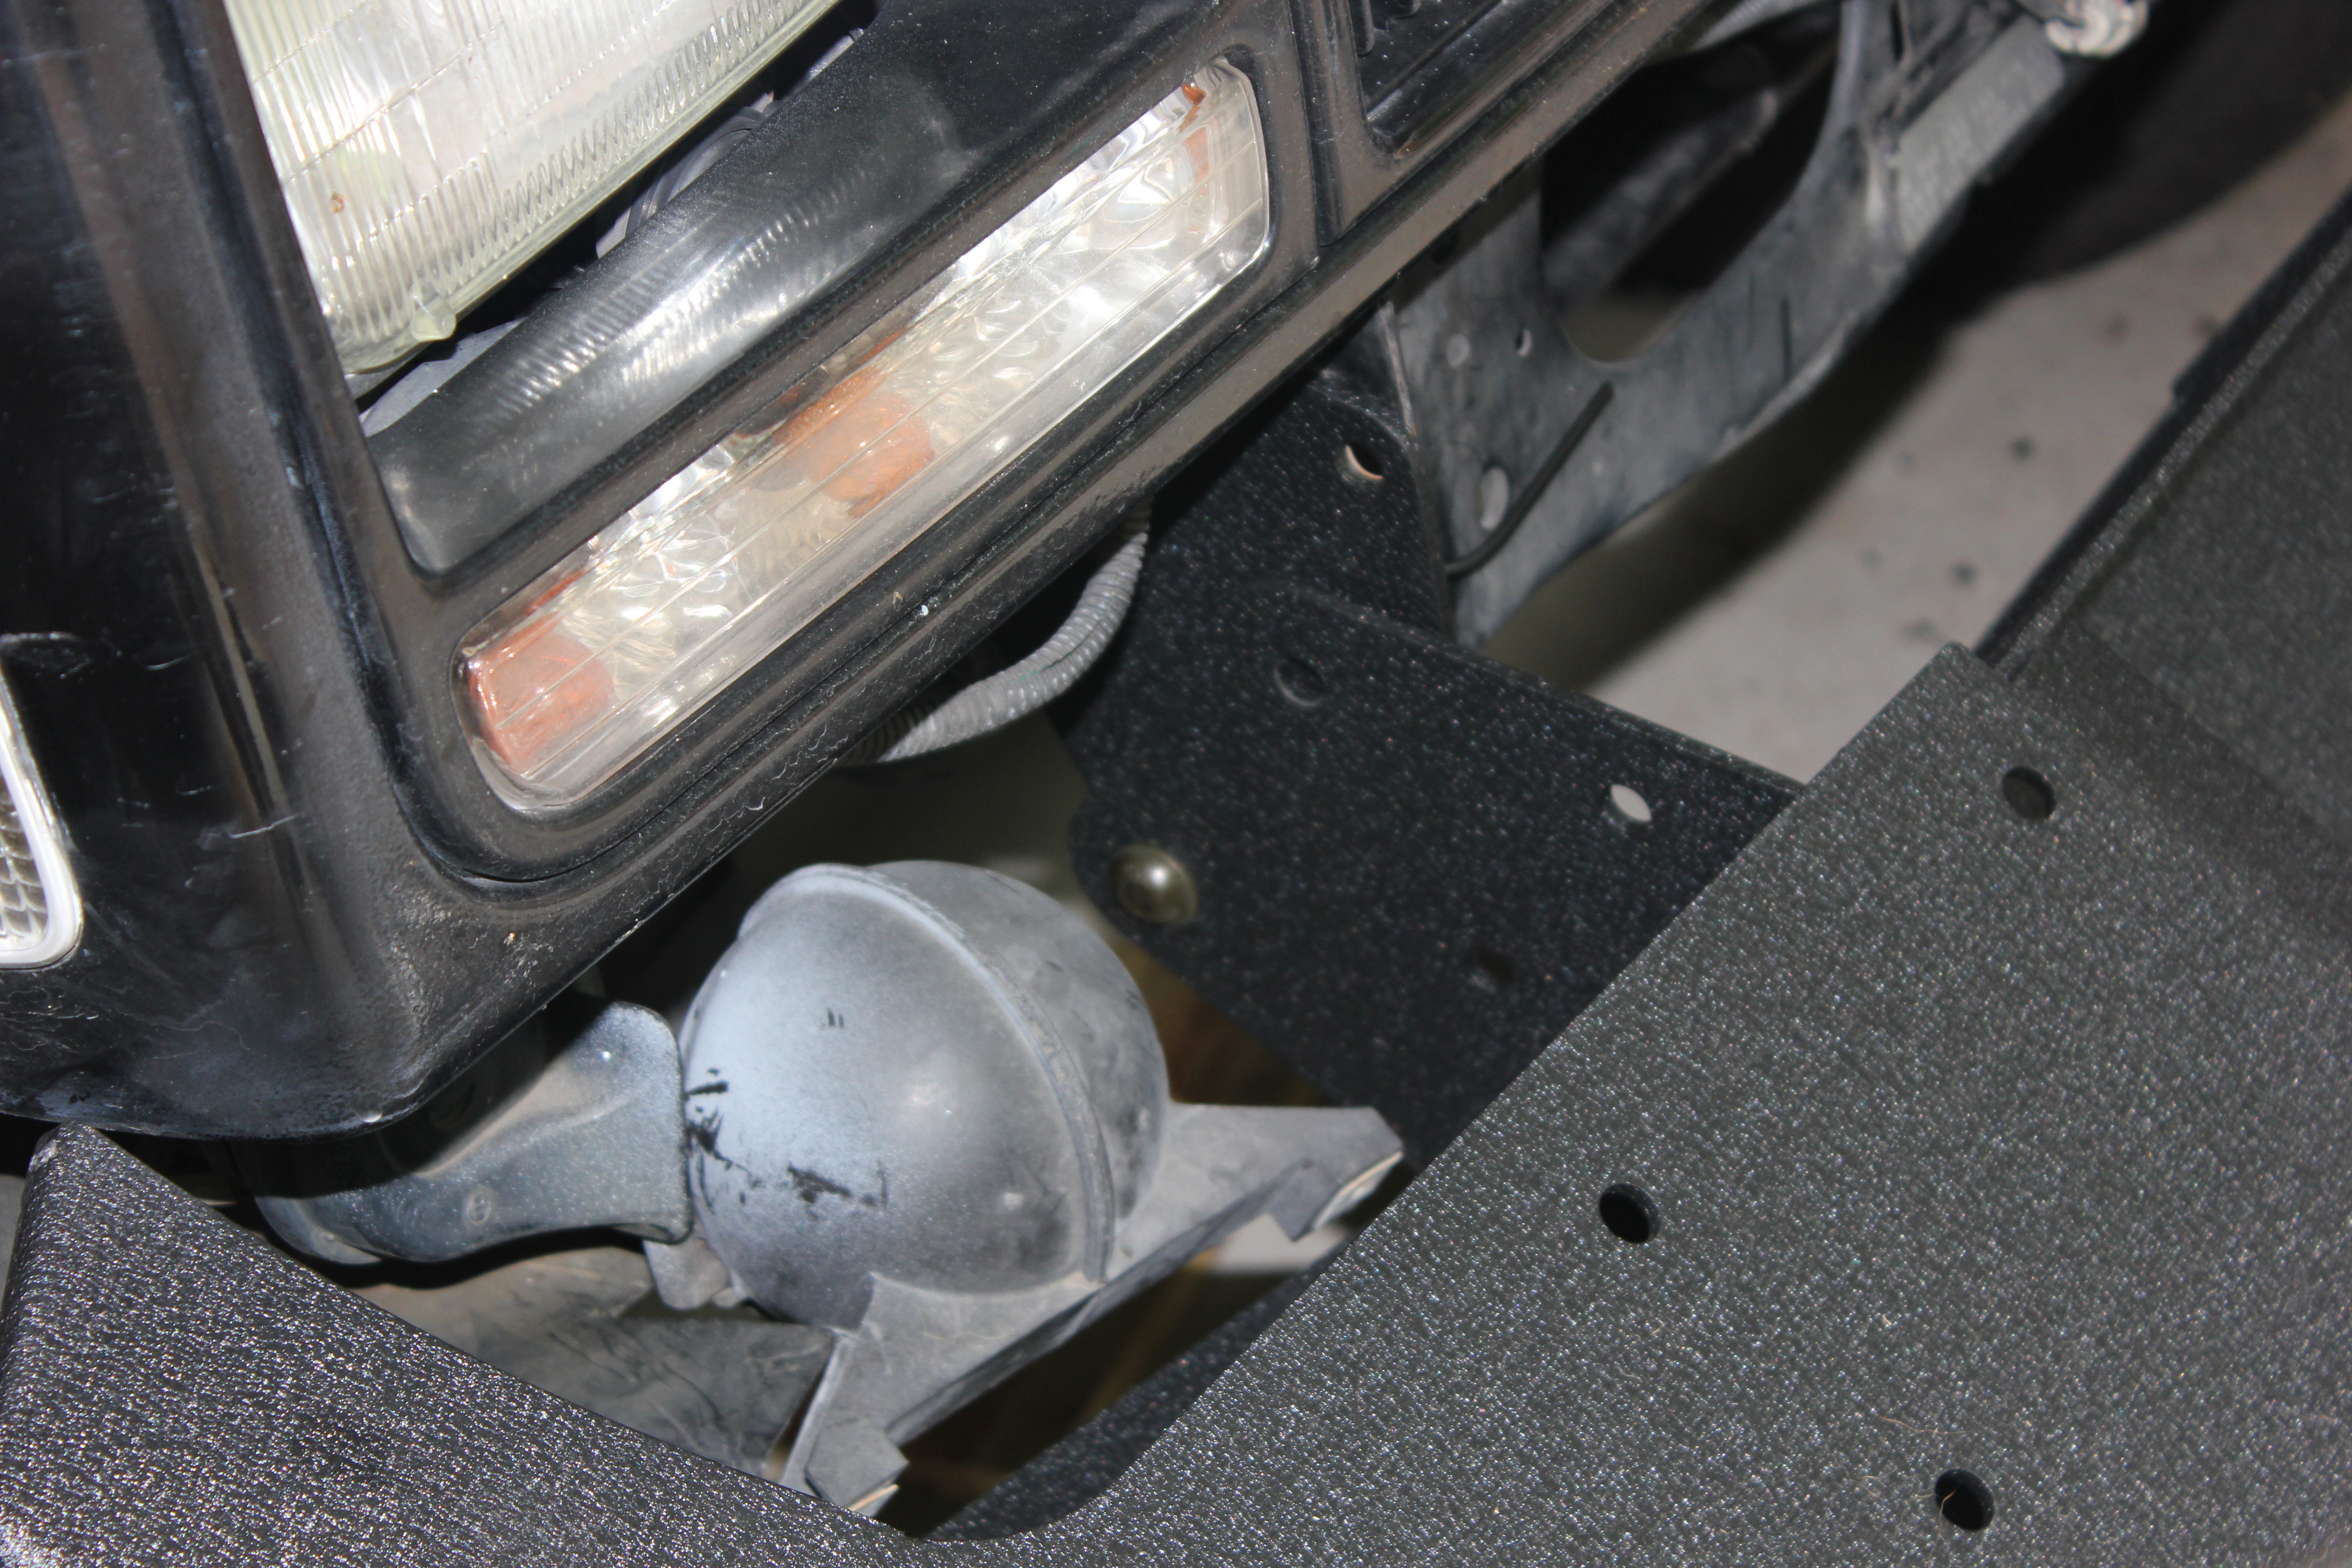
Now you have just the bumper, no end caps. You might also still have the front air dam attached to the bumper, and you can leave that on (it’s a piece of plastic on the bottom that extends down a couple of inches). Before you take off any more bolts, you’ll want to remove the two T-25 torx screws that are on the passenger side. They hold the vacuum reservoir to the bumper. The reservoir looks kind of like an old toilet float. Later on, I’ll let you know what I did with it.
There are four T-50 torx bolts holding the bumper onto the bumper brackets. Take off the bottom two (if you haven’t already), then take off the top two. Pull the bumper off.
Removing other bits
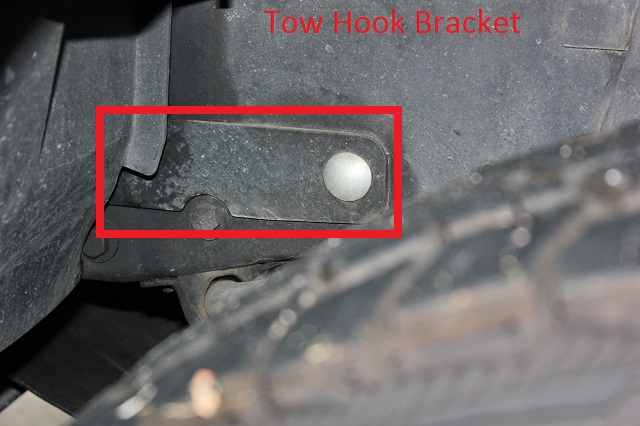
You’ll need to also take off the bumper brackets and tow hook brackets. The bumper brackets are the bits that your bumper attached to, so that’s a no brainer. The tow hook brackets are similar. Be mindful of the rear bolt for the tow hook brackets:
Once all that stuff is off, it’s time to start following Smittybilt’s instructions.
Installing the Bumper
Step 1 is removing the old bumper. That we’ve already done. On to step 2!
Step 2: On the driver’s side of the vehicle, remove the (3) OE steering box bolts. Be sure to
support the steering box after unbolting it, (Fig B)
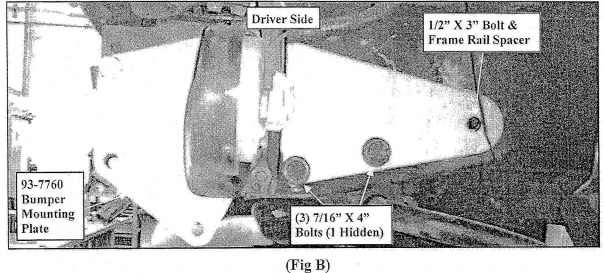
That’s a pretty horrible picture to include in your instructions, don’t you think? And there’s a hidden bolt? What? Where?
They mean hidden in that picture, not like it’s hiding somewhere that’s not obvious. Here’s a pic I took of the “hidden” bolt:
It’s just hidden by the bracket in the picture that Smittybilt took.
This is also a step where you’re going to need a friend. I didn’t really find a good way to “support the steering box after unbolting it” other than being under the jeep and holding up the box while my buddy started the bolts by hand. YMMV.
Oh, one thing that is important to note. My steering box bolts had Loctite on them. They were in there pretty good–to the point that my impact driver couldn’t loosen at least one of them. You can use a breaker bar and a regular ratchet. I ended up setting my torque wrench to like 150ft-lbs and using that.
Step 3: Install (1) front bumper mount plate (93-7760) to the outside of the frame rai1. Secure the mount plate and the OE steering box to the frame rail using the (3) provided 7/l6″ X 4″ bolts and hardware in the OE steering box bolt holes. Install the 1/2″ X 3 1/2″ bolt, 2″ spacer (90-1051 inside the frame) and hardware into the rear most hole in the mounting plate.
NOTE: Be sure the (2) front OE bumper mounting plate bolt holes line up with the Remaining holes in the front bumper mount (93-7760). (Fig B)
What I did here, as previously mentioned, was had a friend start the steering box bolts while I held the steering box in place. They were hand-tightened, and then I put in the rear bolt. Remember, on the rear bolt you put the big 2″ washer inside the frame. So it goes Locking Nut->2″ washer->frame->bumper mount plate->small washer->bolt head. Since you’re working with a locking nut, you’ll need to use a wrench on one side and a ratchet on the other. Tighten it down most of the way, but allow the plate to move freely.
At this point the mounting plate should have a little play in it. Why? Well, you see those three empty holes on the picture above? Those need to line up with the holes in the frame. One of them has a nut welded in the frame, but the other two (the ones closest to the front) do not. You have to make sure all these holes line up or you won’t be able to get the bumper on. I did this by using the included mounting hardware to line them up. At one point, I had to use a 1/4″ socket extension as a lever to line up the two front holes.
Once everything is lined up, take out the top bolt for the steering box. Put Loctite on it, and then tighten it down to 70 ft lbs. Make sure the holes continue to line up! Do the same for the other two. There’s no torque spec for the rear bolt, but while you’ve got your torque wrench set to 70, might as well use that.
Now, on to the passenger side…
Step 4: On the passenger side of the vehicle, install (1) front bumper mount plate (93-7760) to the outside of the frame rail. With the bracket secured in it’s proper position, use the (3) middle holes in the mounting plate as a template, center punch and drill through the outer wall of the frame ONLY! NOTE: Be sure the (2) front OE bumper mounting plate bolt holes line up with the front holes in the front bumper mount (93-7760) before drilling. (Fig C)
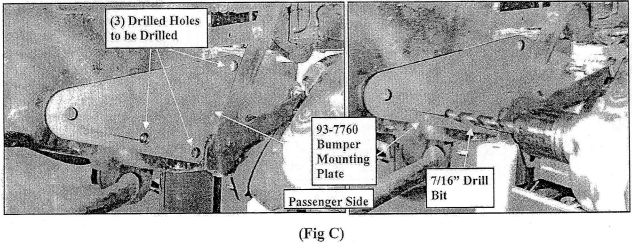
Maybe its because the previous owner installed factory tow hooks, or maybe it’s because Smittybilt was using a 1996 or earlier model to write their instructions, but I only had to drill one hole, not three. The way I made sure everything lined up was to basically bolt the thing in place and mark the missing hole. Then I unbolted everything and drilled it out.
Step 5: Insert the nut plate (90-7758) into the front opening of the passenger side frame rail. Secure the mounting plate through the frame to the nut plate (90-7758) using the (3) supplied 7/16″ X 1 1/4″ bolts and hardware. (Fig D)
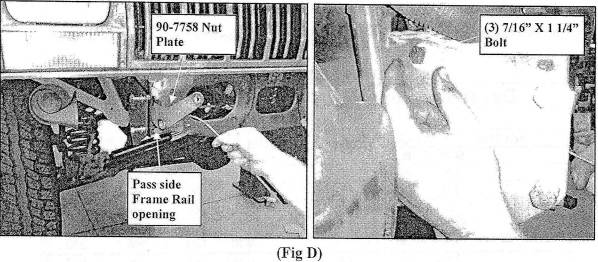
Like I said before–and you can kind of see it in the picture on the left–you have to fish the nut plate inside the frame rail. I had to bend the wire into a Z or an S or maybe an N but you get the point. There was a nut welded inside the frame rail that I had to get up and over in order to get the nut plate where it needed to go. I put one of the bolts into the frame rail first so i could see where I was going, and then tried to match up the nut plate to the bolt. Don’t tighten them all the way down just yet since you’ll still need to do the rearmost bolt in the next step. Lather, rinse, repeat.
Step 6: Install the l/2″ X 3 1/2″ bolt,2″ spacer (90-1051 inside the frame) and hardware into the rear most hole in the mounting plate. (Fig B)
This is just like the driver side. Tighten down most of the way, make sure everything is lined up, then tighten all the bolts down.
Step 7: NOTE: This step might require 2 people. Raise the new XRC front bumper (93-7761) up into place and align the bumper mounting holes with holes on the bumper mounting plates. Secure using the supplied (6) 10mm X 40 bolts and washers. Insert the (2) 7/16″ X 1 1/4″ bolts and hardware into the remaining lower holes and secure using the supplied hardware.
(Fig E)

That’s right…. Step 7 is basically “and now, mount the bumper” with a picture of what it looks like when you’re done. What I tried to do was get something tall enough that we could sit the bumper on and scoot it over to line up the holes. That didn’t work out for me, so I decided to try to use the lower hole and swivel the bumper up. SO I got the tallest thing I had and put the bumper on it, like so:
And then I put the bolts in the lower hole on each side, like so (forgive the blurry):
That…..didn’t work. You see, the fenders kind of got in the way. In some later pictures you’ll see some missing paint right where the grille shell meets the front fenders. That’s what happened there.
So plan be was that my friend and I got under the bumper, one on each side, and lifted at the same time. We each put a bolt in two holes to keep the thing in place. Then I went back around to the 8 bolts needed and tightened everything down.
The rest of Smittybilt’s instructions basically say make sure it’s level and torque the bolts down and you’re done, but there’s a couple more things you need to do.
First, your vacuum reservoir is still just kind of hanging out. Now that the bumper is in place and not going anywhere, it’s time to secure that. I used some zip ties and connected it to the bracket that connects the frame rail and the fender–it’s the passenger side version of the bracket that was “hiding” the bolt we talked about earlier. That’s mostly worked out for me but I can hear it rattling around when I go over grooved pavement. If you’ve got a better suggestion, I’m completely open to it.
And the last thing is that even though I have a 97+ Cherokee, I still have to do some trimming! Fortunately, it’s not trimming sheetmetal. The splash guards have to be trimmed because you end up with this:
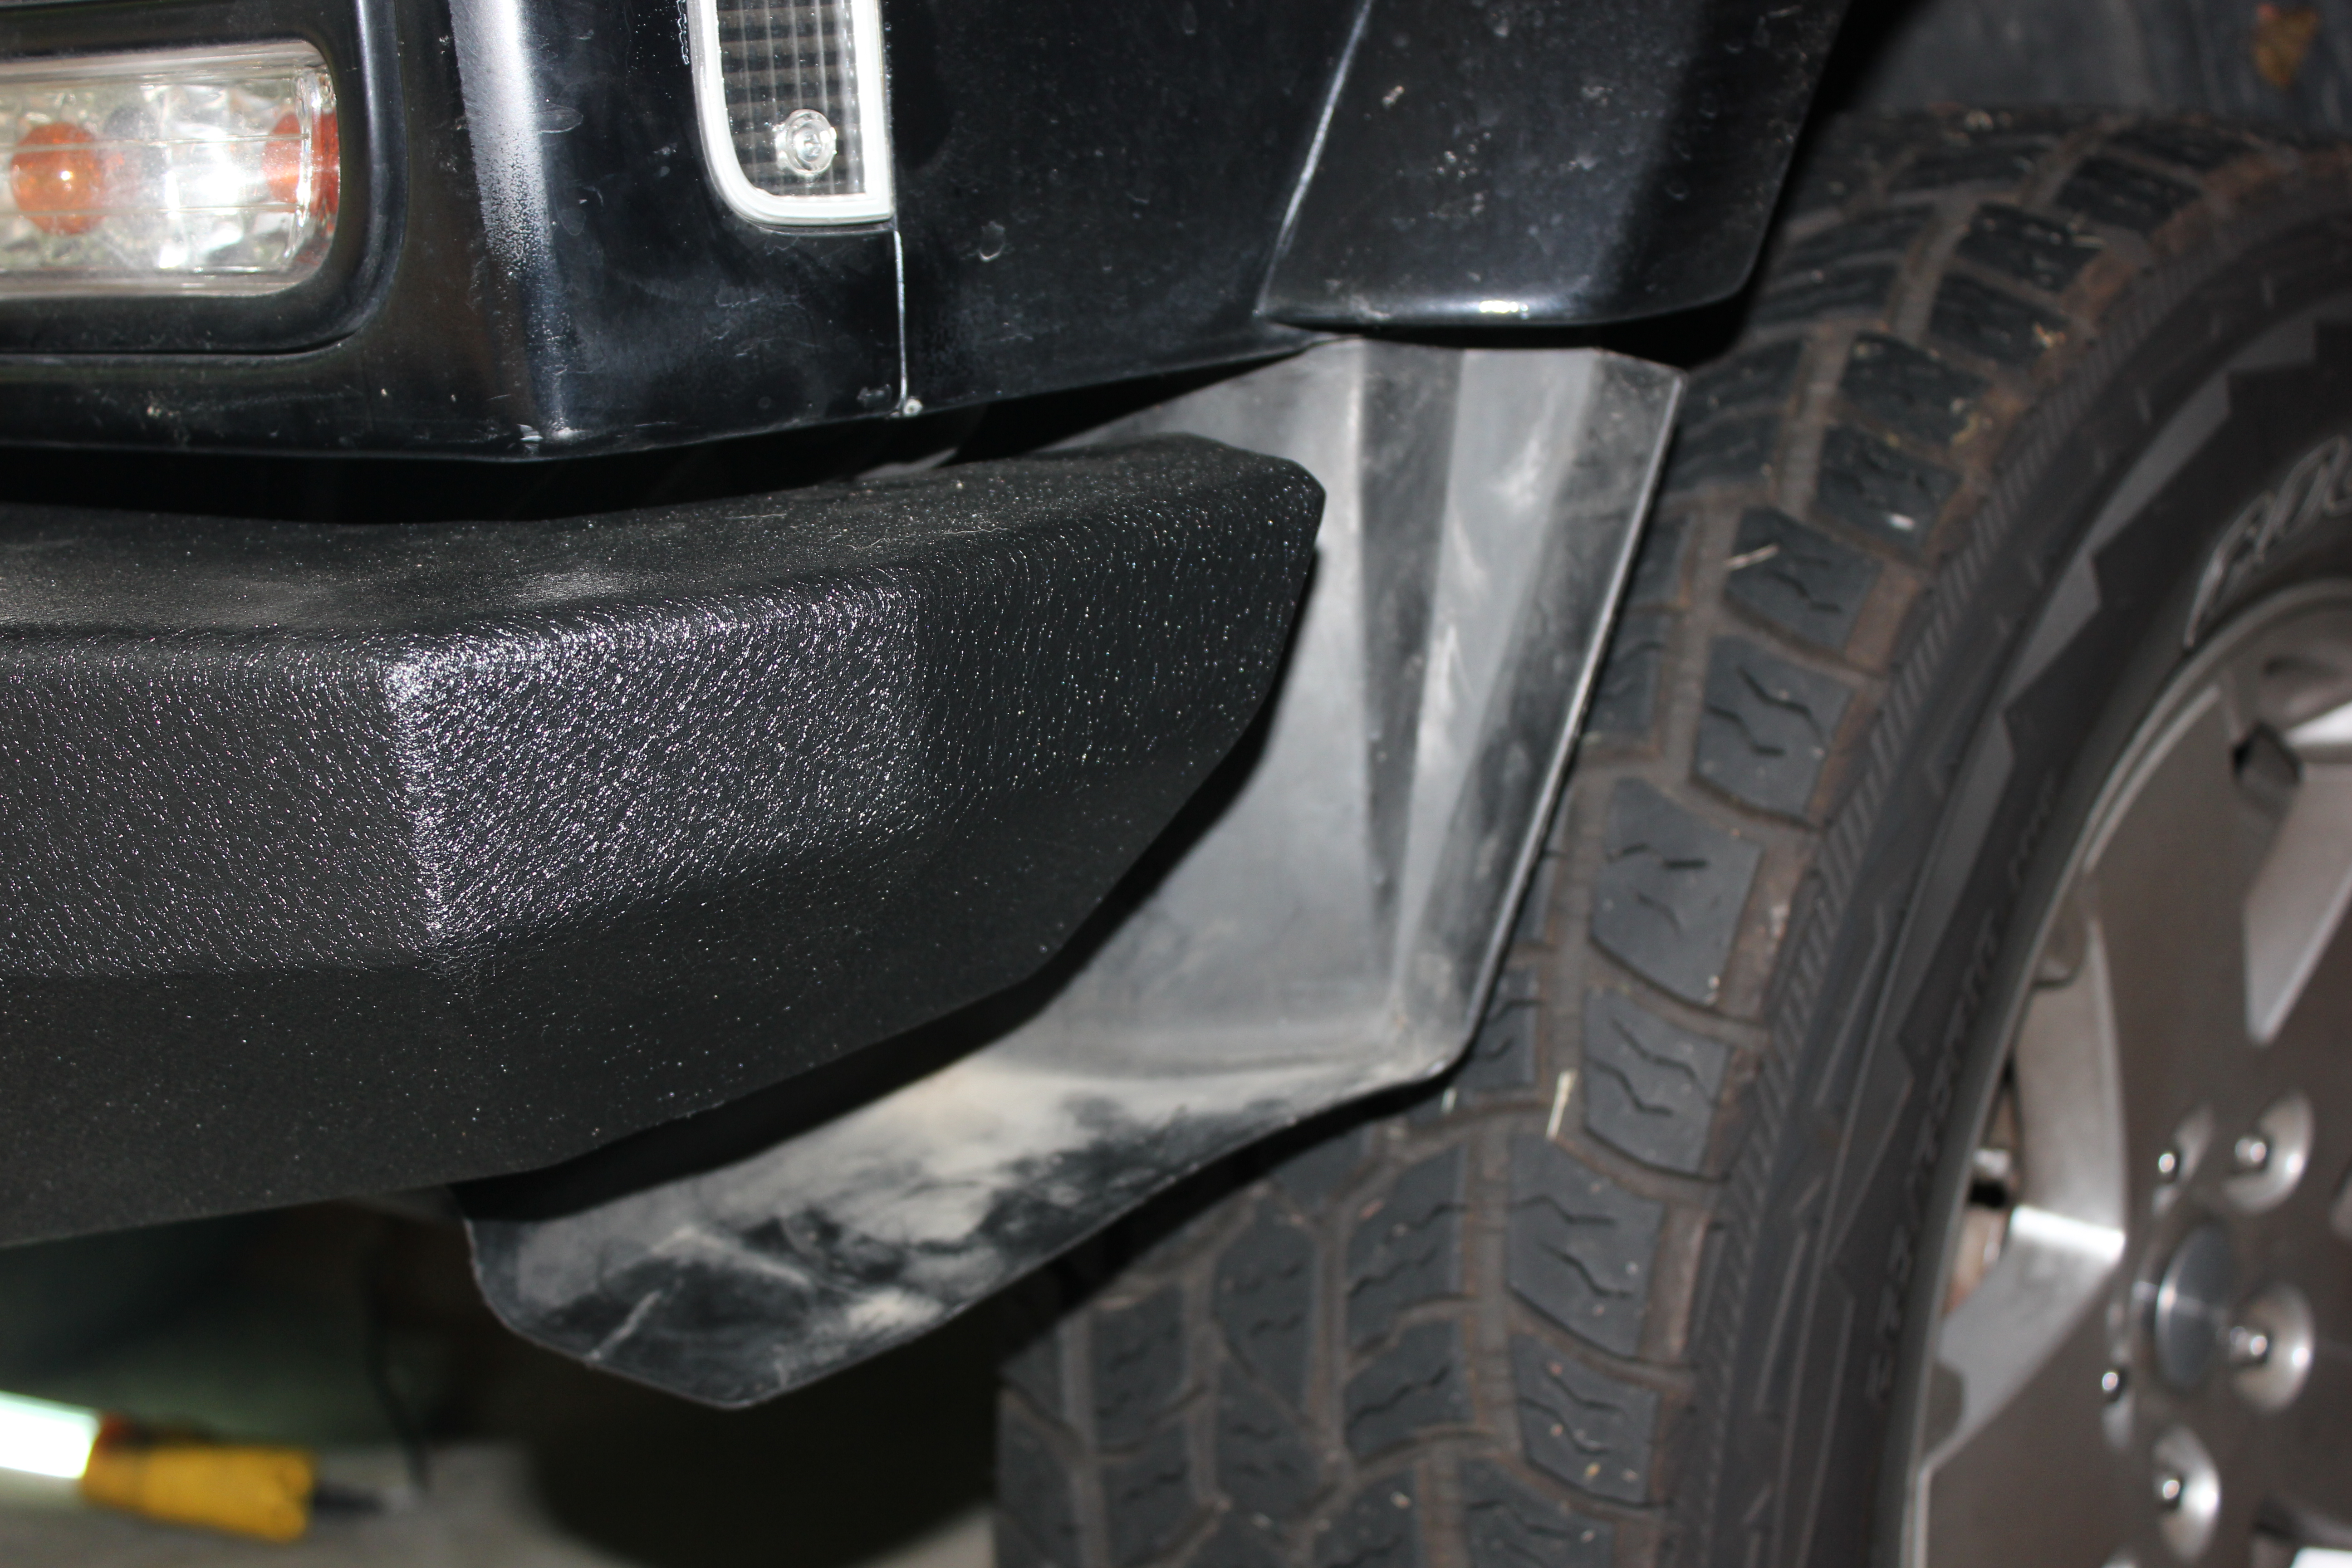
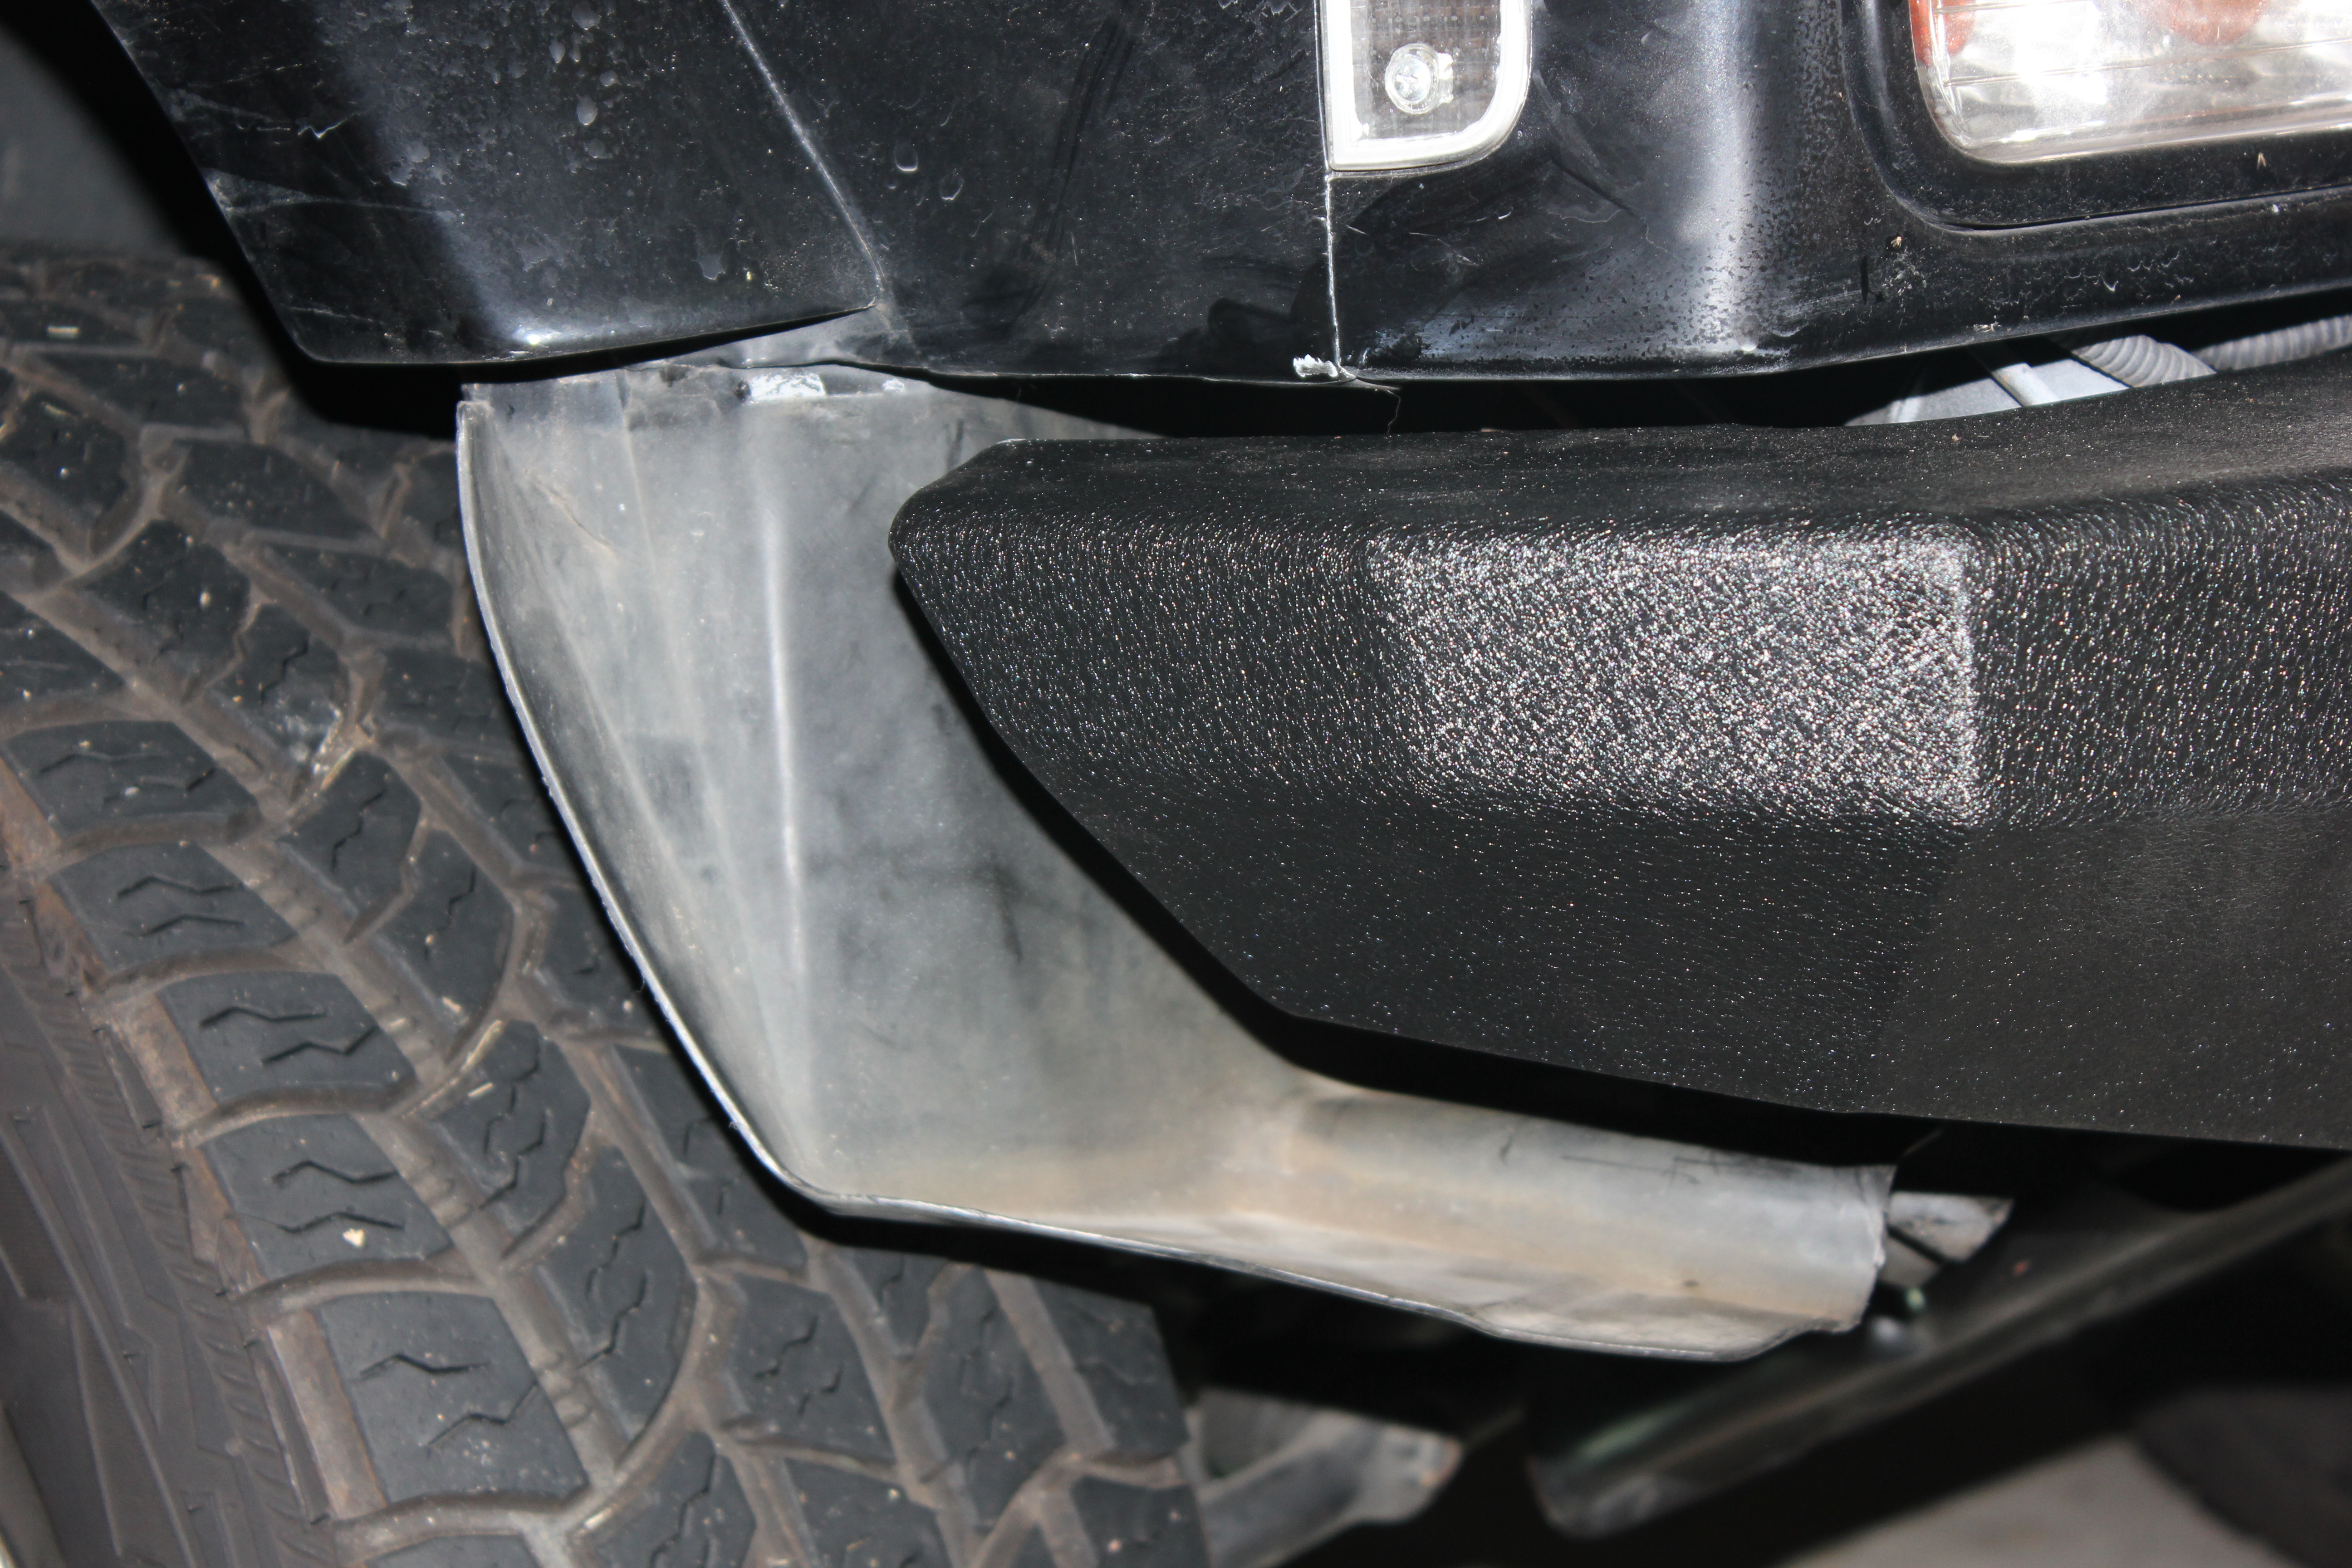
This is pretty easy to fix with some Stanley Snips 😀
Remember earlier when I said to save those plastic rivets for the splash guard? Pop those bad boys back in and use the snips to cut away the excess splash guard. I tried to leave enough that my horns are still somewhat protected. Here is the final result:

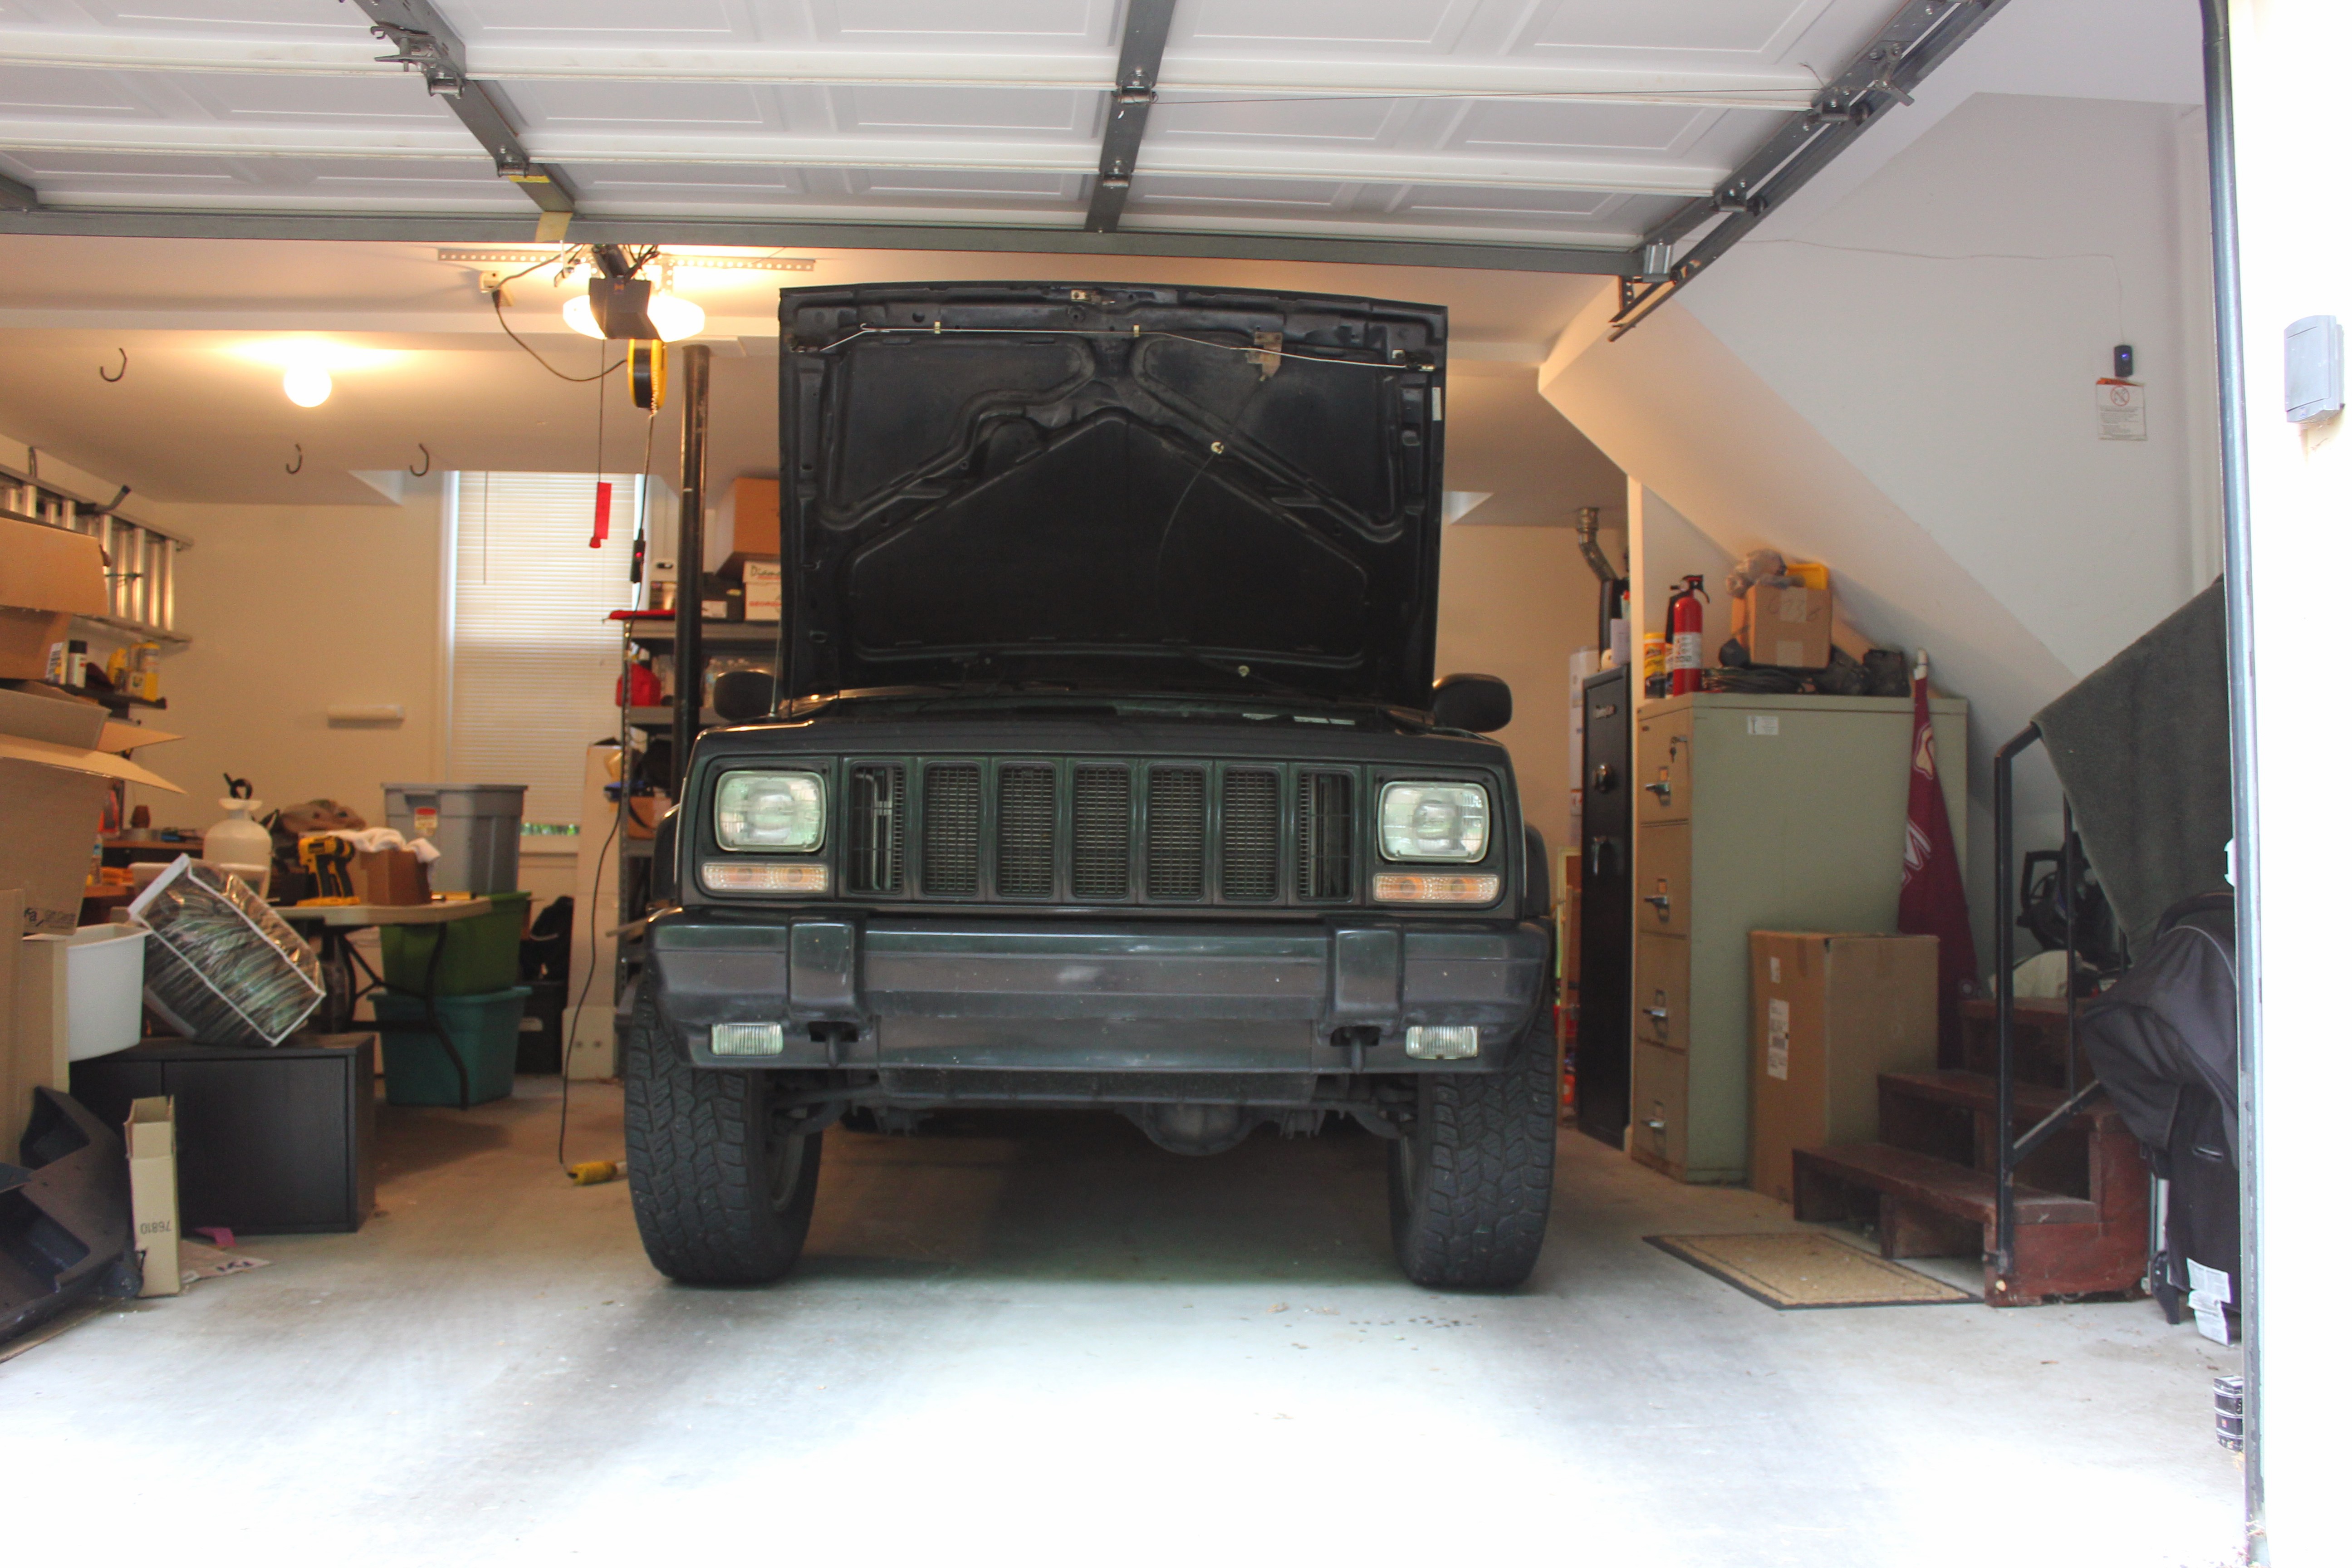
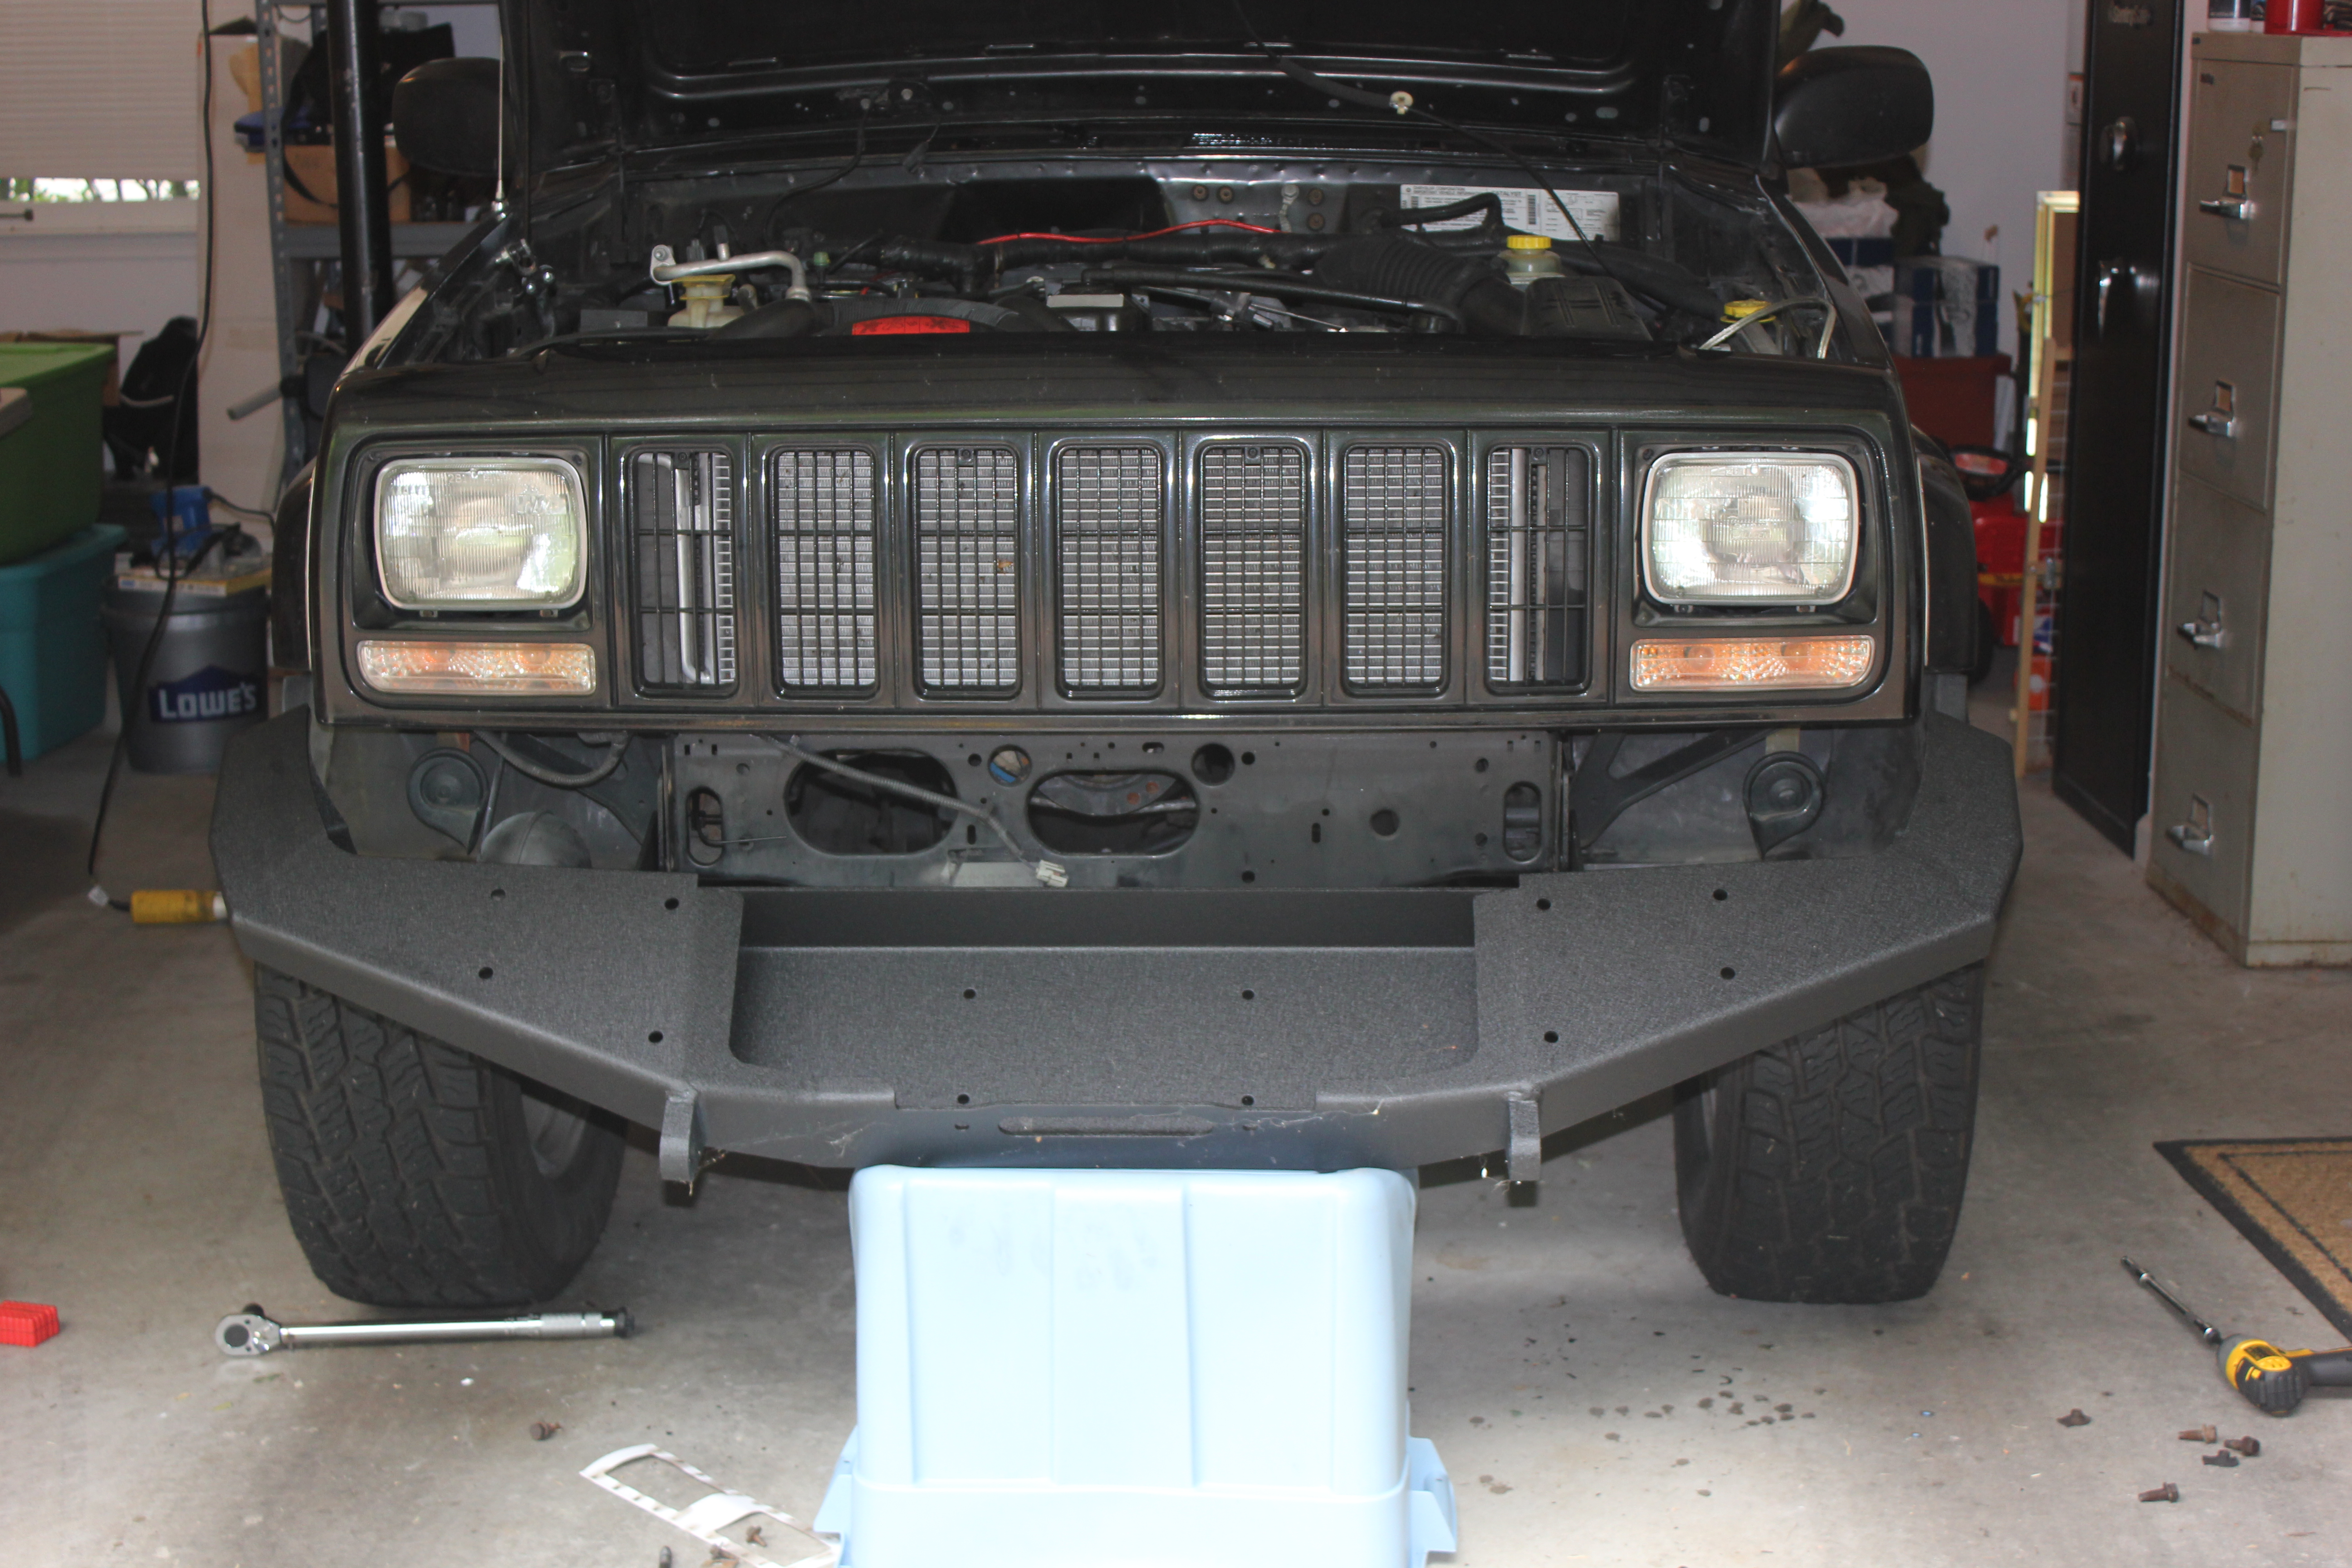
So that’s it! Now it looks like this:
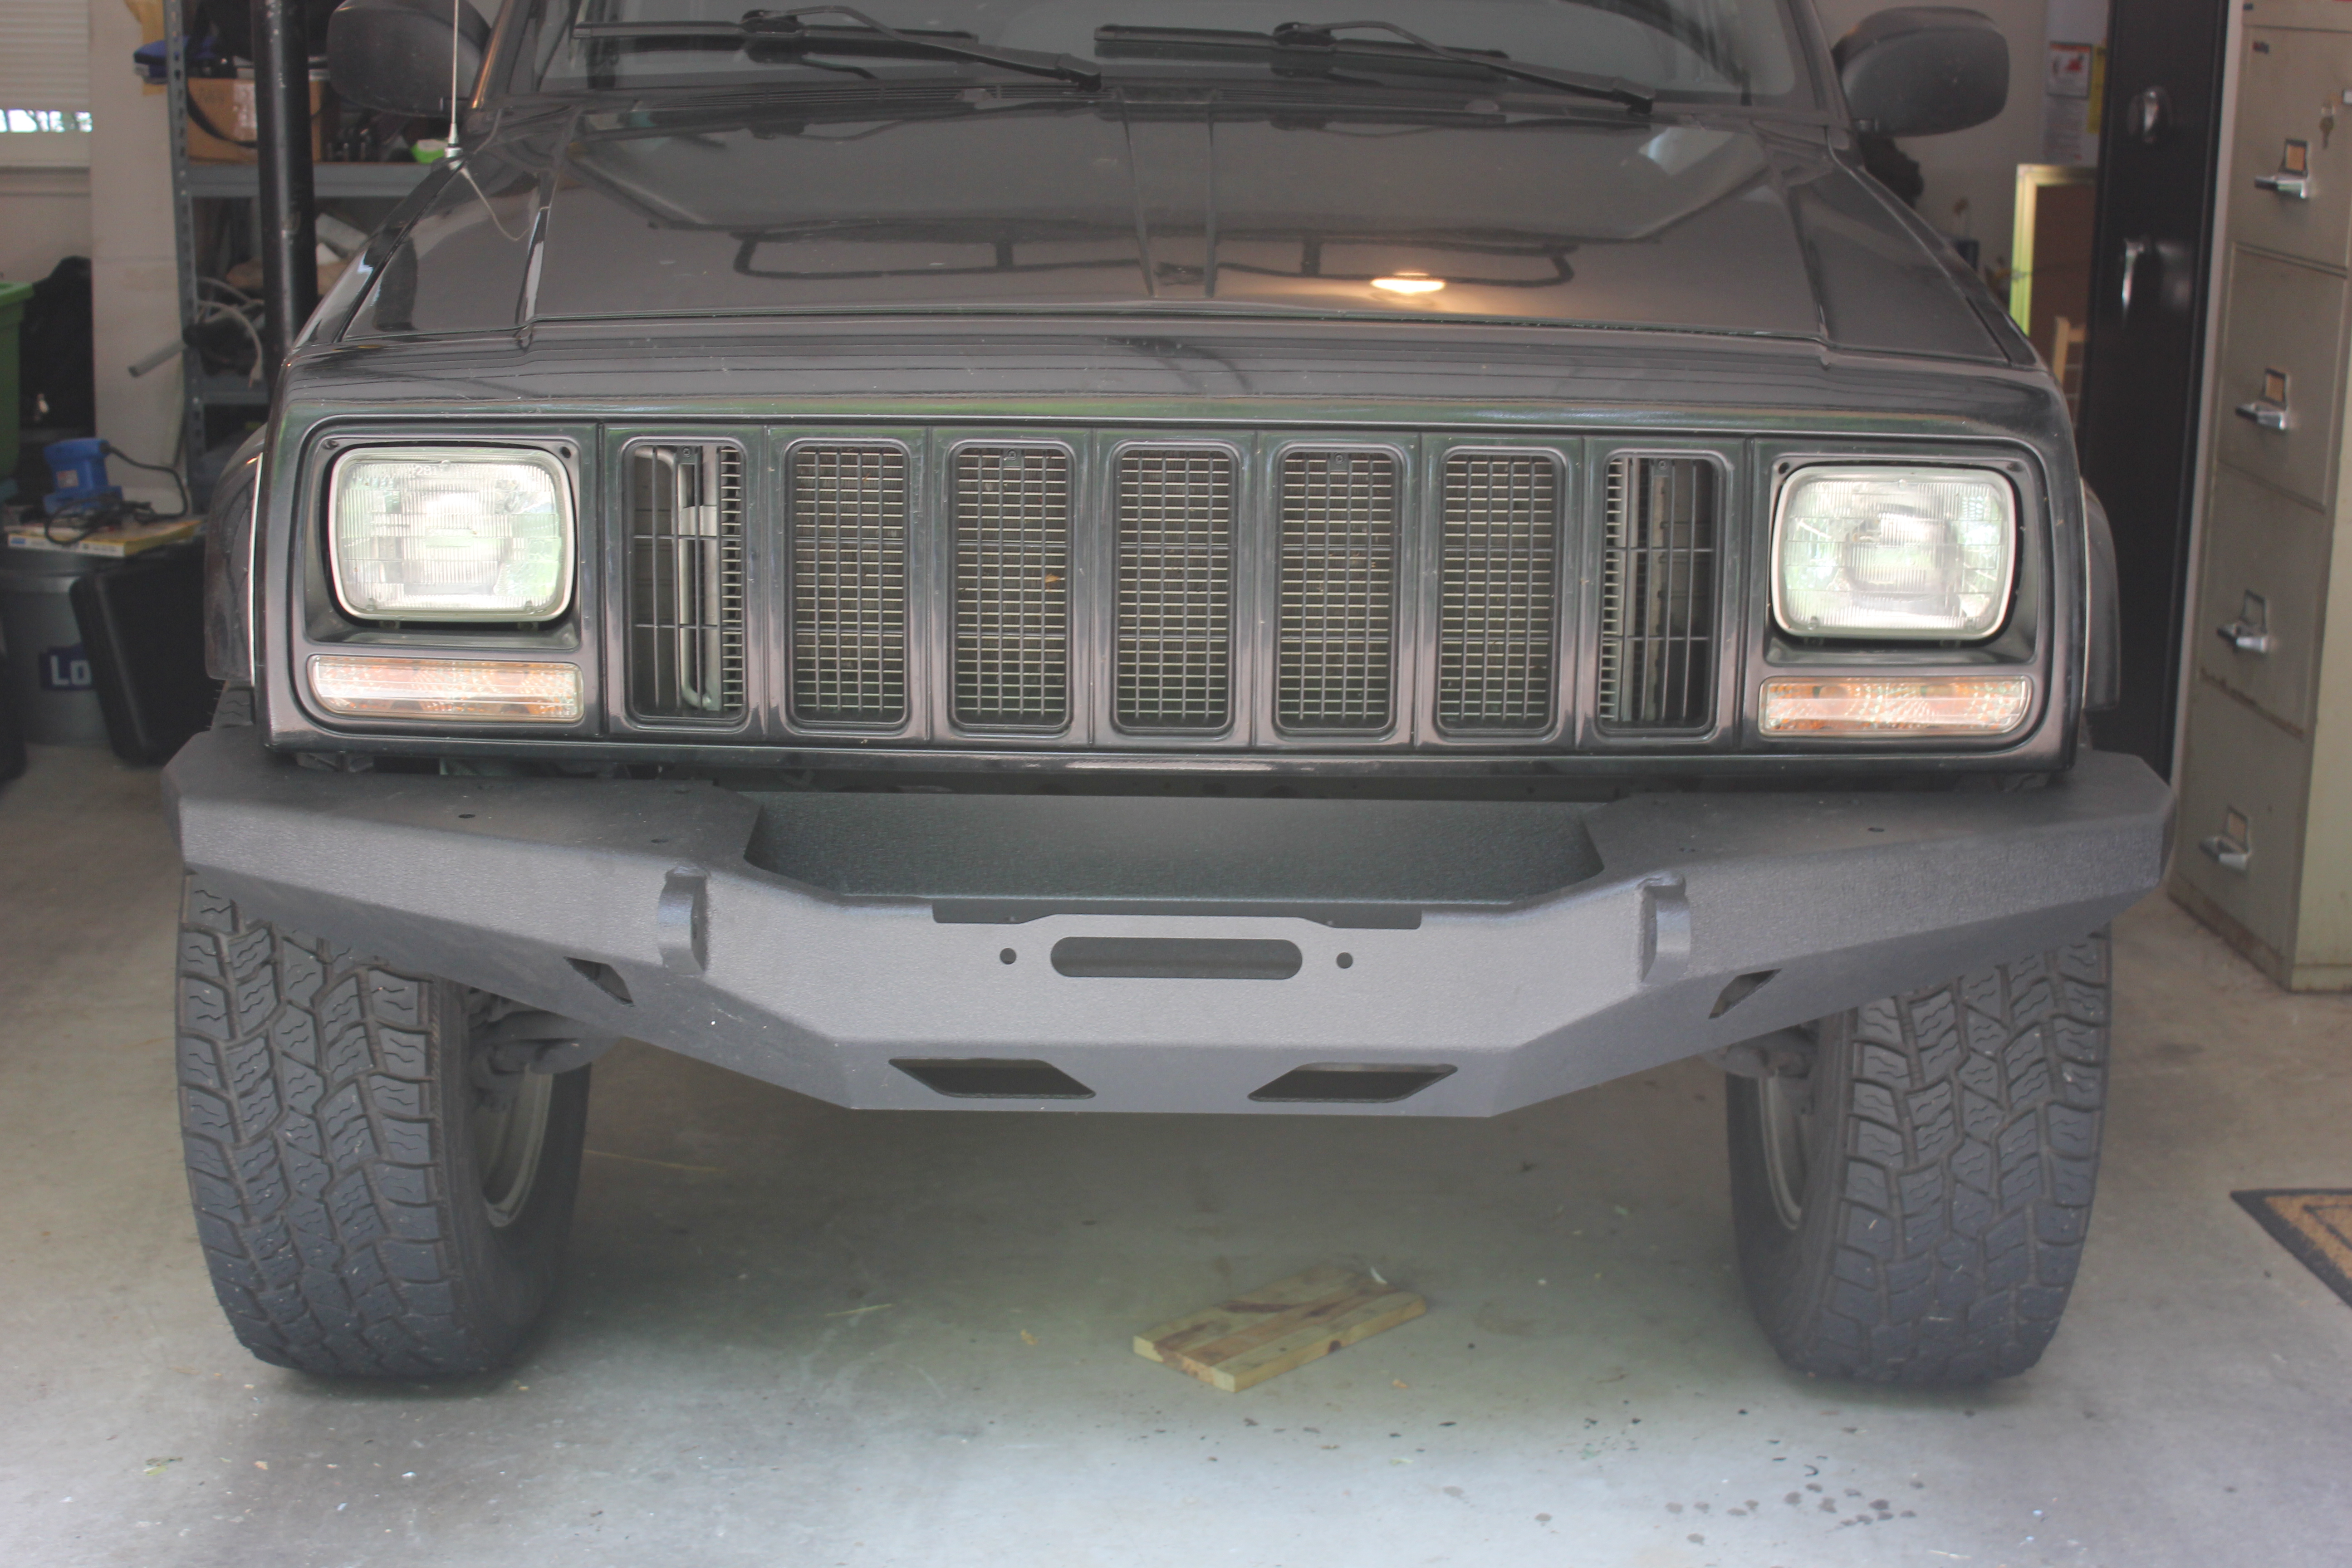
Now here is the problem. It looks kinda dumb to have all that bumper and no winch. Well, that’s coming. I think I’m probably going to get an XRC winch because they’re inexpensive and again, I’m a mall crawler. Be aware, though, that the first generation XRC winches were NOT WATERPROOF. So if you don’t cover them, they die. The new ones don’t have that problem, nor do the X20 series. I haven’t made a decision yet and it will probably be a couple of months. I’ll also need to put a better battery in first.
In the meantime, I can minimize the Fat Lip look by getting the Smittybilt 76811 XRC Front Bull Bar.
Other than that, I’m pretty pleased–and in the meantime I’ve got a dinner table on the front of my Jeep!
You can order one from these resellers:
4 Wheel Drive Hardware
4 Wheel Parts
Summit Racing
Morris 4×4 Center
“your friend,” huh? Gee… must be a nice guy…
Probably the kind of guy that would obsessively sharpen a knife handed to him while waiting to help out. :p
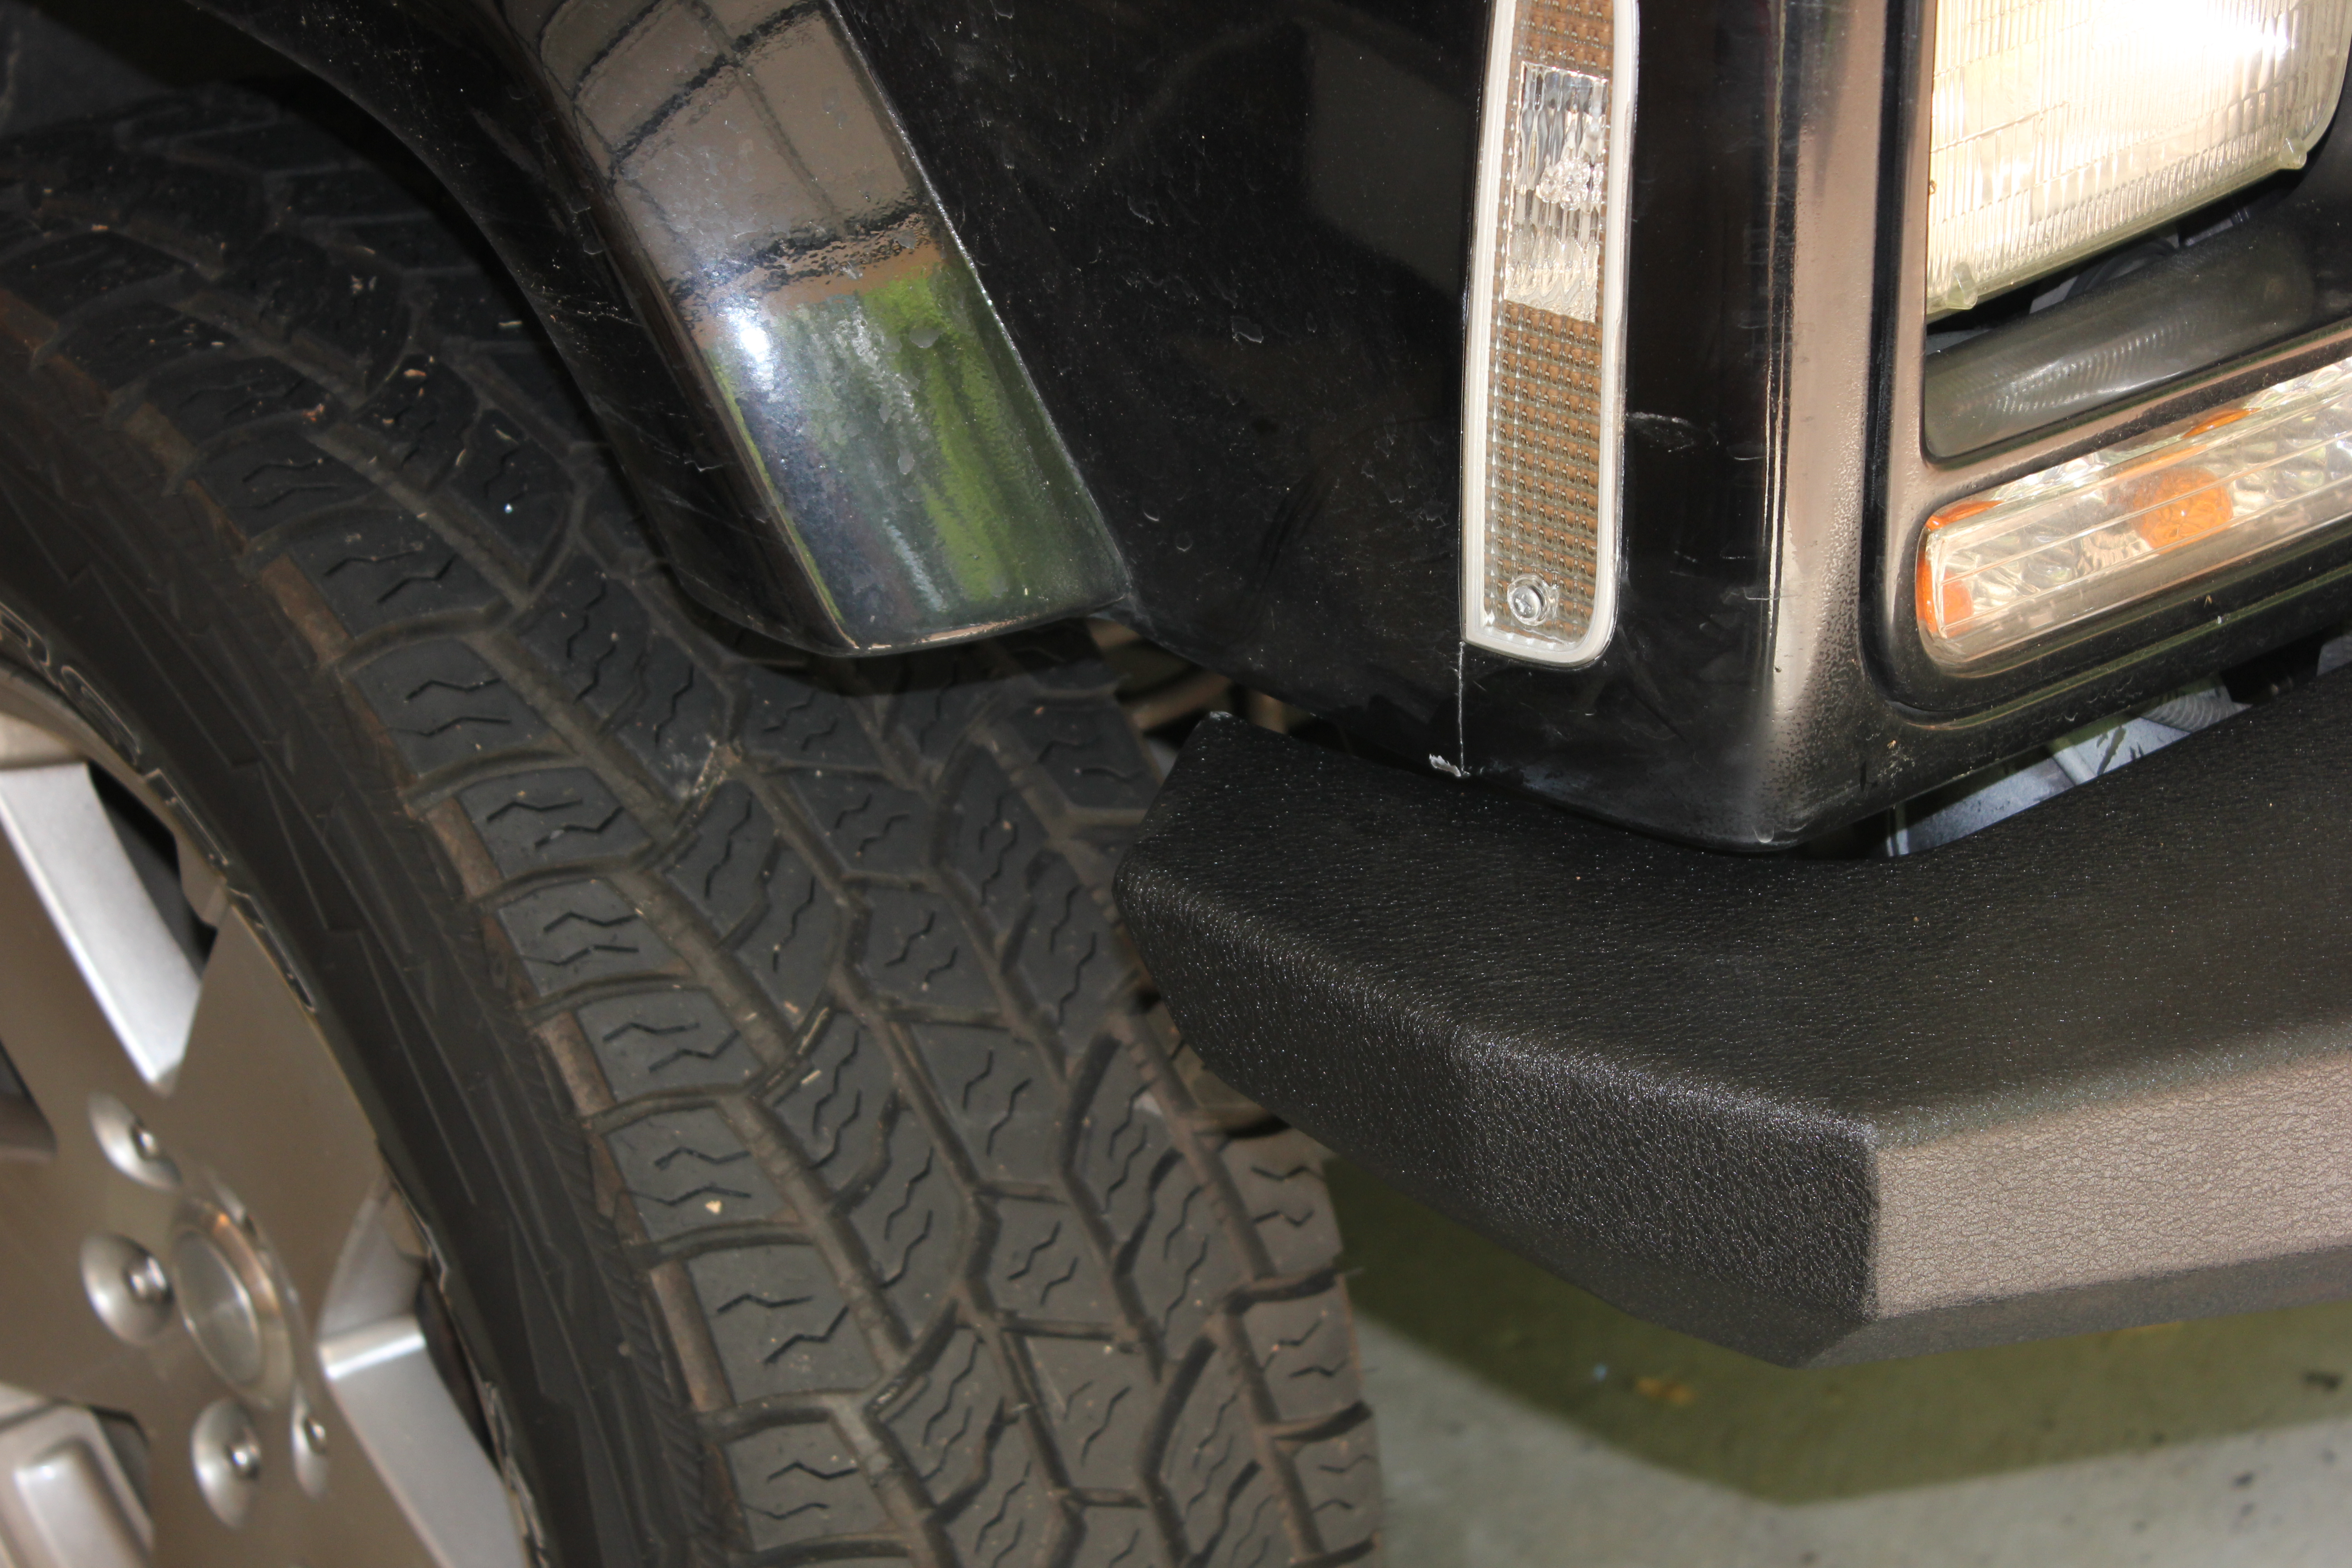
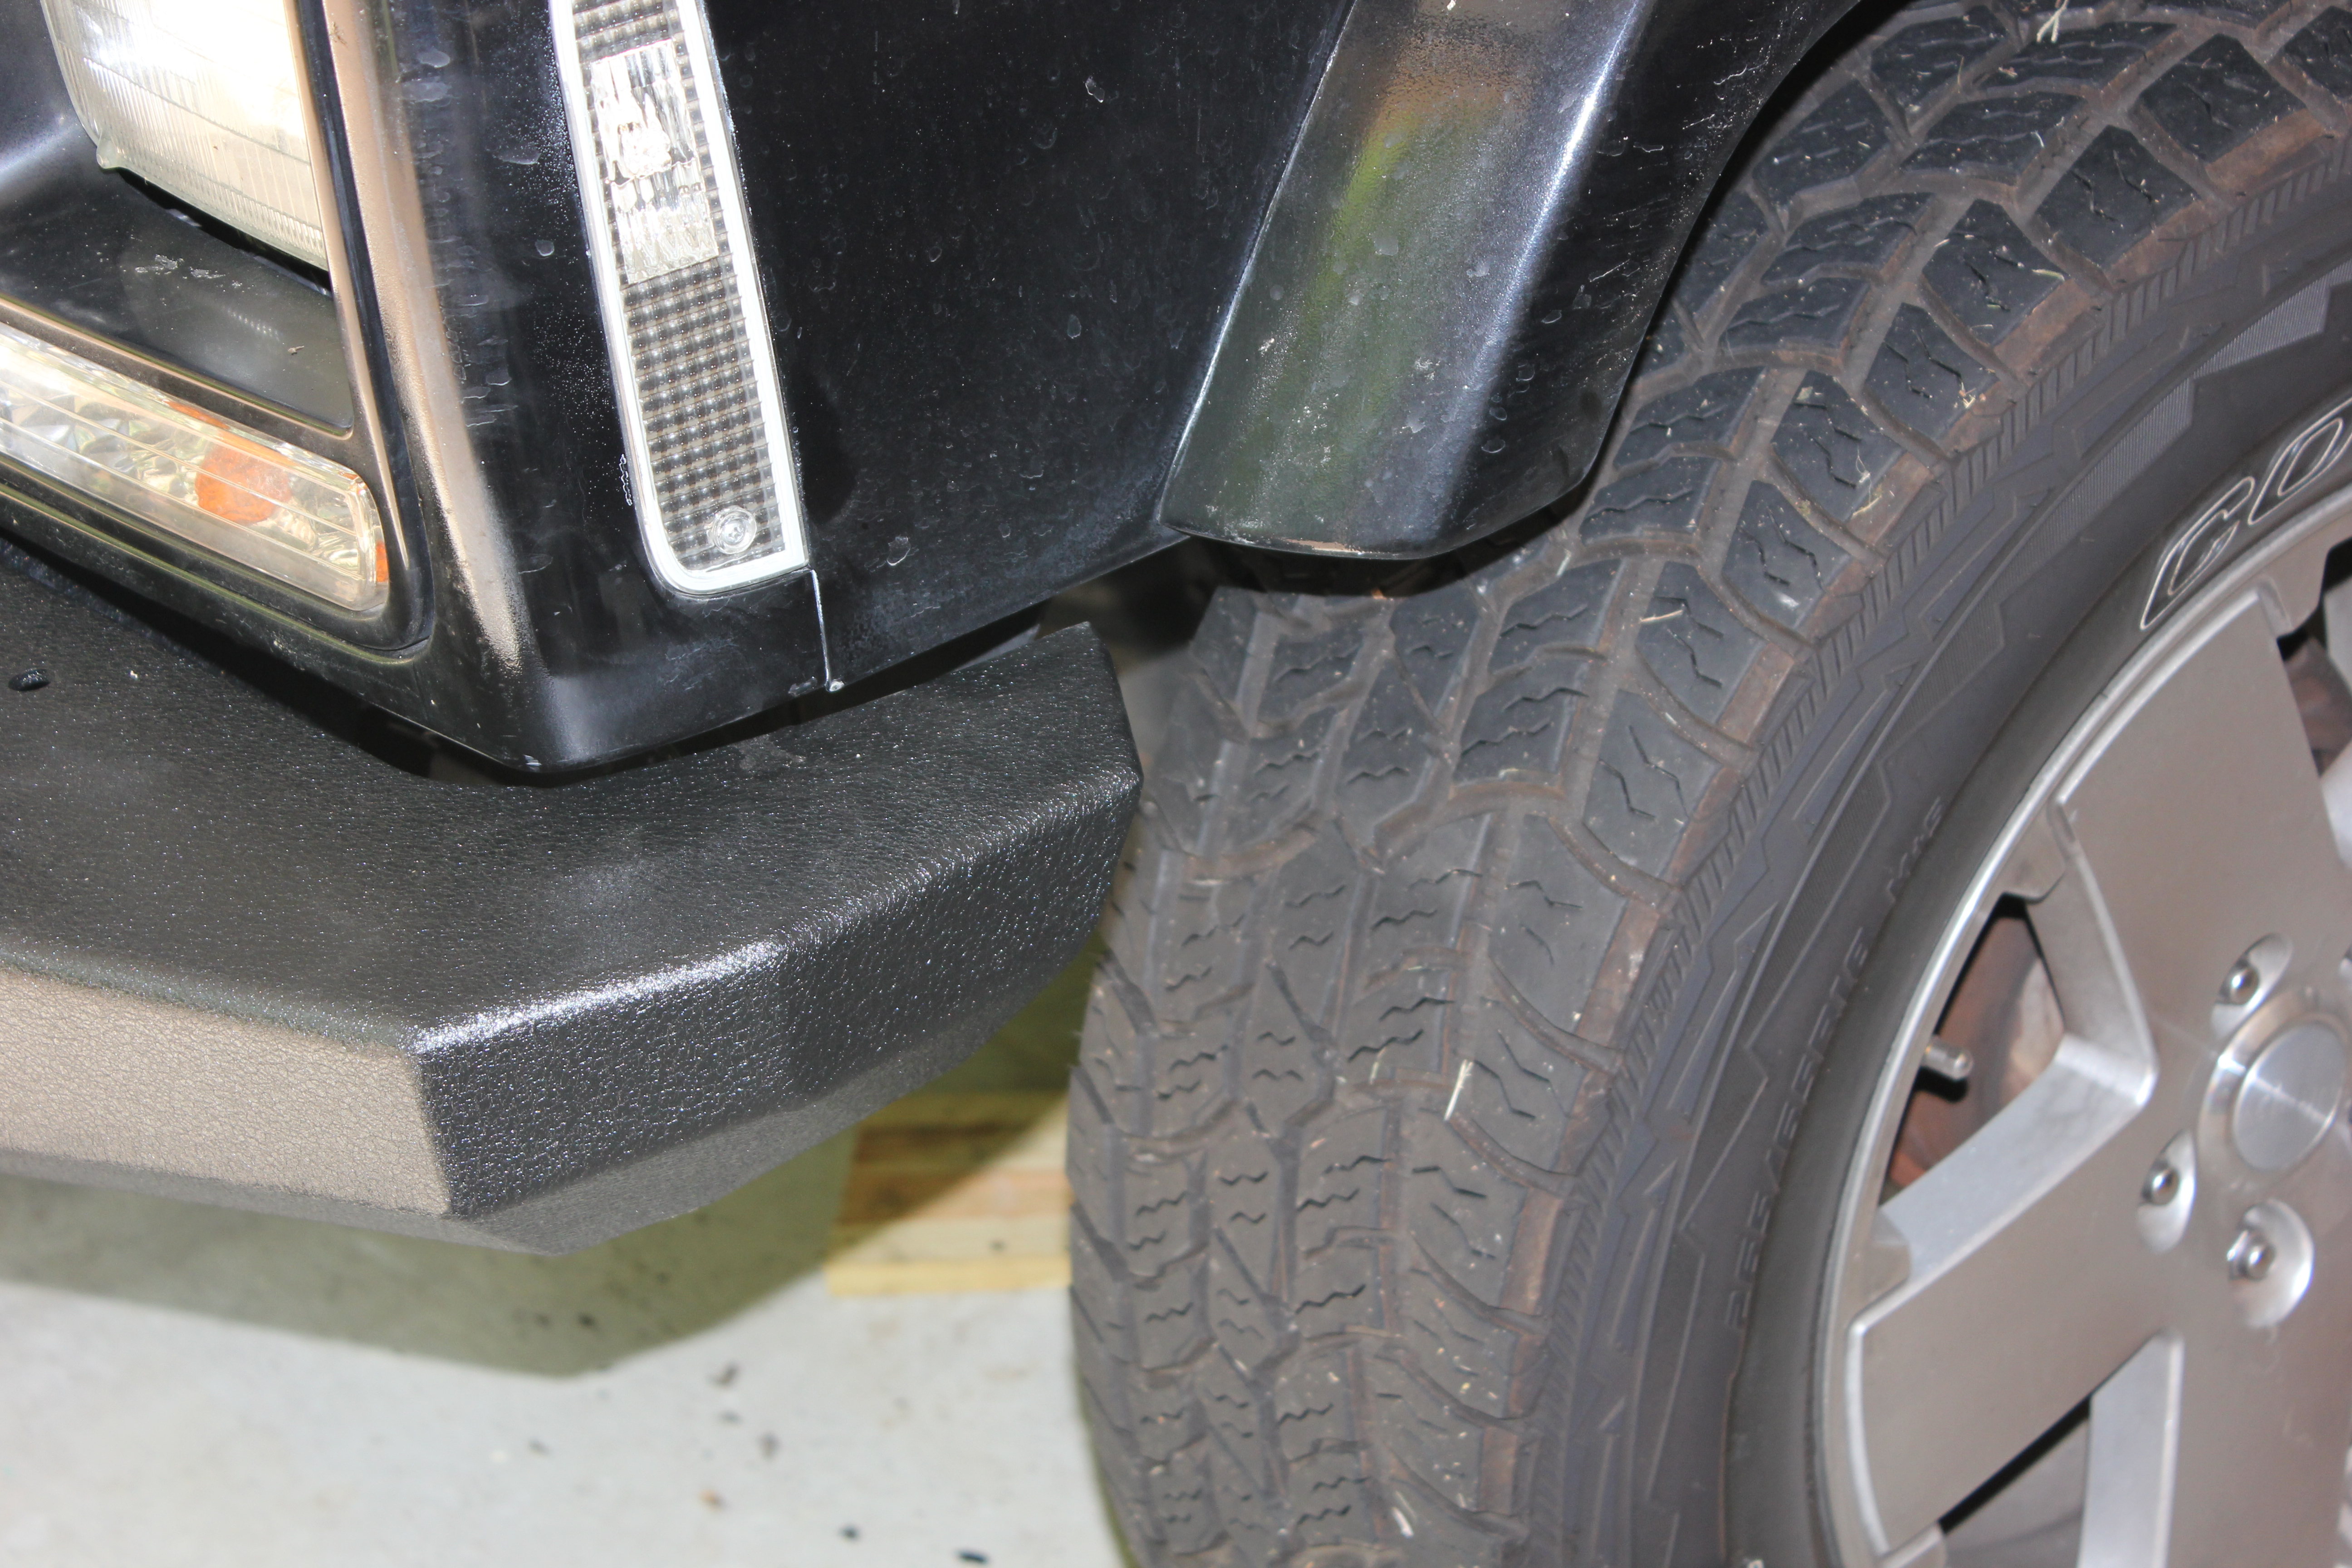
I don’t know why after all this time they can’t make an XJ bumper that doesn’t leave a gap between the bumper and fender flare.
I think that’s because most folks eventually trim the fenders to accommodate larger tires. I’ve got 31s and they rub at full stuff even with 3″ of lift. If I wanted 33s on there, I’d have to break out the sawzall.
Looking good!
Pingback: 1999 Jeep Cherokee Sport front bumper removal - JeepForum.com
Very helpful. I’m mounting it on my ’96 Cherokee after my Wrangler was demolished while I watched. One comment that might help. I’m using my floor jack with the bumper bungie corded to it to hold up the bumper while I put in the bolts. As well, in my case, the hardware pack just didn’t match up with the instructions. For example, the 7/16 bolts were actually 10mm bolts. But I’m managing.
Thanks for the tips, helped me in mounting my XRC bumper on my 98 XJ. I can add some to it from my experience: First, I installed the bumper by myself without problems. I used a 2×4 laid across the engine compartment and a motorcycle tie down strap to hold up the steering box. Worked great, what didn’t work great was I had no idea that there was a spacer between the box and the frame, so when I re-tightened the 3 bolts, I broke the spacer. I solved that by using the 3 pieces (it is cast iron and sort of a triangular shape with arms connecting each spacer)and sticking them on the bolts and then re-starting them. So, just so this might prevent someone else from making that same mistake.
Also I used a floor jack with two 2×6’s to raise the bumper up and get the first two bolts started. Just make sure you’ve got it balanced with one hand while under it.
Just a note to go along….my hardware kit looked like someone was looking at their phone and just grabbed a handful of bolts, nuts and washers and threw them in the plastic sack. I used the OEM steering mount bolts as they are grade 8 and are plenty long.
Also, the wire they tacked onto the nut bracket broke off after like two tries to start the bolts on the passenger side bumper mount. I was able to get it lined up with a long screwdriver.
Anyway, the instructions were very vague that came with the bumper and the pictures were worse.
Just finished installing mine. It would have been useful to find the site BEFORE, of course 😉
Mostly, it went same way. I noticed that author’s bumper was made Jan 2014. I have seen a couple of these, besides mine, all made a couple months later, and the internal welds have improved remarkably. No rust, either, from chipping.
Because of differences in… err… TOLERANCES (it’s a good, diplomatic word, isn’t it?) between bumper and the variables in XJ year to year, flight to flight, sometimes the fit on bolt holes on the plates, to the unibody rails, required some PERSUASION (another good diplomatic wording, usually brought to you by a 1/2″ steel bar to yank the holes into alignment. Since I despise torx bolts, I chose to replace the torx bolts with hex bolts, equal or higher class rate, fraction of inch longer. Helped, a lot, set me back $20 for bolts, locking nuts and washers, so I call it worth the while.
Interesting was installing this without the benefit of another pair of hands. Enter the transmission jack! During the steering box removal and re-attachment,creative use of PERSUASION (SWYDT?) helped. Having bear paws for hands didn’t. Articulated socket joints shined, then. A plus of the install hardware is that the support plates reinforce the steering box.
The weird, wand-bearing nut support plate made sure my chopsticks sk1llz are PEAKING!!!1111, now, but had no trouble aligning and threading bolts through it.
Overall, can’t complain, and I am happy with the bumper, which may or might not receive the bull bar.
’99 XJ.
Thanks for this article. I will be putting my bumper on tonight. I already have the bull bar and an xrc winch. Should I mount that to the bumper first before I mount it or will that make the bumper too heavy to safely handle? If it’s not too much of a pain to mount them later I’ll just wait.
It’s very easy to add the winch and bull bar after the bumper is mounted. I would mount the bumper first, then the winch, then the bull bar.
Mount the bull bar FIRST!!!!!!! It is impossible to get the last bowl tightened if you put the winch in first. I had to remove the winch to tighten the bolt
what are the two large washers in the instruction bag for?
Step 3: Install (1) front bumper mount plate (93-7760) to the outside of the frame rai1. Secure the mount plate and the OE steering box to the frame rail using the (3) provided 7/l6″ X 4″ bolts and hardware in the OE steering box bolt holes. Install the 1/2″ X 3 1/2″ bolt, 2″ spacer (90-1051 inside the frame) and hardware into the rear most hole in the mounting plate.
NOTE: Be sure the (2) front OE bumper mounting plate bolt holes line up with the Remaining holes in the front bumper mount (93-7760). (Fig B)
What I did here, as previously mentioned, was had a friend start the steering box bolts while I held the steering box in place. They were hand-tightened, and then I put in the rear bolt. Remember, on the rear bolt you put the big 2″ washer inside the frame. So it goes Locking Nut->2″ washer->frame->bumper mount plate->small washer->bolt head. Since you’re working with a locking nut, you’ll need to use a wrench on one side and a ratchet on the other. Tighten it down most of the way, but allow the plate to move freely.
I used 3 12 inch steel rods that fit in the steering box holes to keep it aligned and a ratchet strap over a 2×2 across the fenders. As I threaded the steering box bolts in I let them push out the rods starting with the upper most bolt. Had no problems getting them started. As for mounting the bumper I have an overhead hoist in my garage. I slung the bumper with straps and lifted it into place. The othe way I thought of was to use my engine lift to lift it into place but the overhead hoist is electric and was right over the jeep in the correct place. The welds on the inside on my bumper are quite uniform and well done. Very happy with the bumper. I do agree that the instructions are not very good and need re-writing. My XJ is a 1989 so I had to drill several holes and cut my fenders.
This was very good information and thanks for posting the instal. I installed this bumper on my 1998 XJ. The install was a straightforward install, but I did run into and issue. The gap on top of the drivers side of the bumper is located about a 1/8 inch from the body. But on the passenger side gap is at 3/4 of an inch. I did remove the bumper and elongated the forward 4 mounting hole a little which did not improve the gap situation.
As for lifting the bumper I used a small 4×4 and floor jack with a tiedown strap, no problem.
I just did my 85 XJ not long ago. Front, and rear. Also got the bull bar. I know what the light tabs are for, but just below, and in between are some other tabs with oblong holes. I have yet to figure out what those are for.
Well done instructions. Wish I’d seen these before I installed. I shortened the line and moved the vacuum reservoir near my battery. I can email pic if you want. I have this metal knock when I go over a bump now on my drivers side. No idea what is causing it. I’ve looked over everything. But it def started after my bumper install. Any ideas?
Sway bar is probably hitting the bolt heads on the bumper brackets. I just noticed this myself, but I’m running shorter sway bar links than I should so it takes more travel for me to hit mine.
Such a great writeup! An issue I came across with my 99 is: Inside the passenger side frame rail, there is a bracket that the sway bar bolts to. This bracket, on the bottom of the inside of the frame rail wraps up on the sides and covers half of one of the needed bolt holes (that I did not have to drill). I don’t see any easy way to drill through the portion of thick steel bracket that is covering half the hole AND this sway bar bracket prevents the Smittybilt 3-nut thingamabob from fitting flush to the inside wall of the frame rail. The only option that seemed realistic was to remove the bracket and cut off the portion that wraps up. PLUS: the rearmost bolt heads would rub on the sway bar (causing the problem Scott mentioned above), so I’m going to have to grind down the bolt heads to half of their current thickness, which is going to make them weaker and harder to get a socket to grip them. Nothing is as easy as it should be. Sheesh.
anyone willing to neasure & post the overall length & inside overall length between the the ears of the bumper?
trying to decide on purchase & self install on on a budget with a few modifications for a ’95 zj.
the zj front is cut down to 56 inches
not many budget options for the zj.
Thanks!
Great write up. It’s July 2020 and they still have not updated the instructions. Just had a conversation with a Customer Service rep…
Has anyone find a way to fix the gap. It’s very noticable especially on the passengers side. Any advice or tips on how to make the gaps even.
Nice write up. wish I had found this before I installed. I just did the install and experienced the same problems as most others but it’s on once I went to the hardware store to get missing nuts. Only issue is the Gap on the passenger side vs drivers side. Annoys the heck out me. once I got the bull bar on it’s not as noticeable. Also something I noticed that I do not see mentioned is that the entire bumper left to right is off as well.