
UPDATE 3/26/2020: The site I describe below, ADSBExchange, switched to a completely different piece of software about a month after I made this post, so the specific directions are no longer valid. However, the concept is the same and ADSBExchange remains free.
Original Post:
Have you ever wondered what plane that is, but had no idea how to figure out what it was? Here’s a beginner’s guide to viewing ADS-B feeds from ADSBExchange.
First, a couple of definitions. ADS-B is a replacement for air-traffic control radar, and is now fully-deployed in the United States. Instead of depending on Doppler radar coupled with transponders that react to an interrogation signal, ADS-B transmits constantly from the aircraft itself. This allows other aircraft to get real-time information about everyone else flying around them instead of having to rely on air traffic control to tell them about other traffic in the area.
It also means that anyone can pick up the signal. A few years ago, some enterprising hackers discovered that a $25 USB Digital TV Receiver could pick up these ADS-B signals with very little effort. Fast forward, and now you can buy purpose-built receivers for $20 or less, plug them in to a Raspberry Pi, download some free software, and view ADS-B signals from 250 miles away. No monthly subscription required.
This led to a couple of projects that allow people to share their signals with each other to get a broader map of the skies. One of those projects is ADSBExchange, which receives feeds from hundreds of stations across the world and aggregates them into a single site.
Welcome to the world of open-source intelligence. Unlike some commercial services, ADSBExchange is unfiltered and real-time. The FAA has provided feeds in past to commercial services with a 15 minute delay, and owners could opt-out of having their aircraft included. ADSBExchange gets around those limitations.
If you find this service useful, please consider donating and setting up your own feed.
Now on to the good stuff:
These instructions are Desktop-based, but you can also use your phone. The screens look a little different but the steps are the same.
Open up a browser and go to http://adsbexchange.com
Under the Global Radar View, hover over “Global Radar” and then click “Desktop” or “Mobile” depending on the device you’re using. This is a Desktop-based tutorial, so keep that in mind. I’m also intentionally using a very, very small browser window so I can keep the screenshots readable.

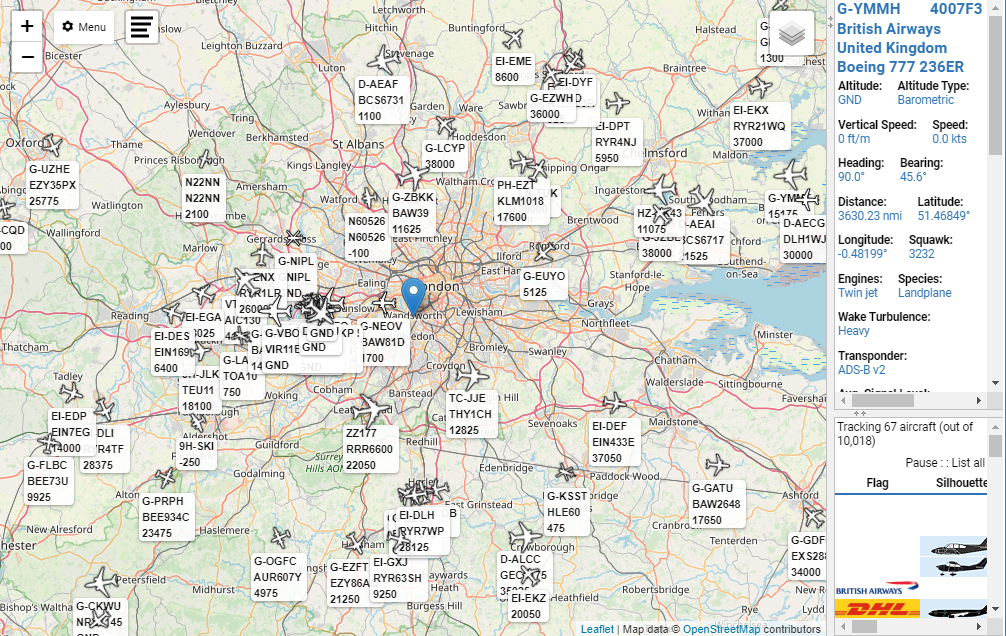
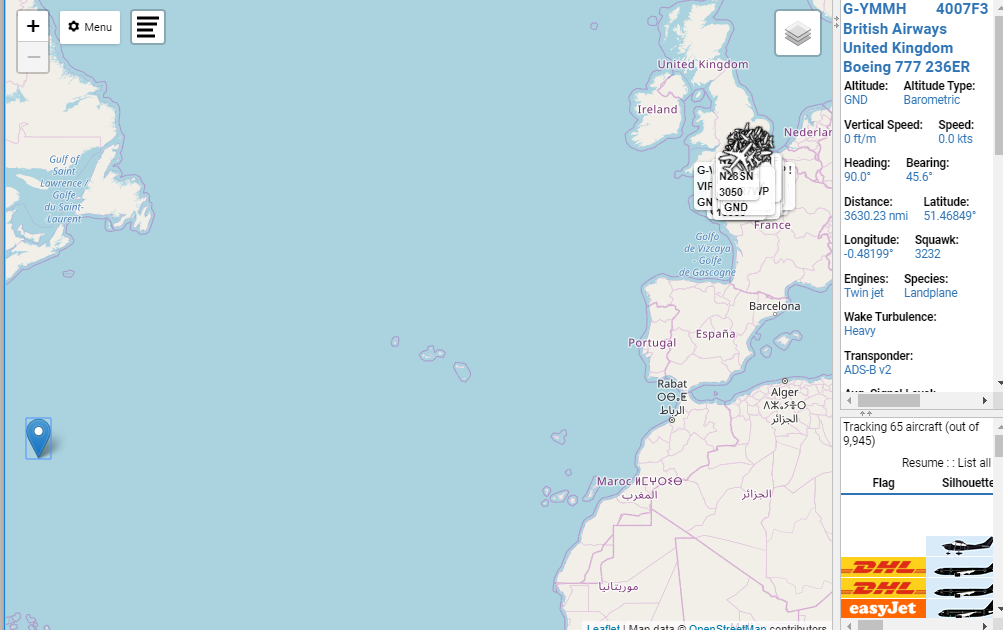
You will be presented with the default settings applied. Virtual Radar Server defaults to London as the center of the map with no filters, no aircraft trails, etc. Here’s what it looks like on a small-ish browser window:
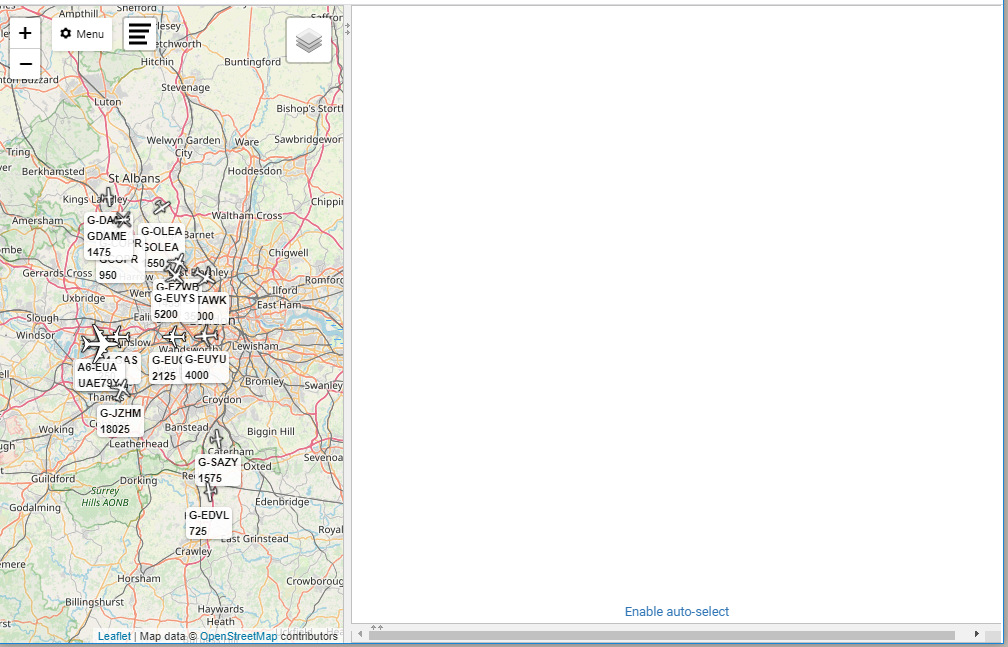
On the left you have the map, on the right you have an aircraft info window which is blank because no aircraft is selected, and below that is a list of current aircraft sorted by model name. You can’t see the list in that screenshot because the Aircraft Info window takes up the entire screen area, but you can see control to “drag up” and see the list while making the aircraft info window smaller.
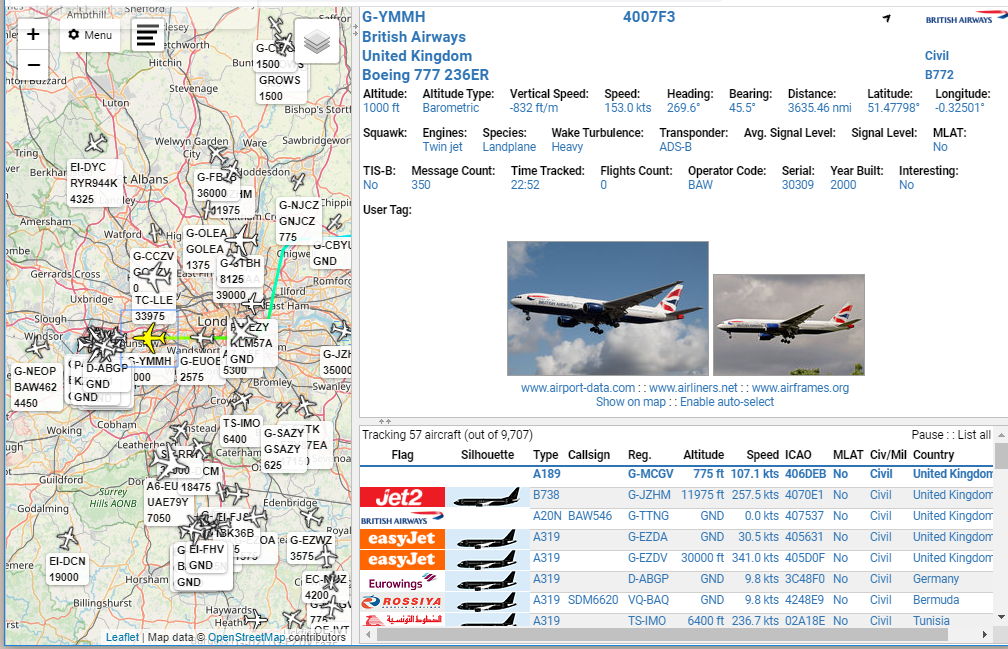
I’ve selected a random aircraft on the map and dragged the list up a little bit so you can see them. There’s a lot of info, including (sometimes) pictures of the actual aircraft, not just a stock photo.
The list shows some details of the currently tracked aircraft (note here that it’s 57 of 9707 in the screenshot). You can re-sort that list on any field.
The first thing you want to do is set your location so you can calculate things like bearing and distance. We’ll use Richmond, VA because…why not.
Drag the vertical divider to the right to make the map bigger if necessary:
Now, most of the stuff we want to do is going to be in the “options” piece. To get there, you click on the Menu Icon and select “Options”

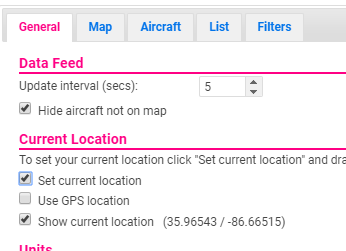
Which brings up the Options menu that has 5 tabs.
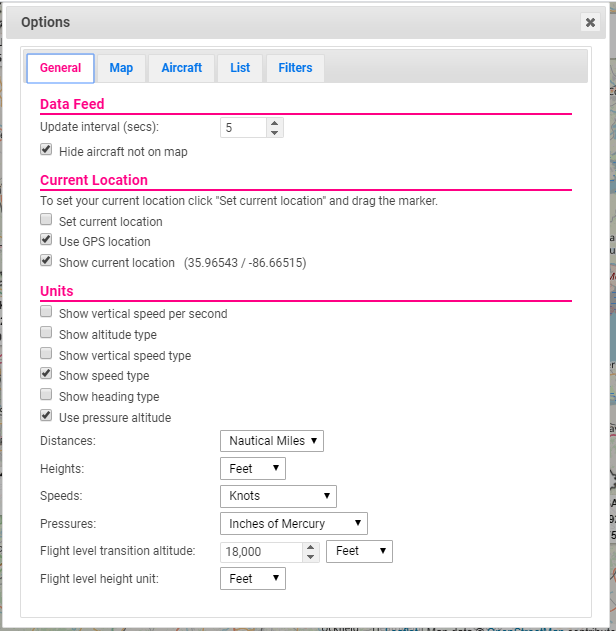
Make sure you never uncheck that “Hide aircraft not on map” box, because there can be upwards of 12,000 aircraft in the feed at once and your browser will crash if you try to load all those into memory every 5 seconds. You also don’t want to zoom too far out or you’ll run in to the same problem of having too many aircraft in memory.
You can change the Update Interval to something longer than 5 seconds, but 5 seconds is the minimum available from ADSBExchange.
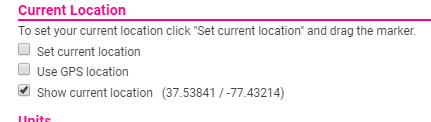
To move the map center, uncheck the “use GPS location” checkbox” (this setting doesn’t appear to work, even in my own installation of VRS at home) and check the “Set current location” checkbox
There is no “save” button on any of these screens. Options are automatically changed at the next refresh cycle, so in this case it’s within 5 seconds. To close out, click the X in the upper right corner of the Options dialog box.
Now we’re back at the main screen and there’s a blue Marker that marks the current location.
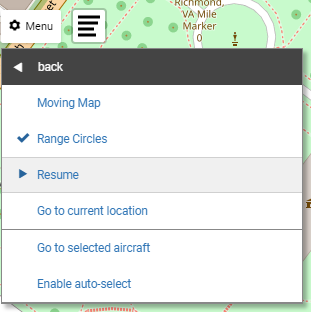
Click Menu and select “Shortcuts”, then select “Pause”
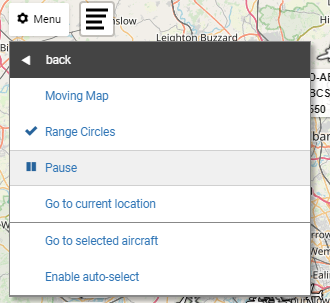
That will stop VRS from trying to load updates. Now you can zoom out without crashing your browser and move the marker.
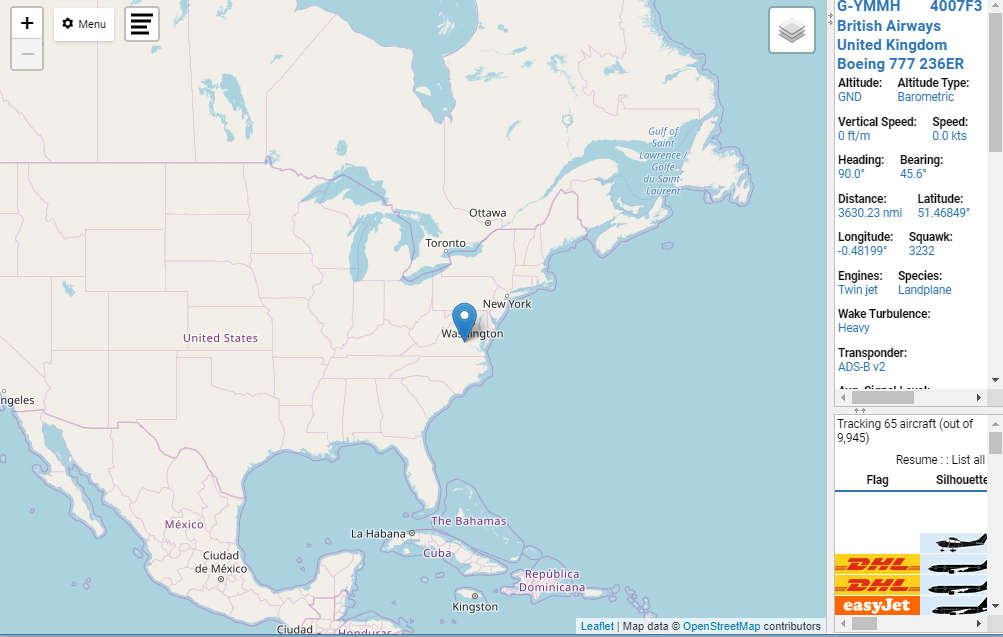
I am zoomed out to the maximum zoom level here:
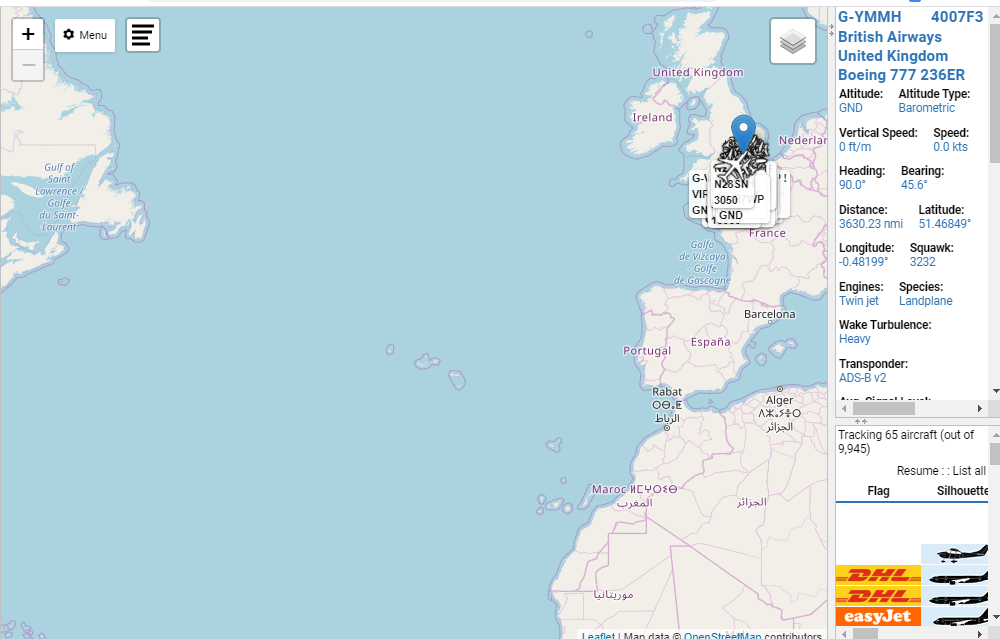
Grab the marker with your mouse and move it. In my case, I have to move it west, then move the map, then move it again closer to Richmond
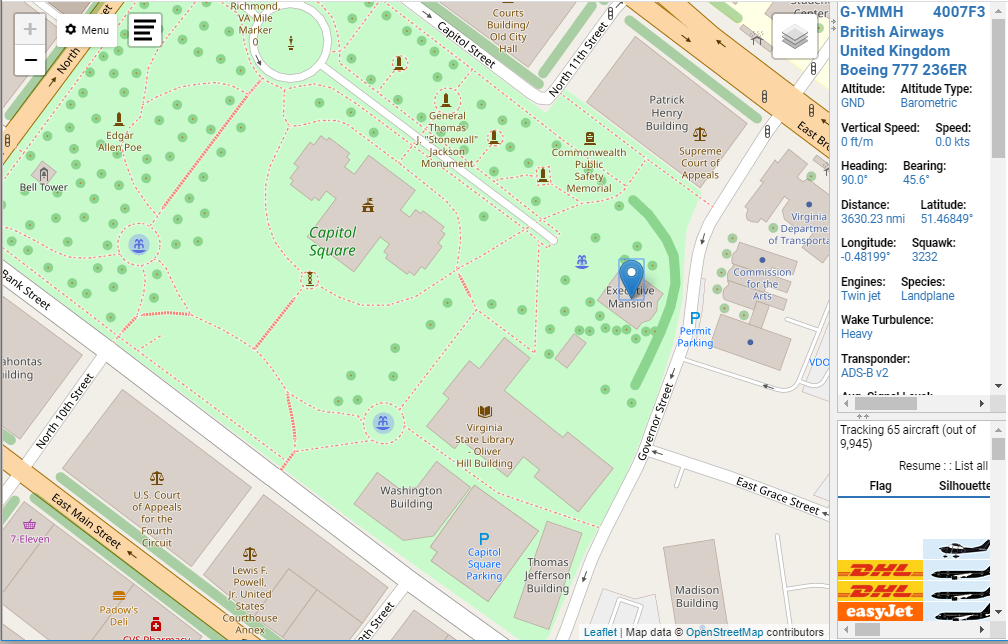
Now zoom back in for fine-tuning. You can do your city for a generic idea of distances or you can plop the marker right on your house for really accurate readings. I’m going to put this on the Governor’s Mansion.
Now go back to the Options for General and uncheck the “Set current location” box. Leave the “Use GPS location” unchecked.
Close the Options dialog box and turn the feed back on by going back to Menu->Shortcuts and clicking “Resume”
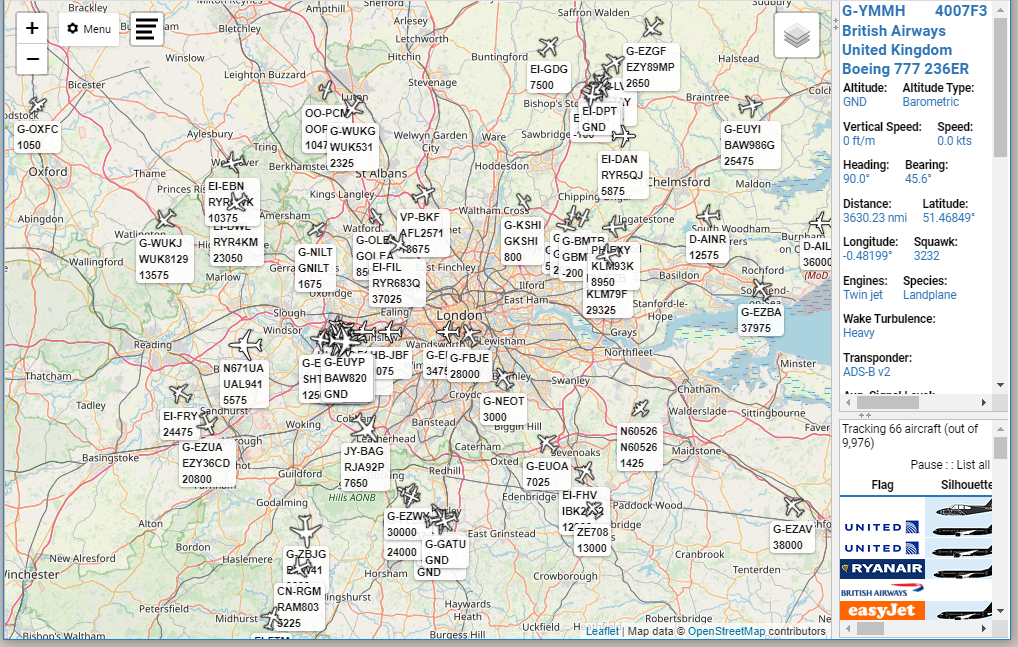
Now you can zoom out to a comfortable level and see some planes. It may take 30-60 seconds for aircraft to start showing up on your map, but zooming out to a metro-regional view usually gives good results
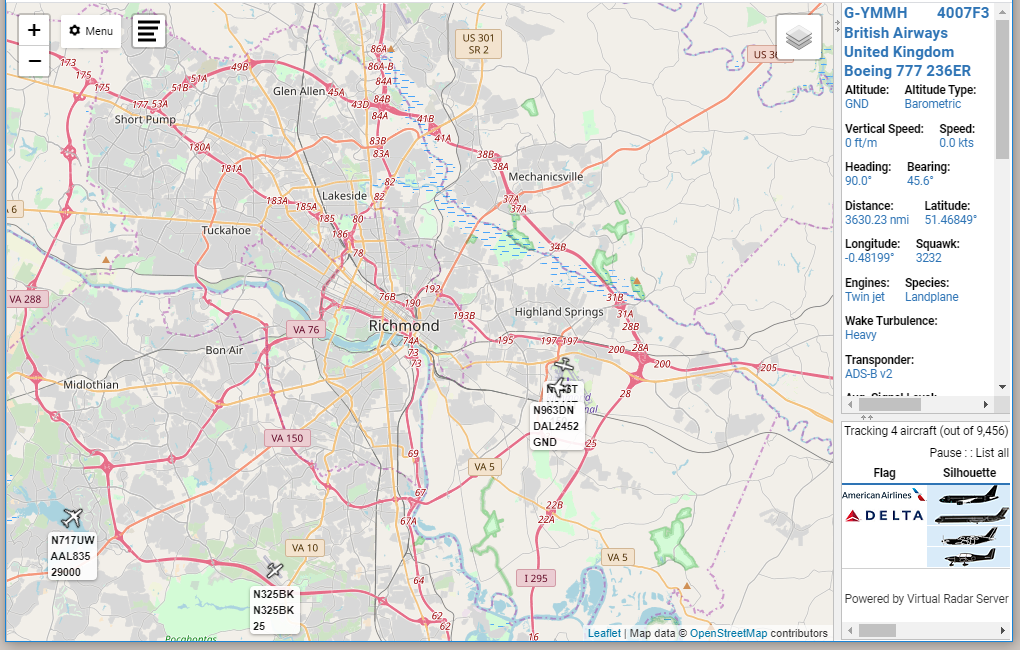
The aircraft info window (top right, remember?) still shows the British Airways jet I looked at earlier, so I’m going to switch it to something over here by clicking on one of the aircraft I can see.
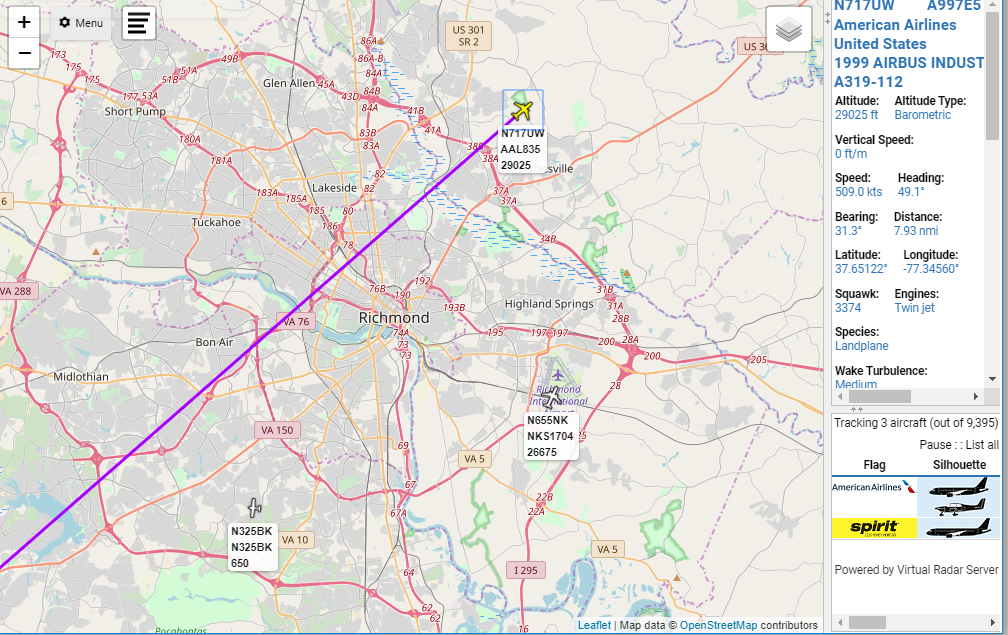
The selected aircraft shows up in yellow, and now we can see an aircraft trail. I’ll be changing aircraft during these next few screenshots because they are going ~500mph and aren’t in my view for long, so don’t worry if it looks like data is changing…it is.
Personally, I like to see trails of all aircraft I can see. This is another reason why I never uncheck the “Hide Aircraft not on map” box. So let’s change that. Go back to the Options, and pick the Aircraft tab:
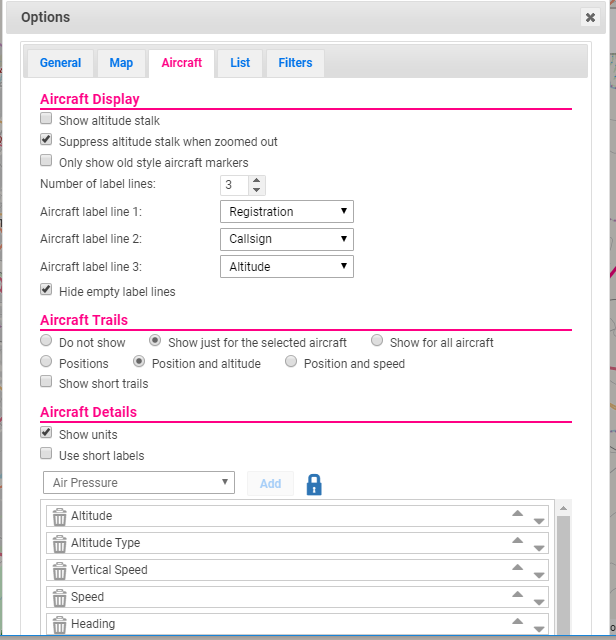
Lots of stuff going on here, but what we want to do is under the “Aircraft Trails” section, check the radio button for “Show for all aircraft” and then close out the dialog box:
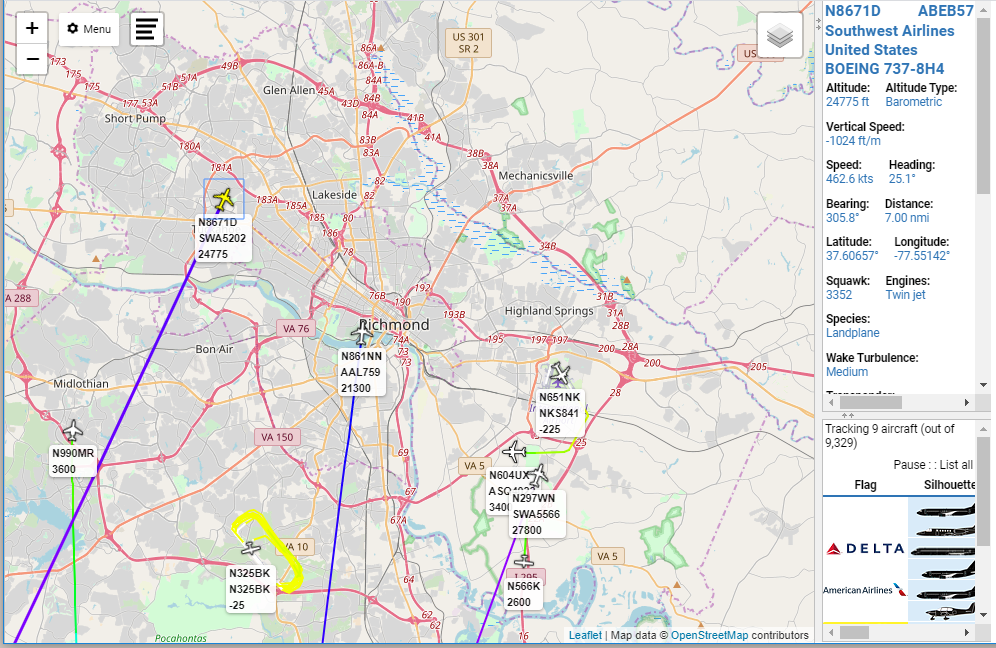
Still not a lot going on over Richmond, but hey look! Now we can easily see that there’s a small plane doing touch-and-goes at an airport south of Richmond. The different colors of the trails correspond to the different altitudes. Yellow is very close to the ground, then it goes to green and cyan and purple and red for 40,000ft or higher. It’s a very good visual indication of what’s going on.
Next, let’s look at the aircraft themselves.
If you look back at the Aircraft tab under Options, that first section was for the Aircraft Display. That’s what this is referring to.
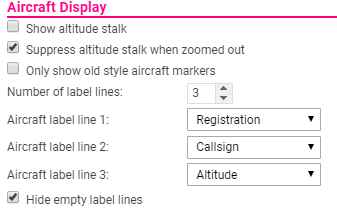
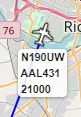
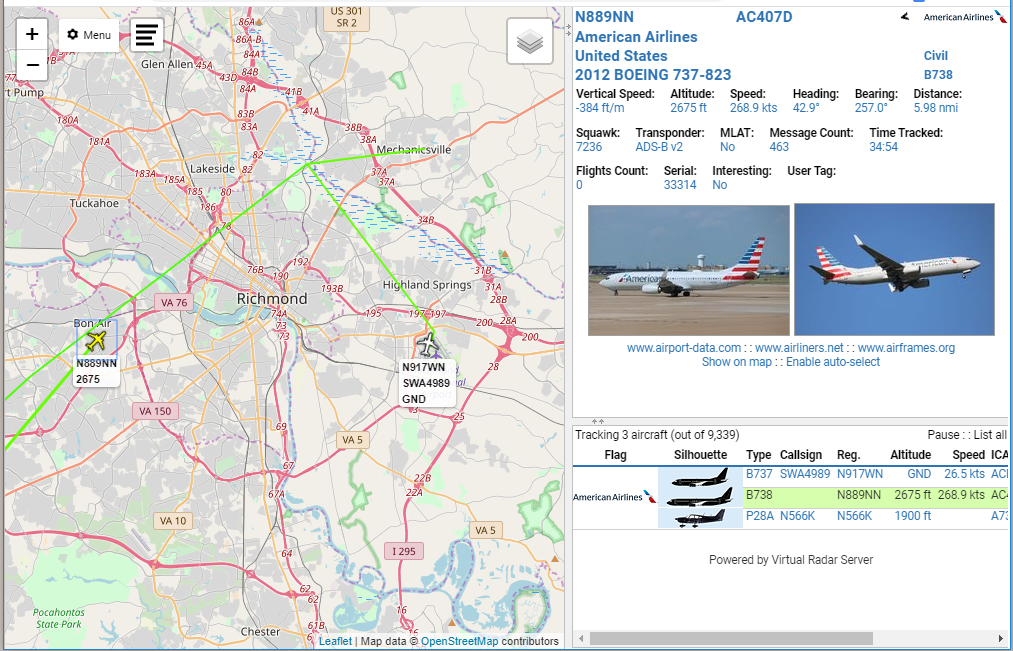
So the marker above is showing that a jetliner with the FAA Registration “N190UW” is transmitting a callsign of “AAL431” and is at 21,000FT. I keep these at the default, but you can play around with them and select whatever you want. You may notice in earlier screenshots that the small plane doing training show an altitude of -25ft. That’s because the default altitude transmitted is pressure altitude based off of standard pressure conditions. The plane is not actually 25ft below ground 🙂
On the same Aircraft tab inside of Options, you can change what data is displayed, and in what order, in the Aircraft Info window there on the top right. To change things, you have to click the blue lock to change it to a red unlocked lock, then you can move things around, add, or remove them, etc.
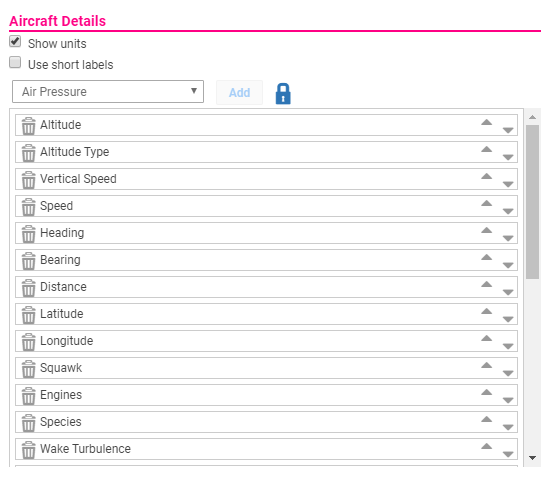
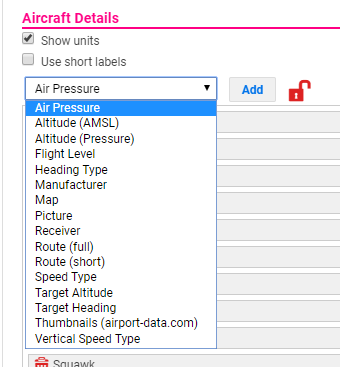
It’s fairly straightforward. Data items are removed from the dropdown as you add them to the Aircraft Info window so you cannot add the same specific item twice. Do understand, however, that some items are duplicates. The “Pictures” item and the “Thumbnails” item will show the exact same picture, only smaller for the Thumbnails. There is also a “Pictures or Thumbnails” item, so you could potentially have the same pictures show up three times if you select all three.
I’m going to remove a bunch of stuff from the list that I don’t care much about–Wake Turbulence, for example, doesn’t matter much to me on the ground. I also like to re-arrange the way the order so that I group like-items together. You can re-arrange the order by drag-and-drop, as long as the lock is unlocked.
Once the list is locked, you can close the Options dialog and re-size the Aircraft Info window to make things fit a little better:
We can do something similar with the Aircraft List, which actually has a lot more of those “thing 1 & thing 2” fields to compress the amount of data.
Go back to Options, and pick the List tab:
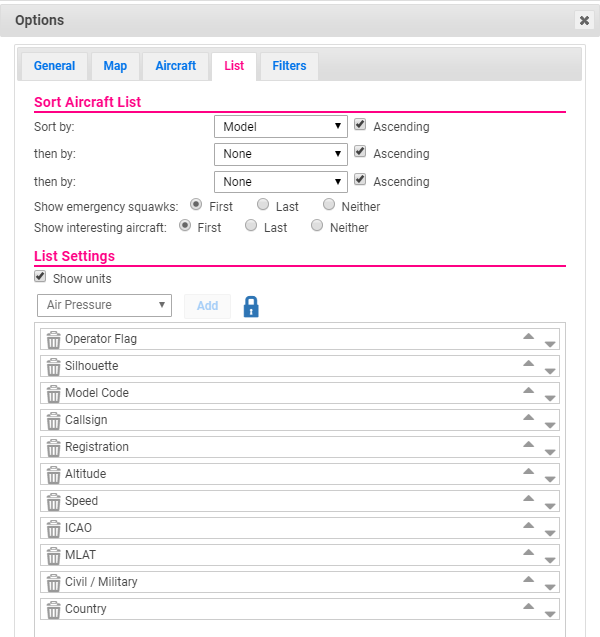
I always change the Sort By to Distance, but you do you.
Okay you see how “Operator Flag” and “Silhouette” are separate fields? It takes up a TON of real estate to do that, so I always remove those and replace them with the “Op. & Sil.”

Versus:

The amount of info can get out of hand pretty quickly, so for readability try to stay with the minimum amount of info that you thing will add value. I like to have the Model (not Model Code for beginners) in the list but it can get really wide. Callsign is usually the actual flight number for commercial flights, the registration number for private flights, or the military callsign for military flights.
Okay one last thing: Filters.
VirtualRadarServer has some pretty awesome filters built in. Go back to Options and hit the Filters tab

You can include or exclude by all of those fields. “Airport” is the ICAO airport code present in the Route information, and if you don’t really know what that means you probably should just ignore that. ICAO here is the MODE-S address of the transponder which, again, if you don’t understand what that means you probably shouldn’t use it. I’ll probably do another post just on ICAO codes, what they are, how to find them, etc.
A super easy one is “Military” so I’ll walk you through that. Select Military from the dropdown and click “Add Filter”
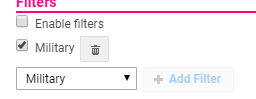
When you check the “Enable filters” box, the only aircraft displayed will be aircraft marked as Military in the database. If you enable filters and uncheck the Military box, then only non-military aircraft will be displayed. That’s something that gets people sometimes. Check the Enable filters box and go back to your map.
Now you can zoom WAAAAAAY out and see all the military aircraft that are in ADSBExchange’s feed!
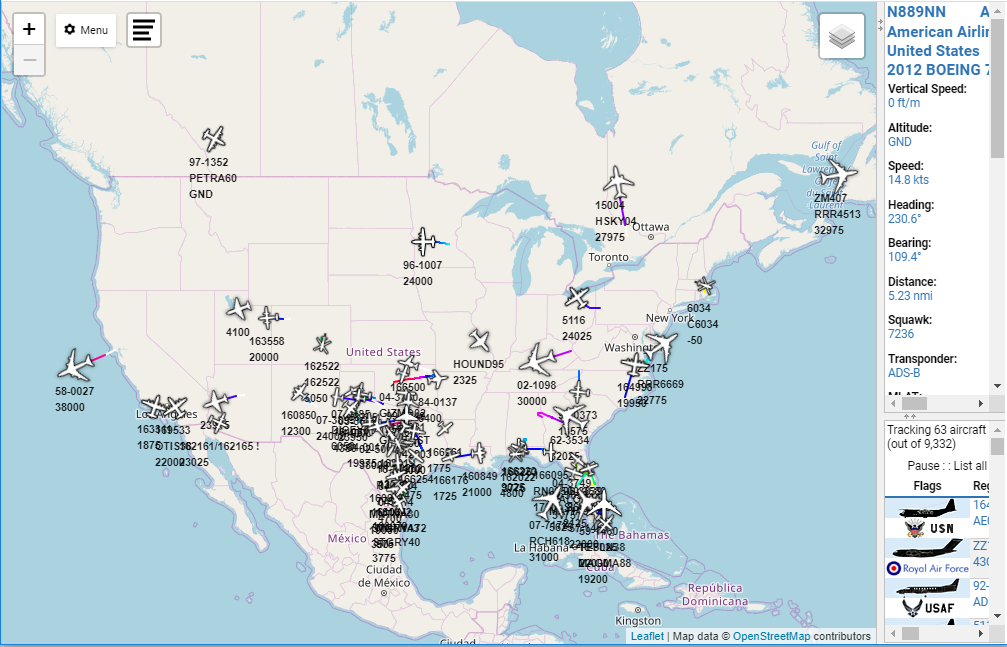
You can do the same for a specific registration or callsign if you want to track a flight across the country and don’t want to have to constantly move the map around to limit the number of aircraft in view. As you can see here, I’m only displaying 63 aircraft while viewing the entire country and it’s not a problem.
A note on Military Aircraft: You’re not going to see drones or B2s or F22s or anything combat-related like that. They have the ability to turn off ADS-B if they want, and ADS-B is not radar.
Play around with it, but also understand that there’s a timeout. You can only use it for, I think, 30 minutes before it will log you off, so you can’t just throw it up on a monitor and watch traffic all day. It’s also limited in that it receives feeds from other stations, so if there’s nothing in your area feeding it, you won’t get good results. If you find that to be true, it’s super easy to set up your own receiver and start feeding them data, and I would encourage you to do that.
Have fun! It’s rather addicting if you like planes!